Using a Crackle Glaze
*This post contains affiliate links. If you click a link and make a purchase, I receive a small commission that helps defray the costs of running my blog.
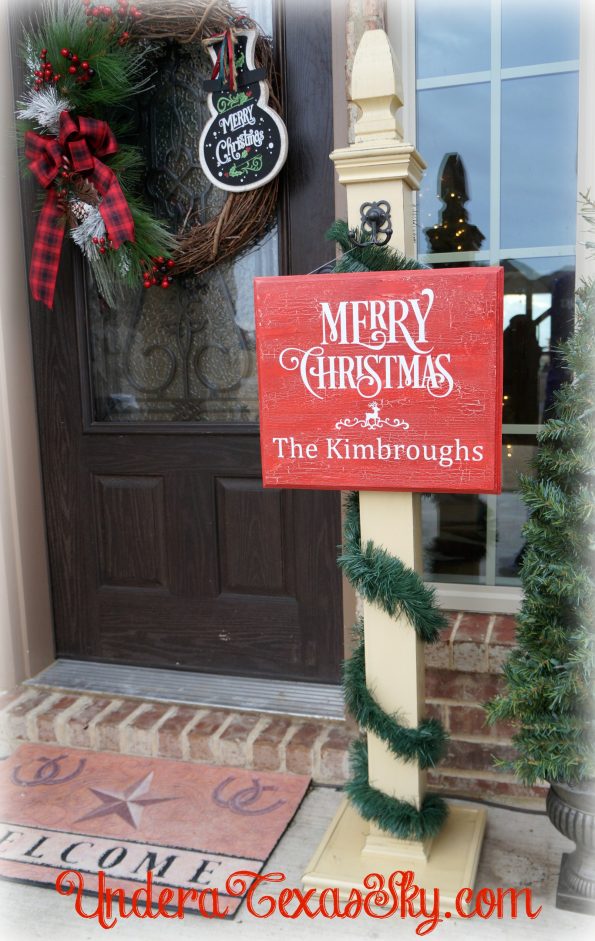
Can you tell that I’m a bit obsessed with making wood signs these days? Here’s our latest; a crackle finish wood sign.
The Mean Man made this big wood sign by joining two wood slats. He routered the edges to give a nice decorative finish. Once I had the sign base, the steps to create this crackle finish are so easy.
First you need to determine what color your want your overall sign to be. Since I was making a Christmas sign, I decided on red. Now, you need to decide what color you want to show through when the “crackle” happens. This is going to be the base color of your project. I decided on a simple red and white combination so white was the base color.
The Base
I used an inexpensive acrylic paint by Martha Stewart. This was used on a frame wreath project last year, so I didn’t even need to buy more paint.
I painted the entire surface in the base color.
Be sure your surface is nice and smooth. The Mean Man sanded the sign he had made until it was nice and smooth to the touch. This surface will drink in the paint, but it still doesn’t take a whole ton of paint. My sign is about 15″x17″ and I had plenty of paint using the leftover paint I had on hand. Let the paint try completely.
Add the Crackle Medium
I used Folk Art brand crackle medium.
Simply paint the crackle medium over the base coat. It’s almost a gel and it’s clear. This makes is a little difficult to be able to see how your coverage is going. Paint in good light so you can better tell that you have all of the base coat covered evenly. In all honesty, (and y’all know how I just wing it most of the time), I wasn’t super careful here. You’ll see later. ALLOW THIS LAYER TO DRY COMPLETELY.
Top Coat
After the crackle layer is completely dry, it’s time to add the top color coat. Again us an acrylic paint for this coat. I started on the routered edges. You’ll see how quickly the crackle starts to happen. As soon as the top coat begins to dry, the crackling begins.
Continue painting the top color. On my sign, I didn’t let my crackle glaze dry all the way in a couple of places, so I’ve got some pretty rough and uneven crackle happening. I knew I was going to be adding vinyl cutout lettering over the surface, so I wasn’t worried too much about it. That’s what I love about this style, it’s supposed to look rough and not perfect, so imperfections aren’t something to get upset about- it’s adding character!
I added some vinyl lettering I created on my Silhouette Cameo and then sprayed on a matte sealer to keep it safe while it’s out in the elements.
You can see the really rough area right above the “Merry.” The Mean Man didn’t notice and he added the hanger to where that would be the top of the sign. I would have actually chosen to put that area on the side or bottom, but I don’t think it detracts from how cute the sign is. The best projects are those that don’t have to be perfect!
Display
I finally added the sign to the front porch sign post. And voila! Merry Christmas y’all!


October 28, 2021 @ 6:48 am
Did you use the vinyl as a stencil to paint the letters or are the letters vinyl?
October 29, 2021 @ 10:48 am
Misty- On this particular sign I just used the vinyl itself. These days I create a stencil with the vinyl and paint the letters. It’s a little bit of a hassle but the painted letters last longer without any extra care. Hope this helps! Blessings- Kelly
August 25, 2021 @ 9:57 am
Hi, does the transfer tape pull the crackle off when adding the vinyl?
August 26, 2021 @ 11:42 am
Alan- I did not have any of the crackle finish come up on my transfer tape. That’s the thing though, some transfer tape is super sticky- I’ve had actual paint come up with some. Just be sure your transfer tape is sticky enough to grab your vinyl but weak enough to not grab other stuff. I hope this helps!! Blessings- Kelly
March 2, 2021 @ 3:21 pm
How tall is the actual post without the cap? Thank you
March 9, 2021 @ 2:38 pm
Bonnie- I’m pretty sure it’s 48″. Thanks for stopping by! Blessings- Kelly