This post contains affiliate links. See details in my disclosure.
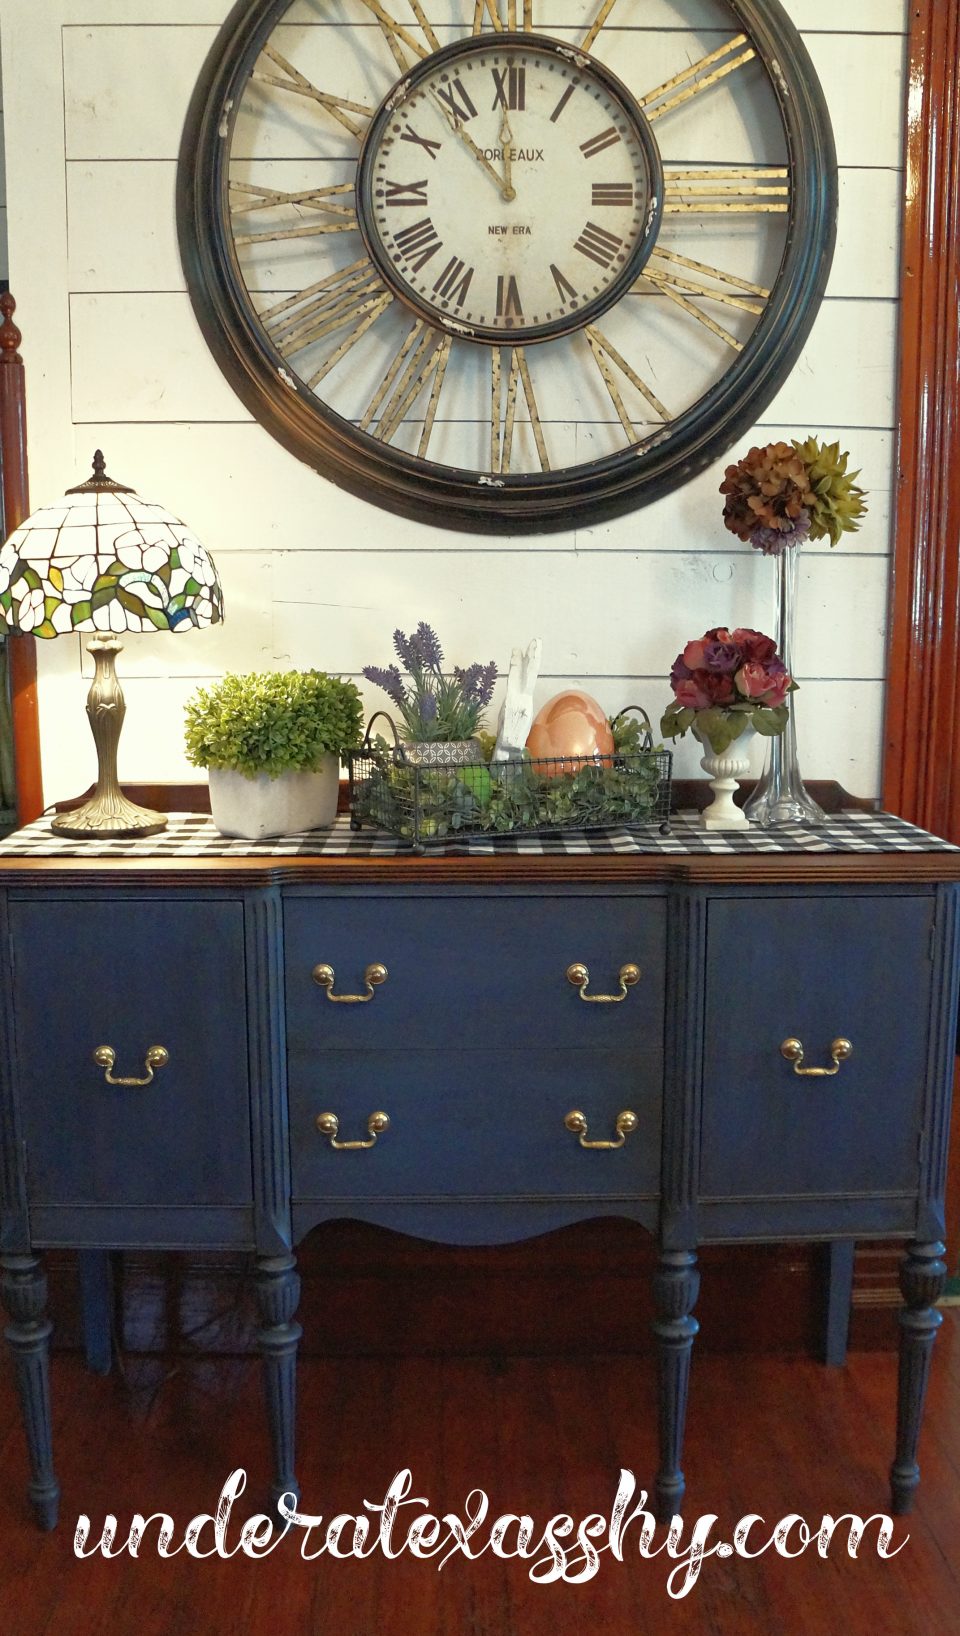
I found a sad little buffet at the antique mall. It was more money than I wanted to spend, but I saw the potential for a beautiful painted piece.
A Hot Mess
This buffet was a hot mess, I’m not gonna lie. It had normal wear and tear expected, but also had some deliberate scratches. Someone, likely a child, etched some words on the top and down the end. The hardware was incredibly tarnished and actually one pull didn’t even match the others. Needless to say, this wasn’t an easy piece to refinish, but it was so worth the trouble.
First Thing We Did
Normally when I paint a piece of furniture, that’s just what I do; paint. I’ve been intrigued by the pieces that have been re-stained on top and painted on the base. This buffet looked like it would be perfect for this. So, first thing, we stripped the old stain. This was daunting, but using a Klean Strip Premium Stripper made the job much easier. I simply sprayed the stripper over the top of the buffet and waited 15 minutes then started scraping.
This took three application to get all of the old stain off. It was messy, but not difficult. Follow up the removal process with the associated cleaner.
It Gets Better
The Mean Man then sanded the top until it was smooth. We went with a stain and poly combo from Varathane to stain the freshly cleaned and sanded top.
After the top was all nicely stained. I taped off the areas I didn’t want the paint to touch and removed all of the hardware. This is when I noticed that there was one oddball door pull. The Mean Man took some Brasso and scrubbed the five matching pulls.
I went in search of a matching pull. Did you know this style of drawer pull is called “bail handle?” Because, I sure didn’t. Thank you Google. Our pulls were likely made in the 30s and so finding one took a ton of searching. I finally found a few from a vendor on eBay. It came in it’s original box- and was just as tarnished as those we took off of the buffet. But, more scrubbing cleaned it right up.
Painting
A few months ago I purchased some Coastal Blue Chalked Paint from Rust-Oleum. This buffet just called out for this color. I put on the first coat with slightly irregular strokes, not worried about complete coverage. After the first coat dried for a few hours, I added the second coat. I went with pretty complete coverage, knowing I was going to add dark antiquing wax.
Applying Wax
The normal way to finish a chalk painted piece is to apply a wax topcoat to seal it. Taking a stiff brush, pick up some wax and rub it into your painted piece. Really work it into the edges and crevices. This needs to be clear wax. Valspar sealing wax works fine. After the entire piece is covered, follow the instructions for the type of wax you use. I waited about 15 minutes and buffed the wax to get a nice smooth finish.
Next comes the antiquing wax, again Valspar makes a great antiquing wax; my go to. Just paint on the antiquing wax (Valspar’s is a thick liquid) on the edges and crevices with a stiff brush- I like the Zibra 1 inch square brush. Then wipe with a clean lint free cloth to remove excess. I rubbed the wax downward in the big flat spaces. That kind of dragged the wax down lightly. This creates an aged look; you know like there’s a bit of grime that you just can’t get clean.
Be sure all of the excess wax is wiped away. You have to work fast with the antiquing wax. If you put it in a spot and wait too long to wipe it away, you won’t be able to. Work in small areas in other words.
Beautiful Results
After all the buffing, the drawer pulls were ready to go back on. I could not be happier with how it all turned out. It’s absolutely beautiful and the perfect addition to my parlor.


April 2, 2019 @ 8:09 am
Wow what a huge transformation. It came out beautiful. I will be featuring this tonight at my Swing into Spring party that opens at 8pm EST. Please stop by and pick up an I’ve Been Featured button. Thanks. http://diybydesign.blogspot.com
April 2, 2019 @ 11:17 am
Judy- How wonderful! Thanks so much. I just love this piece! Blessings- Kelly
April 1, 2019 @ 10:19 am
This has come out so beautifully, Kelly! You’ve really breathed new life into the old buffet, and I love the colour you used! Thank you for sharing, and for being a part of the Hearth and Soul Link Party. Hope to see you again this week. Have a lovely week ahead!
April 2, 2019 @ 11:17 am
April- Thanks so much. I appreciate y’all! Blessings-Kelly
March 28, 2019 @ 11:34 pm
Gorgeous! I really like that you left the top wood and painted the remainder. Very attractive! And cool that you were able to find a matching pull.
March 29, 2019 @ 10:19 am
Michelle- Thank you so much! It’s the first time I’ve stained instead of painting the top. I love how it turned out. That blue is just so pretty. I’m glad you stopped by. Blessings- Kelly
March 28, 2019 @ 9:15 am
Oh my goodness — love this piece of furniture. You really turned it around to be beautiful!
March 28, 2019 @ 12:14 pm
Penny- Thanks so much!! I absolutely love it too. I’m very critical on anything that I do, it’s very refreshing to really like something I made. 🙂 Thanks for stopping by! Blessings- Kelly
March 27, 2019 @ 2:21 pm
Absolutely gorgeous!
March 28, 2019 @ 12:07 pm
Ann- Thanks so much! Blessings- Kelly