We all have them. Those furniture pieces that we bought back when we were first married… for many of us, over 20 years ago! You can’t bring yourself to get rid of these things because you probably paid a lot for them (when you didn’t have a lot). But face the fact; that 1998 cherry wood dresser with the brass drawer pulls just looks tired. You may be compelled to sell it in a yard sale. Think about that though. You’ll likely only get a few dollars for it; certainly not enough to buy one of the newer farmhouse style pieces. Breath new life into your outdated furniture.
Don’t sell it! Transform it.
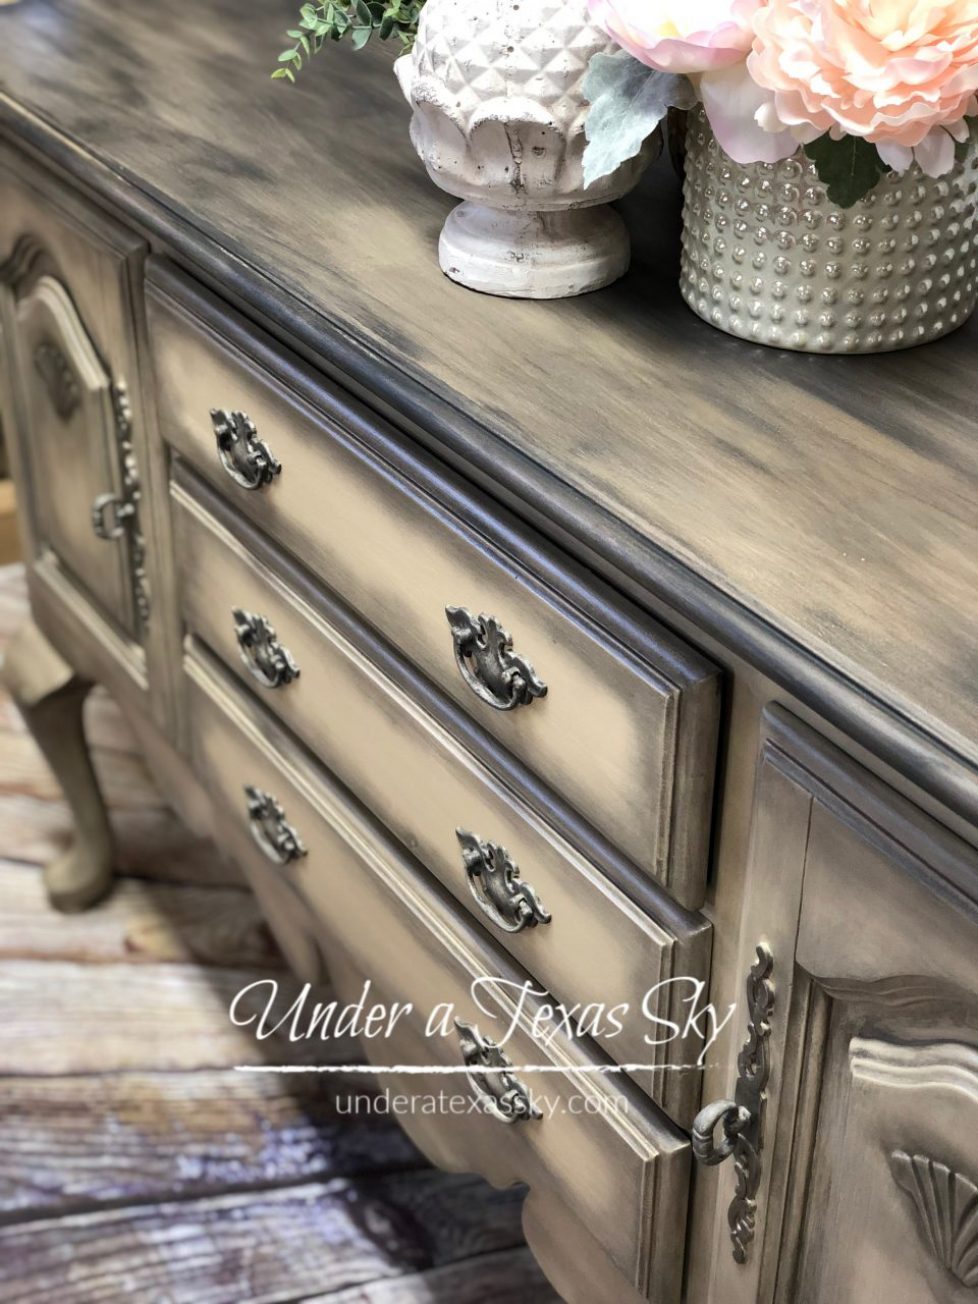
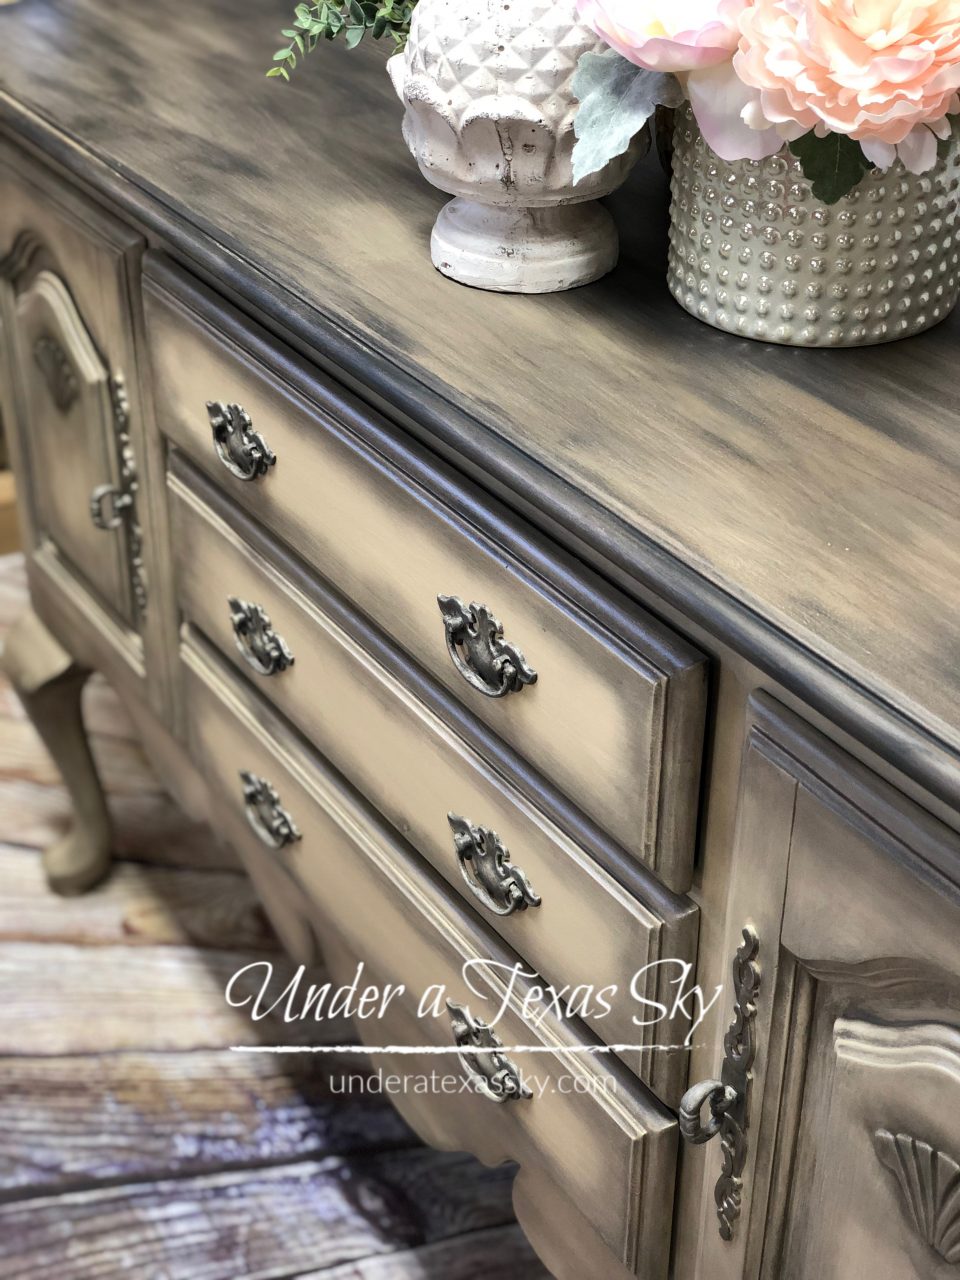
I took an old sideboard much like I just described and turned it into a beautiful piece of furniture with lots of character.
I still love the style.
Don’t get me wrong, I love stained wood furniture. Not all of my pieces are painted- but those that aren’t are more than 50 years old and in great shape. There’s nothing wrong with painting a tired piece of furniture whose design you may still love.
This sideboard is a typical piece that was included in dining room groupings in the 1990s. It’s still in good shape, but would hardly be noticed in a room today. It’s just outdated.
The first thing I did to the piece, as always, is clean it. This is really one of the most important steps. Use some Dixie Belle White Lightning to clean away all of the old grime. Your surface prep is vital.
Decide on Paint Color
Y’all know I’m a Dixie Bell Paint retailer, that is my paint of choice, not because I sell it, but because I love it. I love the coverage, the value, and the endless choice of colors (we just added 5 new!).
I knew I wanted Burlap for my base color. This is a really pretty, light color that isn’t white.
Jazz it Up
Next comes the fun part, and the part that fills me with the most angst. There are tons of choices when it comes to jazzing up a piece after the base coat is on. We have glazes, waxes, stains, and more. You can even use a different color of paint as a wash over the base coat.
I decided on using Best Dang Wax. Dixie Belle has standard colors; white, clear, black, brown, and Grunge Gray. But I wanted something with a blue tint. Let me say I’d already added some Yankee Blue to the doors and blended them in, but I wasn’t happy with it so I painted over it with the Burlap (I may or may not have tried a few things that I painted over). So I decided to make a custom color for the wax. I mixed some clear and black wax in a small container and added a dollop of Yankee Blue paint to the mix.
I took a stiff stencil brush and started adding it the the ridges in the doors. I kept blending it out all around. I kept the Burlap color showing because I absolutely LOVE Yankee Blue and Burlap together. I continued adding wax and wiping it back a bit all over the entire piece, careful to keep some Burlap showing.
I even painted the drawer pulls and waxed over them.
Faux Stained Finish
I wanted to top to have a stained look. I couldn’t do this naturally because the top has a veneer and I didn’t want to sand it. So I did the next best thing. I did a wash over the painted top with Voodoo Gel Stain in Tobacco Road and Black Magic. Basically I put the stain on a rag and wiped it over the painted surface. Then I wiped off the excess. But, I wanted the top to be really dark and these two colors just weren’t doing it for me. So I took some Midnight Sky paint and diluted it with a bit of water and brushed it on top as well. I worked in small sections brushing it on and wiping it back. It was messy! But it turned out so well.
Top Coats
Now, Dixie Belle Paint does not require a top coat or sealer. It cures in about 30 days. But I always apply them just for that added protection against grandchildren, the dogs, or just my clumsiness. I added two coats of Gator Hide to the top and Clear Coat Satin to the base and the pulls. Gator Hide is our toughest finish I generally only use on table tops.
I think the piece turned out so nicely.


January 3, 2024 @ 10:28 pm
Hi there, I’m following this on a dresser I’m painting. Did you put clear wax all over before you used the black, clear wax and blue paint mixture ? Thanks!
January 3, 2024 @ 10:36 pm
Melinda- I did use clear wax first. I wanted to be sure to be able to remove the darker color and the clear wax helps to do that. Good luck!
January 24, 2024 @ 8:56 am
Thank you! Also, do you topcoat over your wax? I always have and then I read that’s a no no. I use water based
January 25, 2024 @ 11:08 pm
Since I just use wax as highlighting and adding depth and not full coverage I always use a poly topcoat on my pieces. I put it right over the wax. I’ve never had an issue. I prefect a poly coat on top as opposed to having to buff and buff wax. Hope this helps!
January 25, 2024 @ 7:47 pm
So you do put poly acrylic on top of your waxed pieces? I always have but have recently read we aren’t supposed to put it over wax. I have never had a problem, but just curious if you topcoat over the wax as well?
January 25, 2024 @ 11:09 pm
I replied to you other comment- but yes- I topcoat over the wax that I put on my pieces. I only use was for depth and highlighting but always poly right over it.
July 27, 2022 @ 7:39 am
Can you share with me the colors you used first, etc. it would help if you could demonstrate how you did this piece
July 29, 2022 @ 11:59 am
Theresa- In the post I get into specifics on the colors I used when I did this piece. I tried to be fairly detailed on how I achieved the look. I’ll be getting into painting more pieces and doing tutorials in the near future so be sure and follow me on Facebook- Under a Texas Sky and on TikTok @underatexassky. Blessings! Kelly
January 6, 2022 @ 8:58 pm
Do you have any tutorials on how to do this? I want to see how you do this. I’m looking to update my kitchen cabinets. Your work is amazing. Thank you.
January 7, 2022 @ 3:04 pm
Melissa- This post is the only information I have on how I created this look. Sorry! Thanks for stopping by. Blessings- Kelly
November 14, 2021 @ 8:46 am
Would this technique work on a plain Jane desk? The drawers have no pizzazz. Just plain edging. Legs have some detailing for the wax to hi-lite but I was hoping this style would dress up the drawers. What do you think?
November 17, 2021 @ 1:23 pm
Pamela- Absolutely! Just blend the wax color dark to light. Flat drawers are always difficult to add interest. Trial and error is really the only way to get it right. You can also blend with paint as well. Brushed by Brandy has tons of amazing videos showing blending. Hope this helps! Blessings! Kelly
October 25, 2021 @ 12:00 pm
Absolutely stunning, wish I can be so good!
Ansa from South Africa
October 27, 2021 @ 9:59 am
Ansa- You’re so sweet. Thank you. It just takes a lot of just doing it! Some pieces haven’t been quite so successful but the more you paint, the better you get. Thanks for stopping by! Blessings- Kelly
April 13, 2021 @ 6:35 am
Please explain your blending process I’m new to this
April 13, 2021 @ 11:12 am
Paula- I used the colored wax to go around the draws and in the details. I used a small stiff bristle brush to apply the wax to the areas around the drawers and in the grooves; then I wiped with a soft cloth. On the top I added Tobacco Road and Black Magic Voodoo Gel Stain with some diluted Midnight Sky brushed on and wiped back. I hope this helps! Blessings- Kelly
February 23, 2021 @ 8:05 pm
Absolutely stunning
February 24, 2021 @ 1:37 pm
Kirstie- Thank you so much! I was really pleased at how it turned out. I appreciate you taking time to stop by and leave some nice encouragement. Blessings- Kelly
January 23, 2020 @ 7:39 pm
This is beautiful. Did you put a coat of clear wax or top coat before adding the dark wax? Thanks for sharing
January 28, 2020 @ 4:12 pm
Jane- Sorry it took so long to respond! Yes ma’am, I did use a clear wax before adding the dark. This helps to be able to move the dark wax around a bit better. I’m so happy you stopped by. Blessings- Kelly
November 9, 2019 @ 9:07 am
OMG this is GORGEOUS
November 16, 2019 @ 10:33 pm
Lisa- Thank you so much! Blessings- Kelly
August 20, 2019 @ 4:50 pm
It is beautiful
August 22, 2019 @ 12:09 am
Heidi- Thanks so much! Blessings- Kelly
August 17, 2019 @ 3:54 pm
Love this! Would like to redo mine with a seaside vibe. Maybe burlap with grunge gray? Do you think that would work? I was going to buy new, but like the idea of just painting it. My furniture is all the veneer type.
August 22, 2019 @ 12:08 am
Barb- I love the idea. And turning existing furniture into something you really want to keep is such a great feeling. I love burlap as a base. We have gorgeous coastal colors as well. Just be sure to clean everything really well and if you’re piece is a super shiny veneer, you may want to put on a coat of Slick Stick before painting to be sure you have great adherence. The piece I did here was relatively shiny though, and I had no problems. I hope yours turns out great. Blessings- Kelly