This post contains affiliate links. More information in my disclosures.
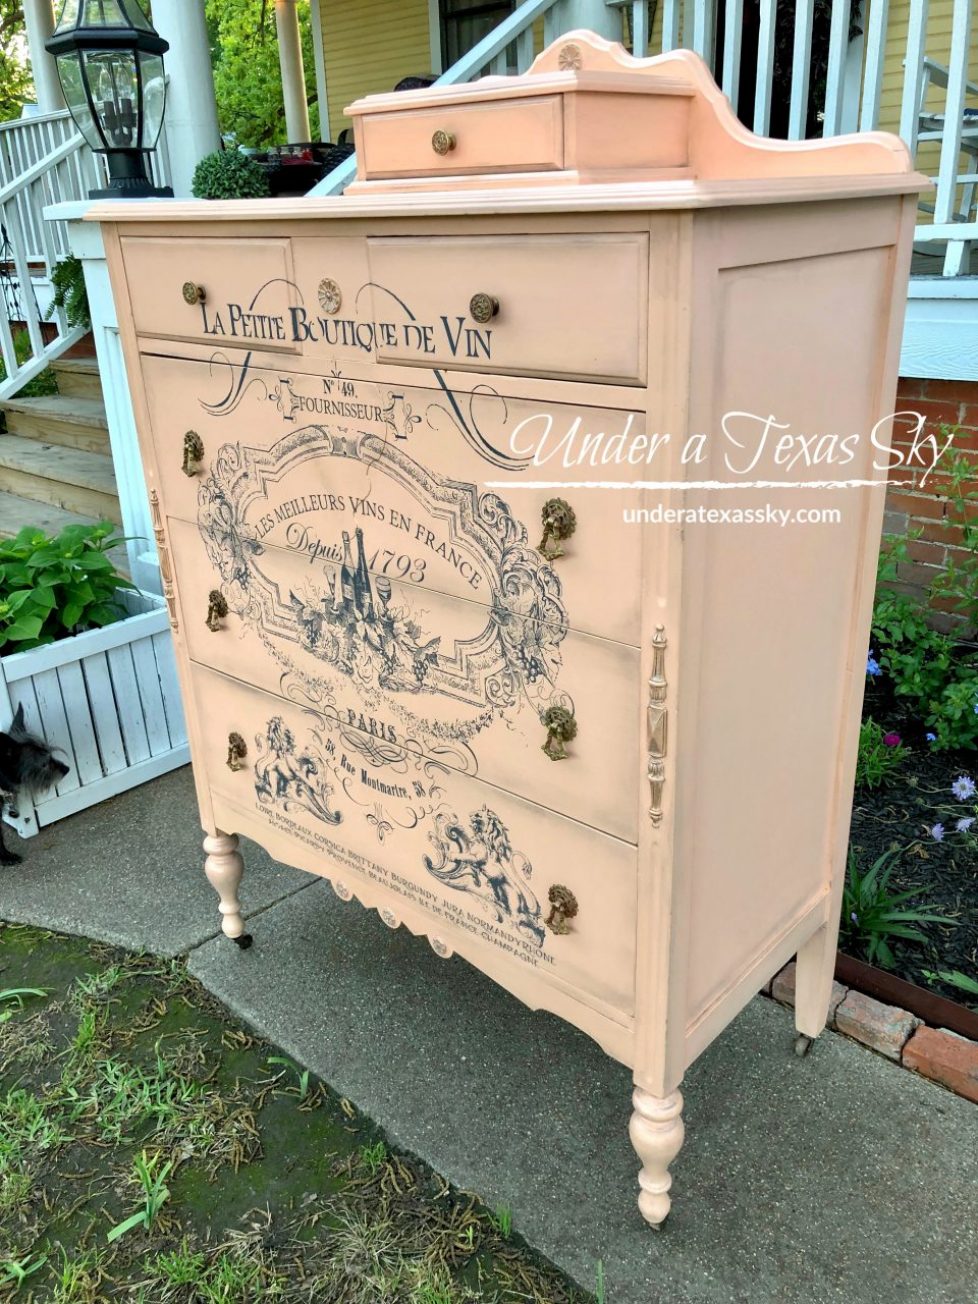
It seems like every time I refinish a piece of furniture, it becomes my favorite. This chest of drawers makeover in Dixie Bell Apricot is no exception! For some reason, I’m obsessed with this color. When we grabbed this chest at an auction a few months ago I didn’t have any idea how beautiful it would become in Apricot.
This is a look that is not difficult to accomplish, if you use the right supplies. I can’t wait to use it on something else as well. Here’s how I got the look.
Clean that Bad Boy
Whatever you’re about to paint, you need to clean, clean, clean it. Just like your skin, your surface is only going to look as good as your prep. Dixie Belle White Lightning is a great pre paint furniture cleaner. It’s a powder that mixes in water. Spray your piece and wipe it clean. Keep cleaning until all traces of grime are gone.
Repair
Take this opportunity to repair any nicks, gouges, or deep scratches. We simply used a wood filler. Once those areas are filled and sanded smooth, you’re ready to paint.
If you have sticky drawers (wow that sounds gross); I mean if the drawers don’t glide well, go ahead and fix those runners. Our drawers were aligned fine, but didn’t glide as smoothly as I’d like. This piece also smelled like old lady. Now, I’m an old lady, but some old ladies wear old lady perfume and I’m not at all fond of that smell. So I took care of two problems at once. You can take a wax melt (you know the ones you use to make your house smell wonderful) and rub it along the glides on the bottom of the drawers and the inner glides as well. The drawers will not only glide smoother, your piece will take on the fragrance of the wax melt.
Paint
When tacking a larger piece of furniture, I like using a paint sprayer. This just makes the process much less time consuming. For this piece, The Mean Man used a gravity fed HPLV (high pressure low volume) paint sprayer. I think we gave less that $20 for this at Harbor Freight. If using a sprayer, you definitely need to dilute your Dixie Belle paint. Use about two ounces of water to eight ounces of paint. Dixie Belle paint is beautifully thick and it won’t flow through your sprayer easily unless you do this. Apply two coats. Even though this paint sprayer doesn’t have a ton of over spray, we still paint in a paint tent.
Sand
Sanding your finish can be intimidating. You are actually only knocking down the very top sheen of the paint, not sanding deep. It is possible to ruin your finish if you’re too aggressive here. Using 400 grit sandpaper, lightly glide over the piece. I use a 3m Pro Grade Sanding Tool to go over all my flat surfaces. Barely drag the sandpaper over the piece. You’ll be able to feel the difference immediately. Chalk paint by nature, leaves a very thirsty paint layer. By lightly sanding, you take this finish to smooth as can be.
The Fun Stuff
Now, if you wanted to, you could stop here and add your clear top coat (although Dixie Belle Paint doesn’t require a top coat- it cures to a strong surface in 30 days). I always put on a clear coat, however. I’m paranoid like that.
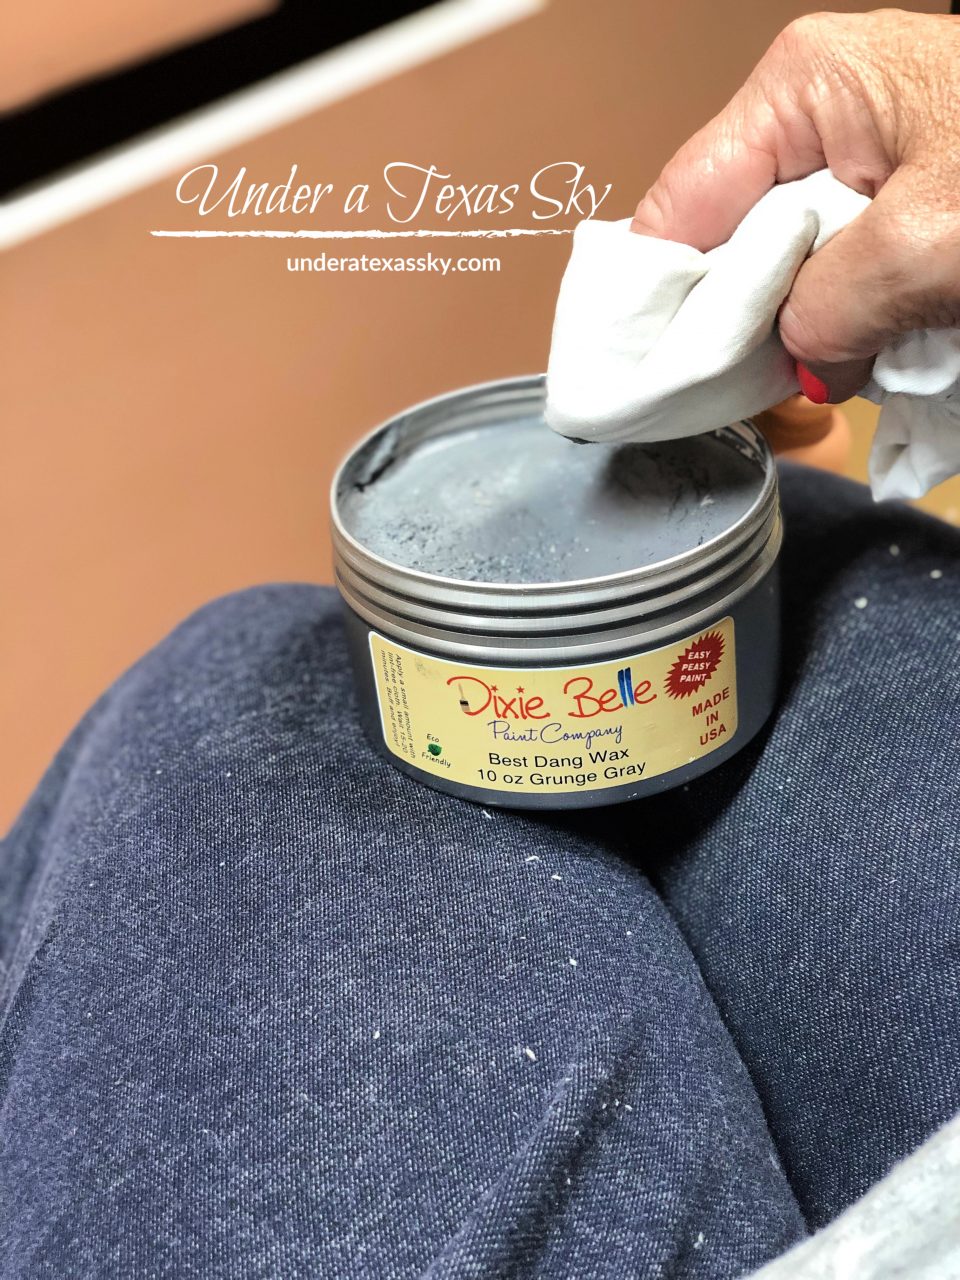
But now is also the time to add waxes, glazes, and such. I wanted to age this piece; dirty it up. To do this use a colored wax. Dixie Belle Best Dang Wax in Grunge Gray worked perfectly. With a soft clean cloth, apply the wax to your edges and any other surfaces that would get normal wear.
I also added some silver gilding wax to the little medallions and the decorative elements on the sides. Apply the gilding wax with a soft cloth.
To add just a little more interest, I added some Dixie Dirt applied with an artist brush. Dust it on and give it a little rub.
Adding a Rub on Transfer
To finish the piece I decided to add a rub on transfer. This is my favorite thing to add to a piece to make it truly special. I’d put these things on everything! I used an older transfer that I’ve had for over a year. This particular one is no longer in stock, but I have some that are close. I had to modify it a bit by cutting out the top embellishment to accommodate the medallion. Then it’s a matter of centering and rubbing on. A little note: do not wax or clear coat before you apply the transfer. The transfer adheres more easily to the paint without finishes. Clearly, mine worked out, but it took a lot of rubbing to get the transfer to adhere. I do have a tutorial specifically on apply a rub on transfer.
Top Coat
After applying the transfer, it’s time to top coat the entire piece. As I’ve said, if you’ve only painted your piece, you don’t have to top coat. I just feel better with that added layer of protection and I like the satin finish of the clear coat. Gator Hide is my choice for most of my pieces. This is a super tough, water resistant top coat. I have four dogs and anything can happen with them around. My yorkie is likely to walk across a side table and knock all kinds of things over. So I add that extra layer of protection- it’s kind of like wearing a belt and suspenders! If you apply a transfer, you definitely want to put a couple of coats of clear coat over it to keep it protected.


June 13, 2019 @ 10:22 am
Hi Kelly, I just found you on You Tube last night and I was so glad I did. I’m just starting out and Dixie Belle is what I use. I watch all the videos, read all the blogs and I’m still a little intimidated. A little. I’m work in ng on an antique secretary right now , like the one Brandy with Brushed by Brandy just painted. I’m using a transfer from Prima called on a voyage. Wish my luck and thank you for telling me what kind of camera you use. I definitely need to invest in one. Keep up the good work
Ps. I thought wax was last?
Your fan
Cheryl from Jacksonville Florida but Texas will always be my home
June 14, 2019 @ 9:03 am
Cheryl- Trust me, I know how intimidating it can be to start a project! I’m a little anxious with every new project. I have a huge secretary with hutch that I’m just waiting to tackle. I love using transfers on my projects also! It just adds such a cool finishing touch. And Dixie Belle products are so amazing- the entire line! I love that it’s a one stop shop for everything. And as far as wax… the great thing about Dixie Belle Waxes are they are water based. I use them mostly to add depth or age. Then it’s fine to put the clear coat right over the top of it. Of course you can always just wax as a final step since Dixie Belle Paints don’t really even need a top coat since they cure in 30 days to a nice hard finish. It’s so versatile!! If you ever have any questions, I’ll do my best to answer them for you. Blessings from one Texas girl to another. -Kelly