Plate (or Frame or Book) Ledge
![]()
I saw a tutorial for a pretty ledge shelf at Christina’s Adventures. Immediately I knew it would be the perfect accent for a wall in our farmhouse dining room. Her tutorial served as our starting point. We tweaked a few things to make it work better for our space (and plates). This is truly an easy shelf ledge to make with only a few materials. To be sure it’s all solid, use a Kreg Jig, brad nails, wood screws, and wood glue.
Here’s what you’ll need:
1×6 board (48″ long)
2×4 board (48″long) (ripped to 3 1/4″ width)
Kreg Jig- 1 1/4″ screws for pocket holes
1×4 board (48″long) (ripped to 2 3/4″ width)
2 1/2″ woodscrews (to attach to wall- this could vary depending on your wall situation)
1 1/4″ brad nails (for nail gun)
wood stain
wax to seal
Be sure your pieces of wood are as straight as possible.
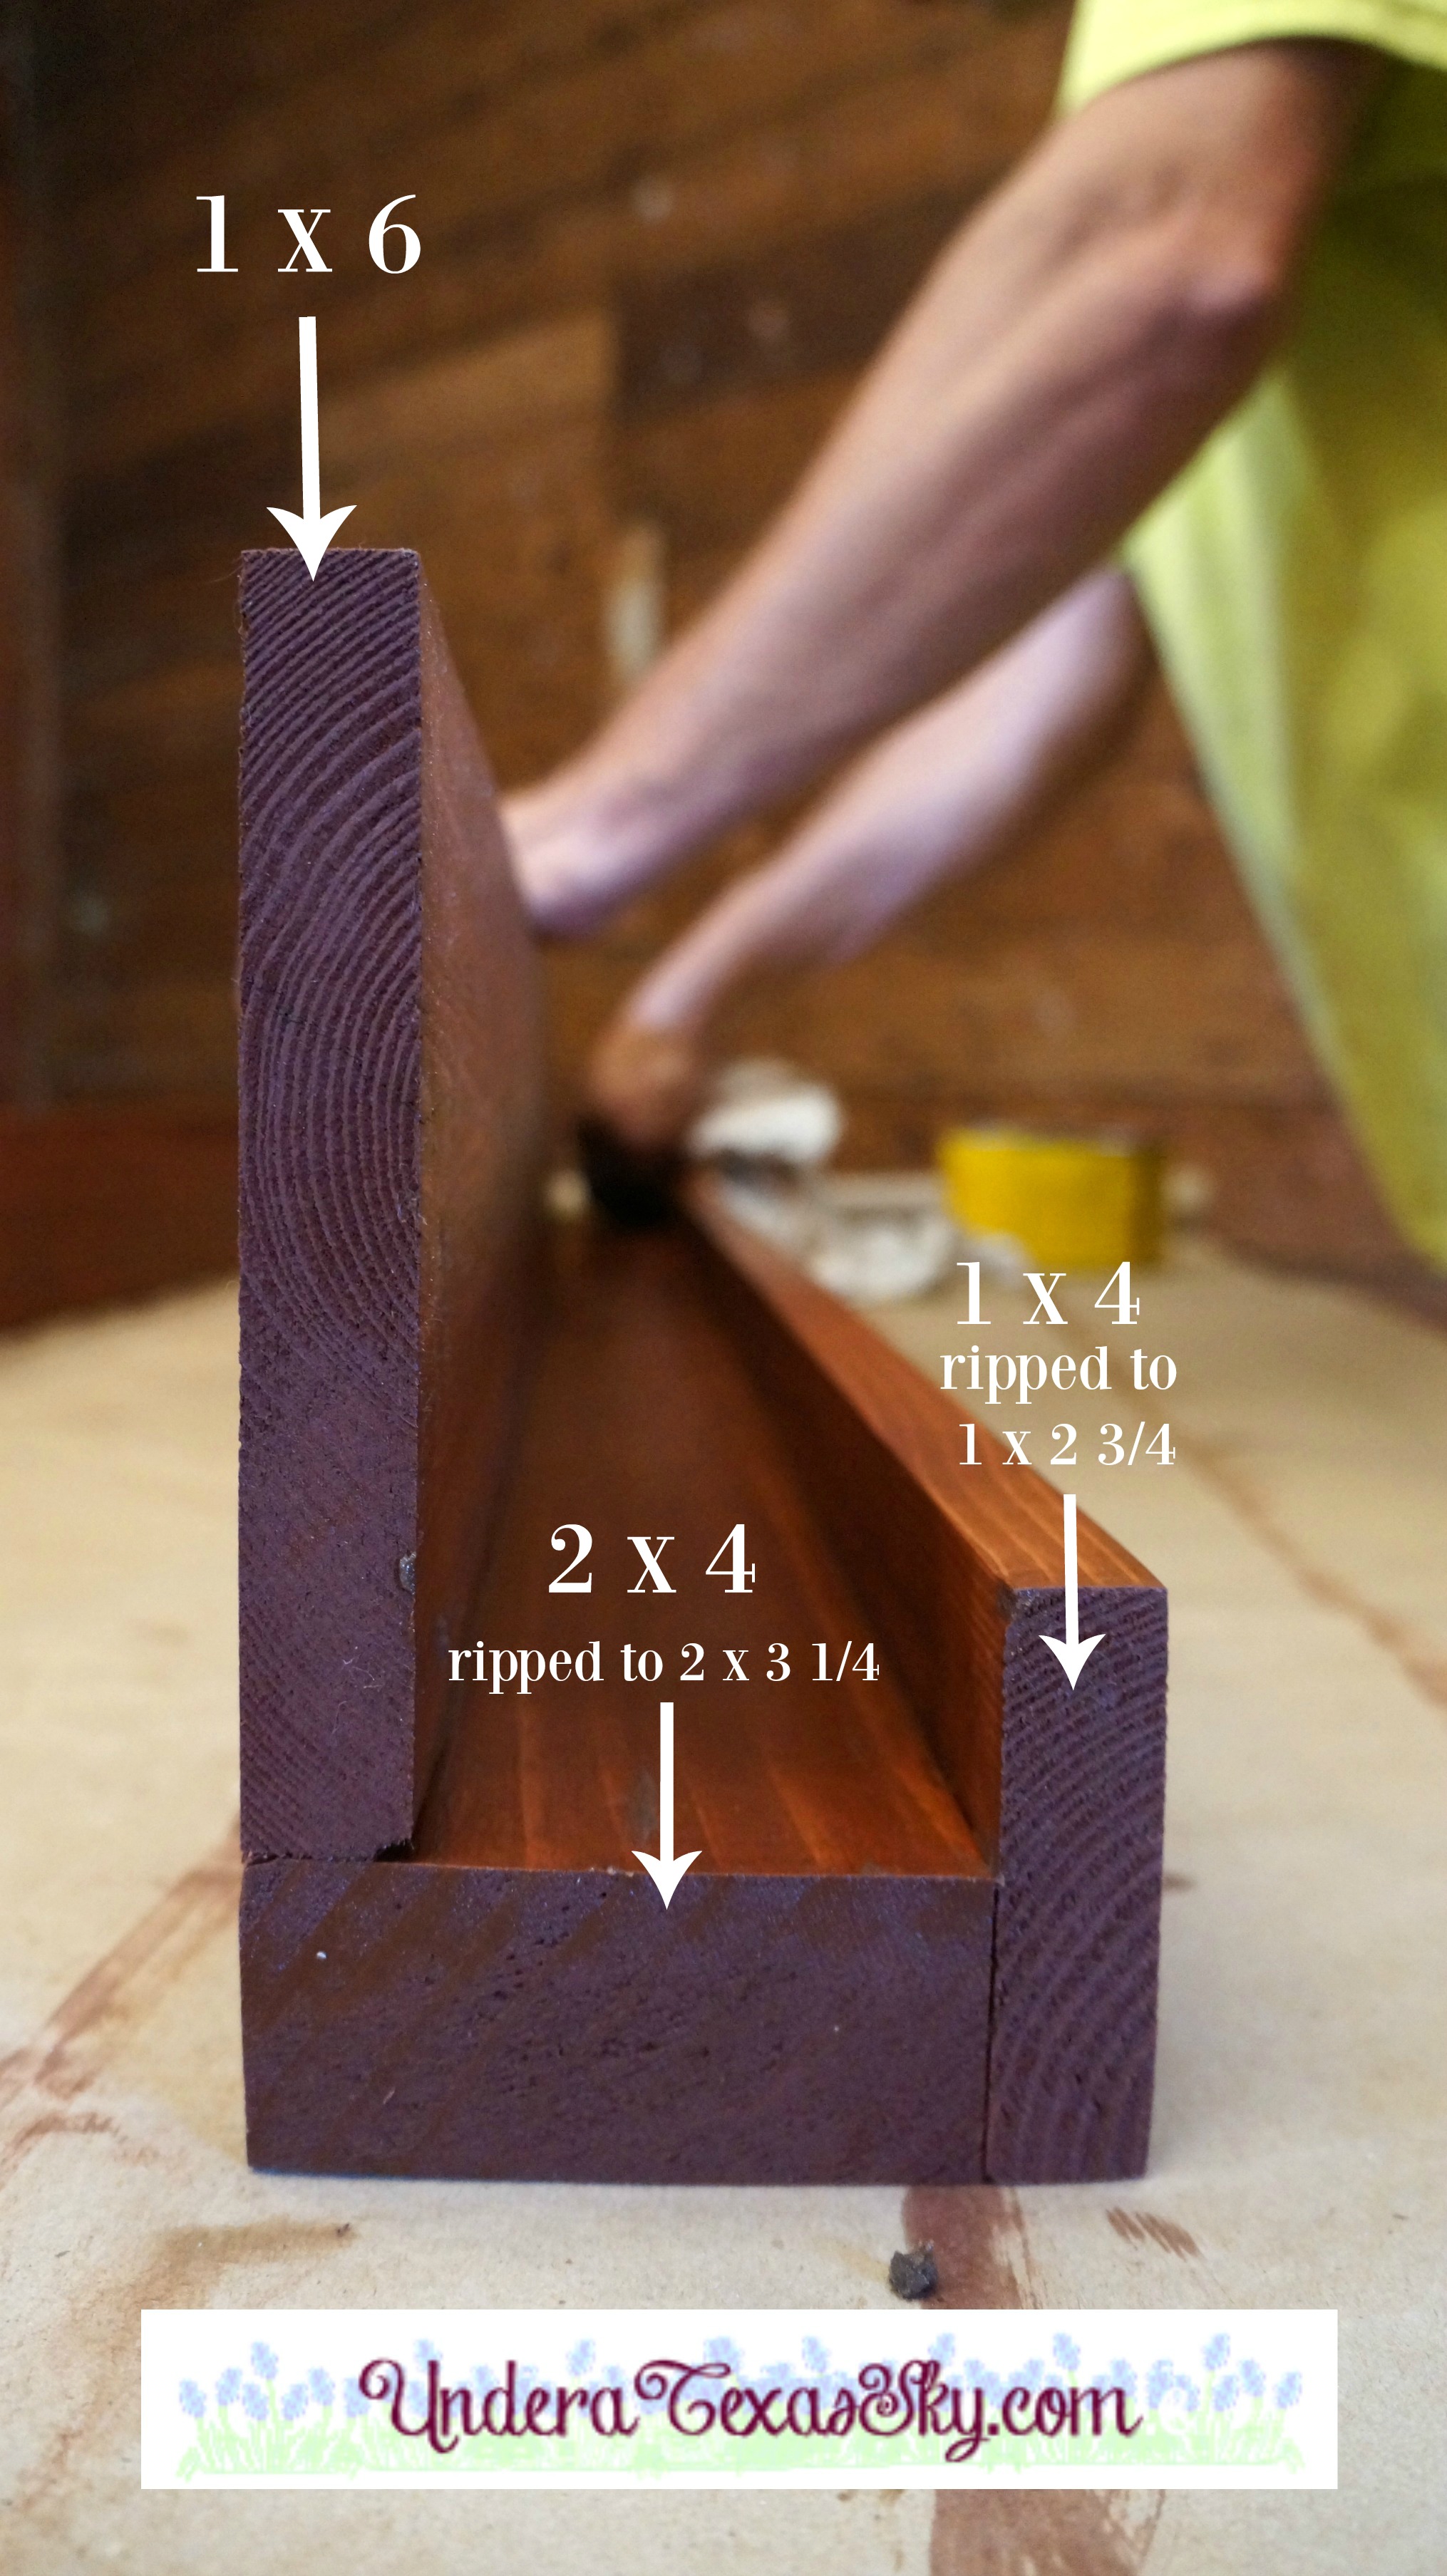
Putting it all together
Put the boards together before staining. Run a bead of wood glue along the bottom of the back board (1×6). Fasten the board to the base using 5 Kreg Jig pocket holes and screws. This will ensure a solid bond that can hold up to the weight of your plates.
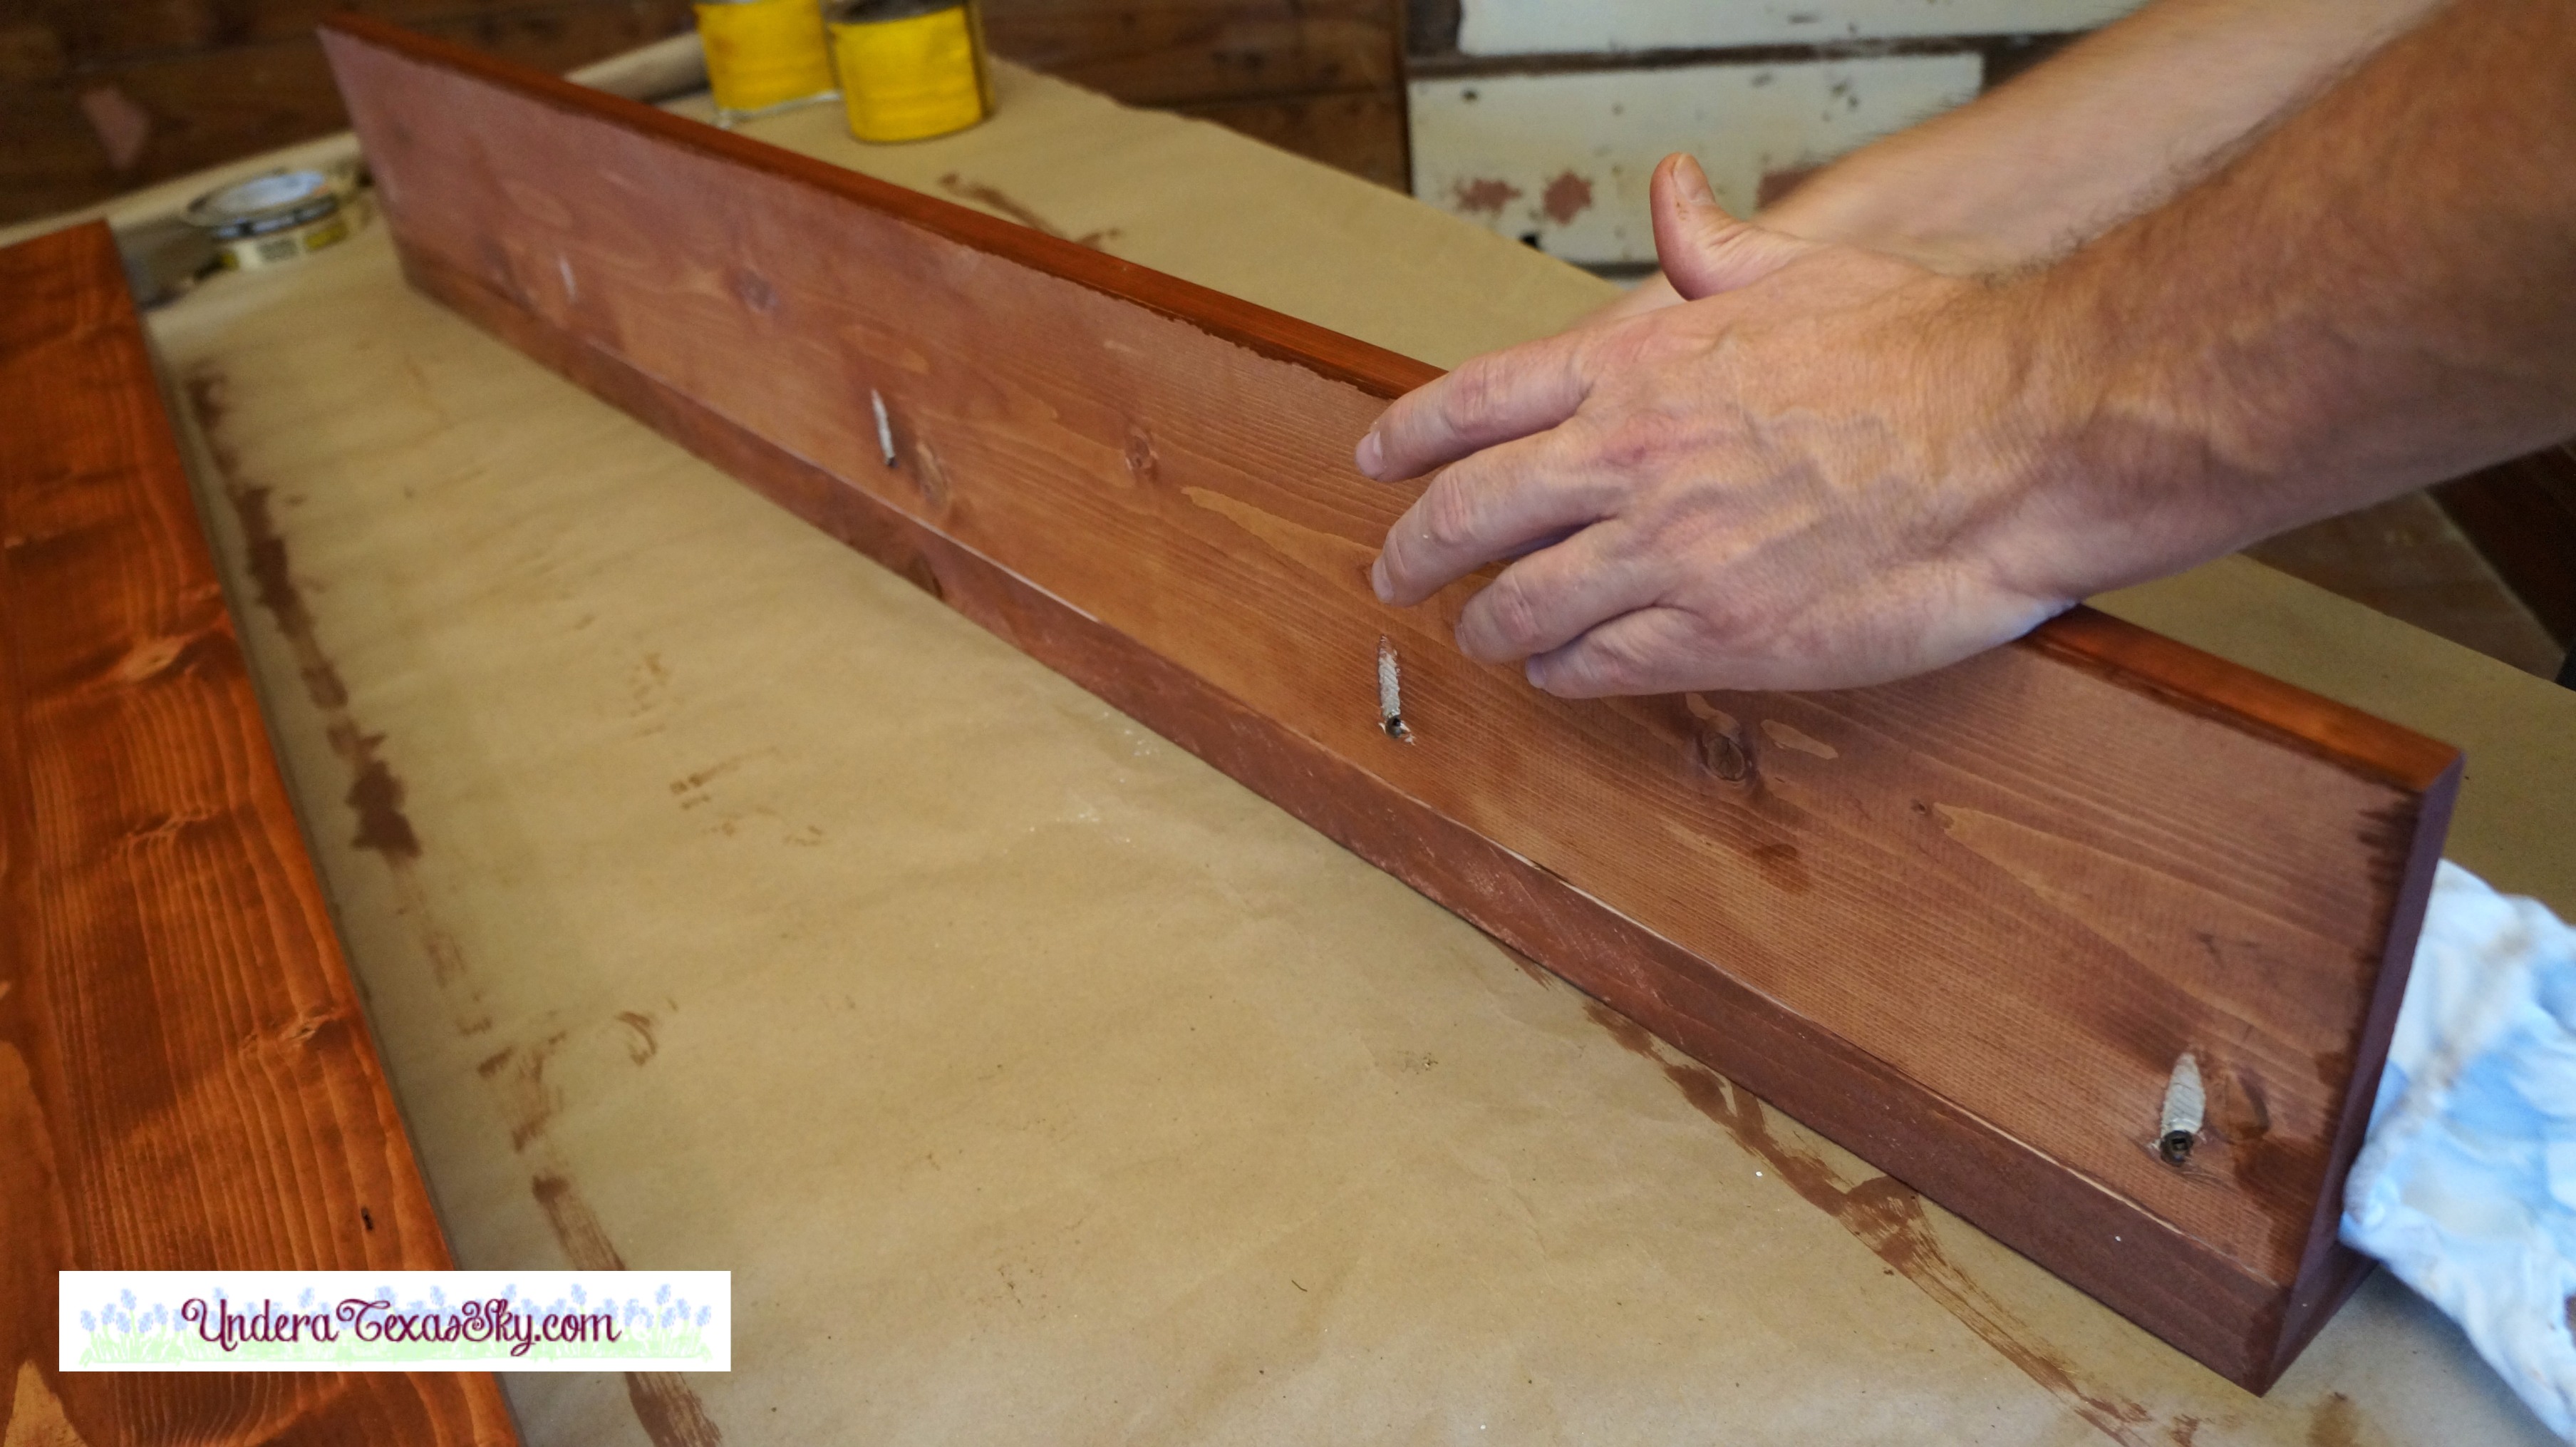
Next, place the front board against the bottom base board. Run a bead of glue along the front of the base (2×4). Using a nail gun, put six 1 1/4″ brad nails spaced evenly along the front board. Nail close to the bottom of the board.

Let the piece set up overnight. We actually waiting a couple of days before staining. Stain and use the finish of your choice. We chose to use wax to seal our shelves. You can use poly or whatever.
Pages: 1 2