Faux Shiplap Installation- Big Impact, Little Cost

Shiplap installation seems to one of the most popular design elements going today. Like so many, I love this farmhouse look! I thought singling out the shiplap wall element in my laundry room makeover would be helpful to those who are looking to add this style to any room in their house. We did not use true shiplap boards. I’ve seen those advertised at different hardware stores (none in our area, however), but we used sanded plywood that we purchased in 4×8 foot sheets. To make is easy- here’s what it took to create this wall, and what we spent to do it:
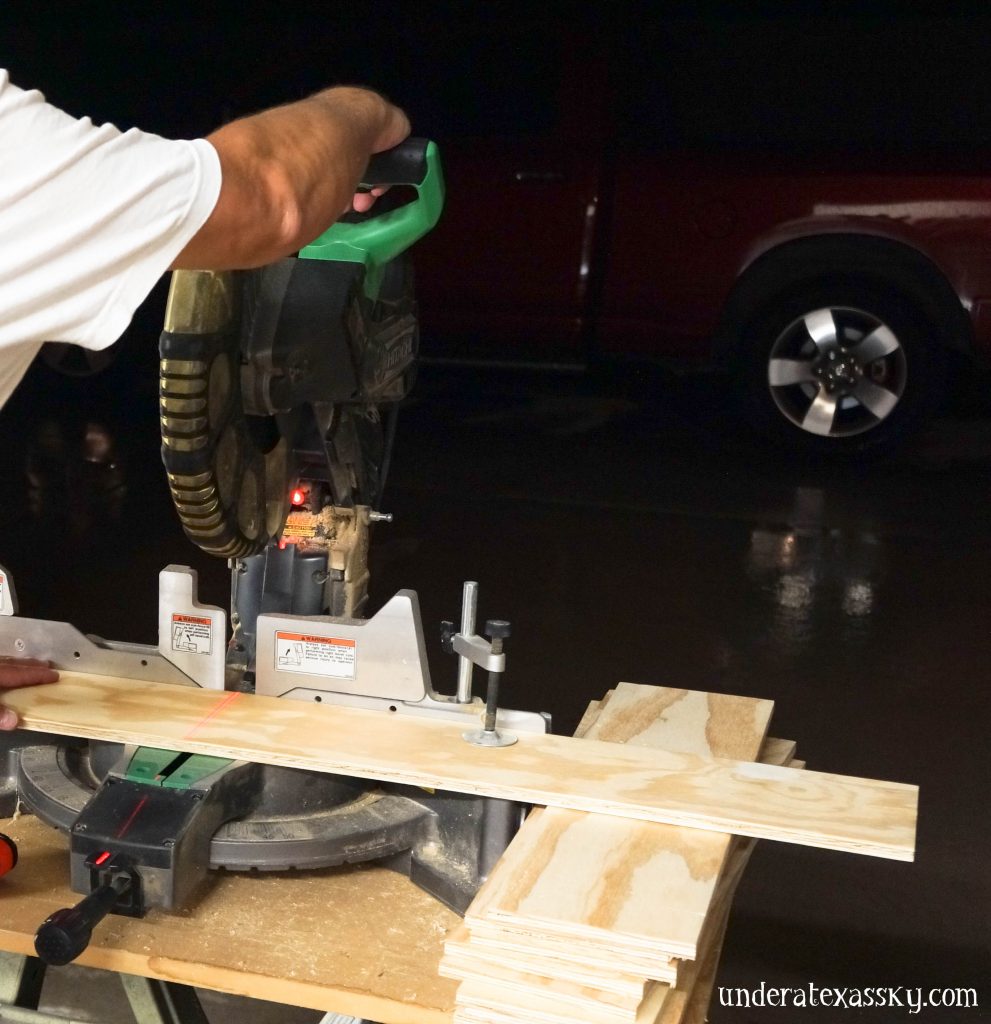
3- 4×8 ft sanded plywood sheets (we needed three because out ceiling in 10 feet high in that room) @$23.45- $70.35 (We had Lowe’s rip the plywood sheets down to 6″ planks. They did this for free).
2″ pneumatic nails for the nail gun $19.54
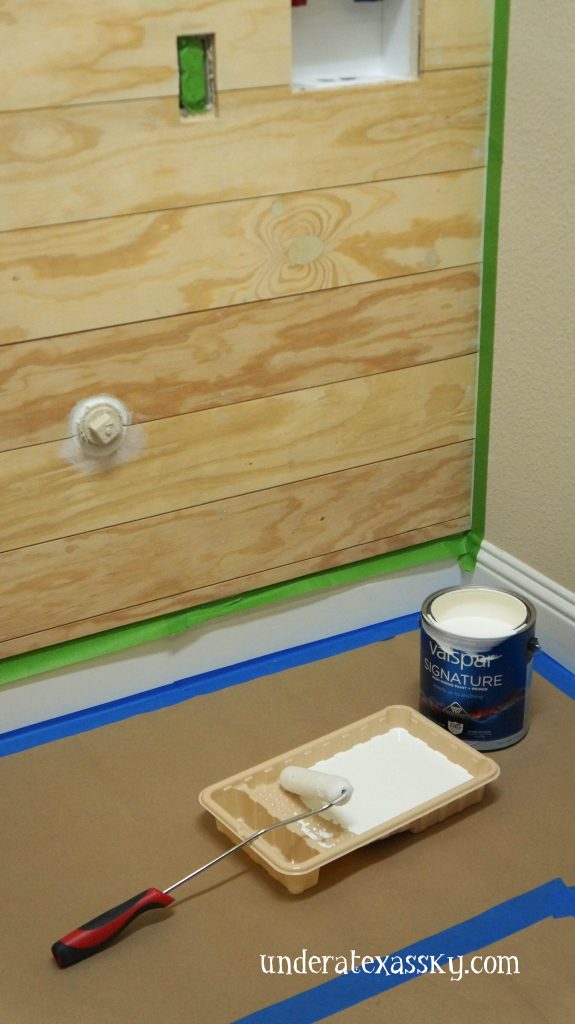
1 gallon Valspar Eggshell Latex Interior Paint and Primer in One- $32.98
Gator 400 grit commercial sanding sponge- $4.98
Fast ‘n Final Lightweight Spackling- $6.78
Paint rollers and tray -$13
We had the Frog Tape and caulk so didn’t need to purchase those things to seal and tape the side walls before painting.
We were able to add the shiplap wall in that room for less than $150! Not much money, but what a difference!
Here are the steps:
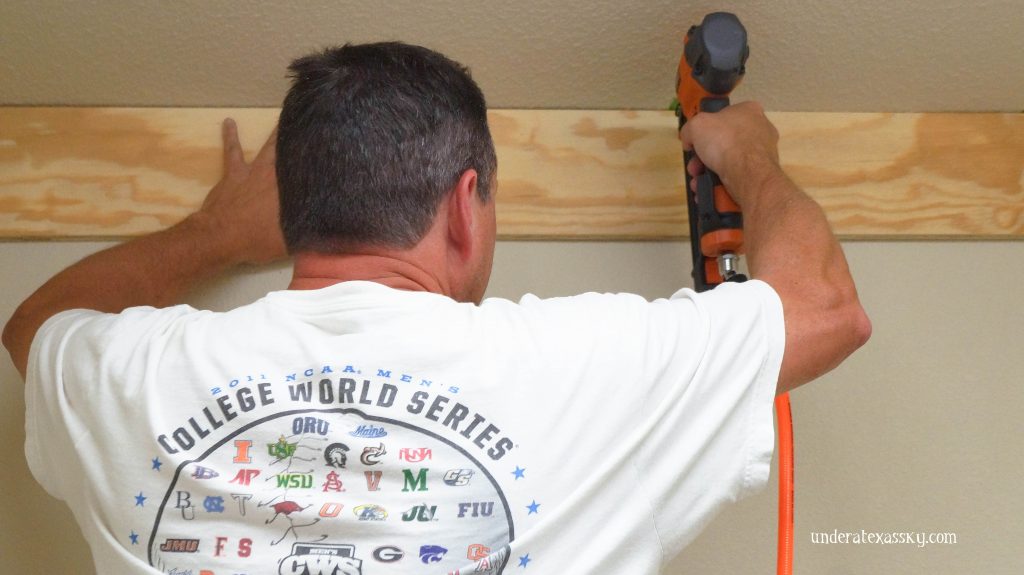
The first thing the Mean Man did was to sand all of the planks smooth. It’s really important to have the planks ready to paint. Sanding assures that the paint will go on smoothly.


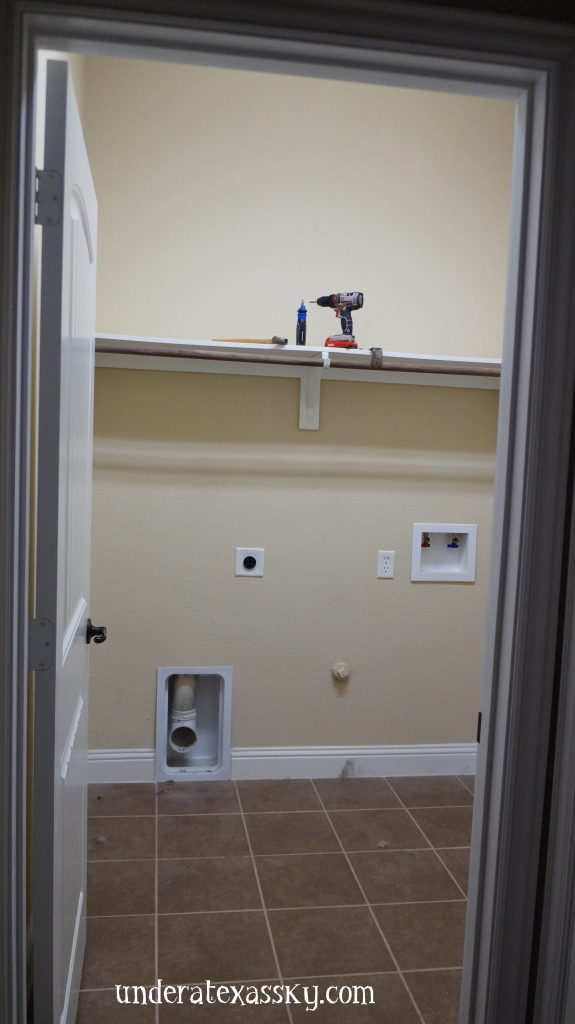
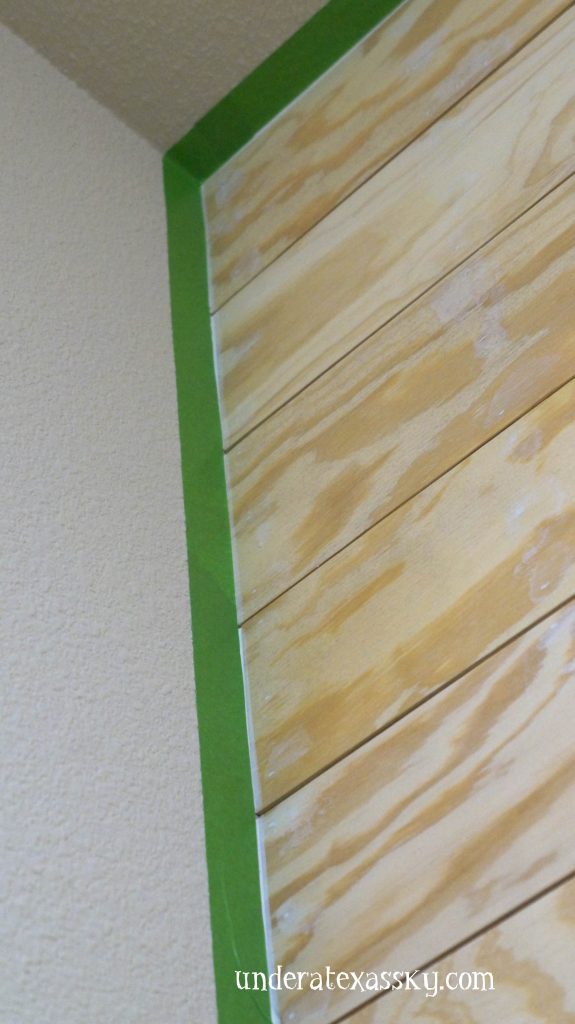
Next came prepping the wall. We had to remove a shelf and the caulk that surrounded it before starting the shiplap. We wanted to be sure the wall was as level as possible so the planks would all sit even on the wall. We also established where the studs were located so the planks would be nailed as securely as possible. We used painter’s tape on the ceiling to mark where the studs are located.

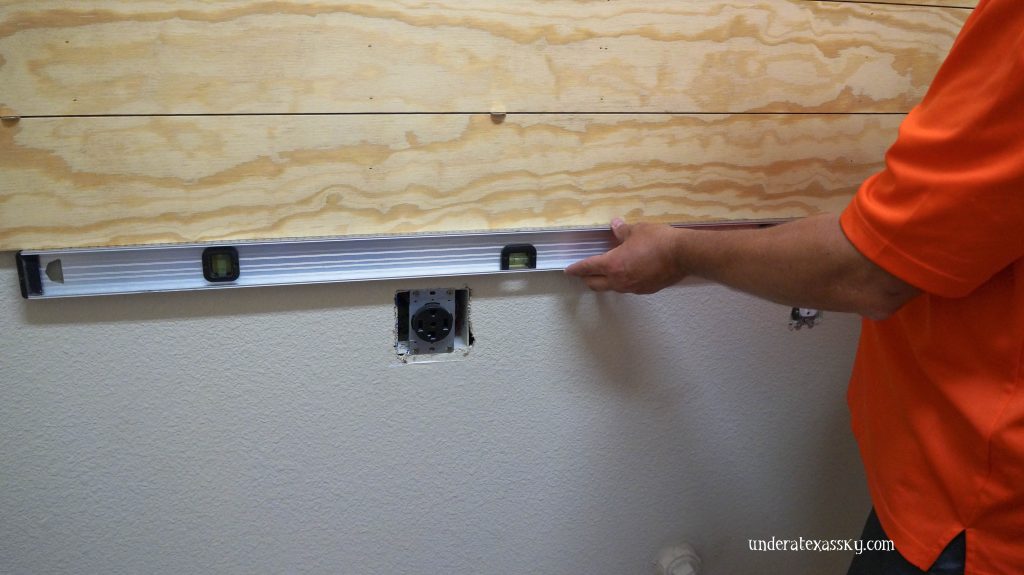
Then it was time to set the top piece of shiplap. Starting at the top is best, just be sure the plank is level. This will guide the next planks. Since we weren’t using actual shiplap, we needed a way to set the space between each plank. We used a nickel to get just the right amount of space between planks.
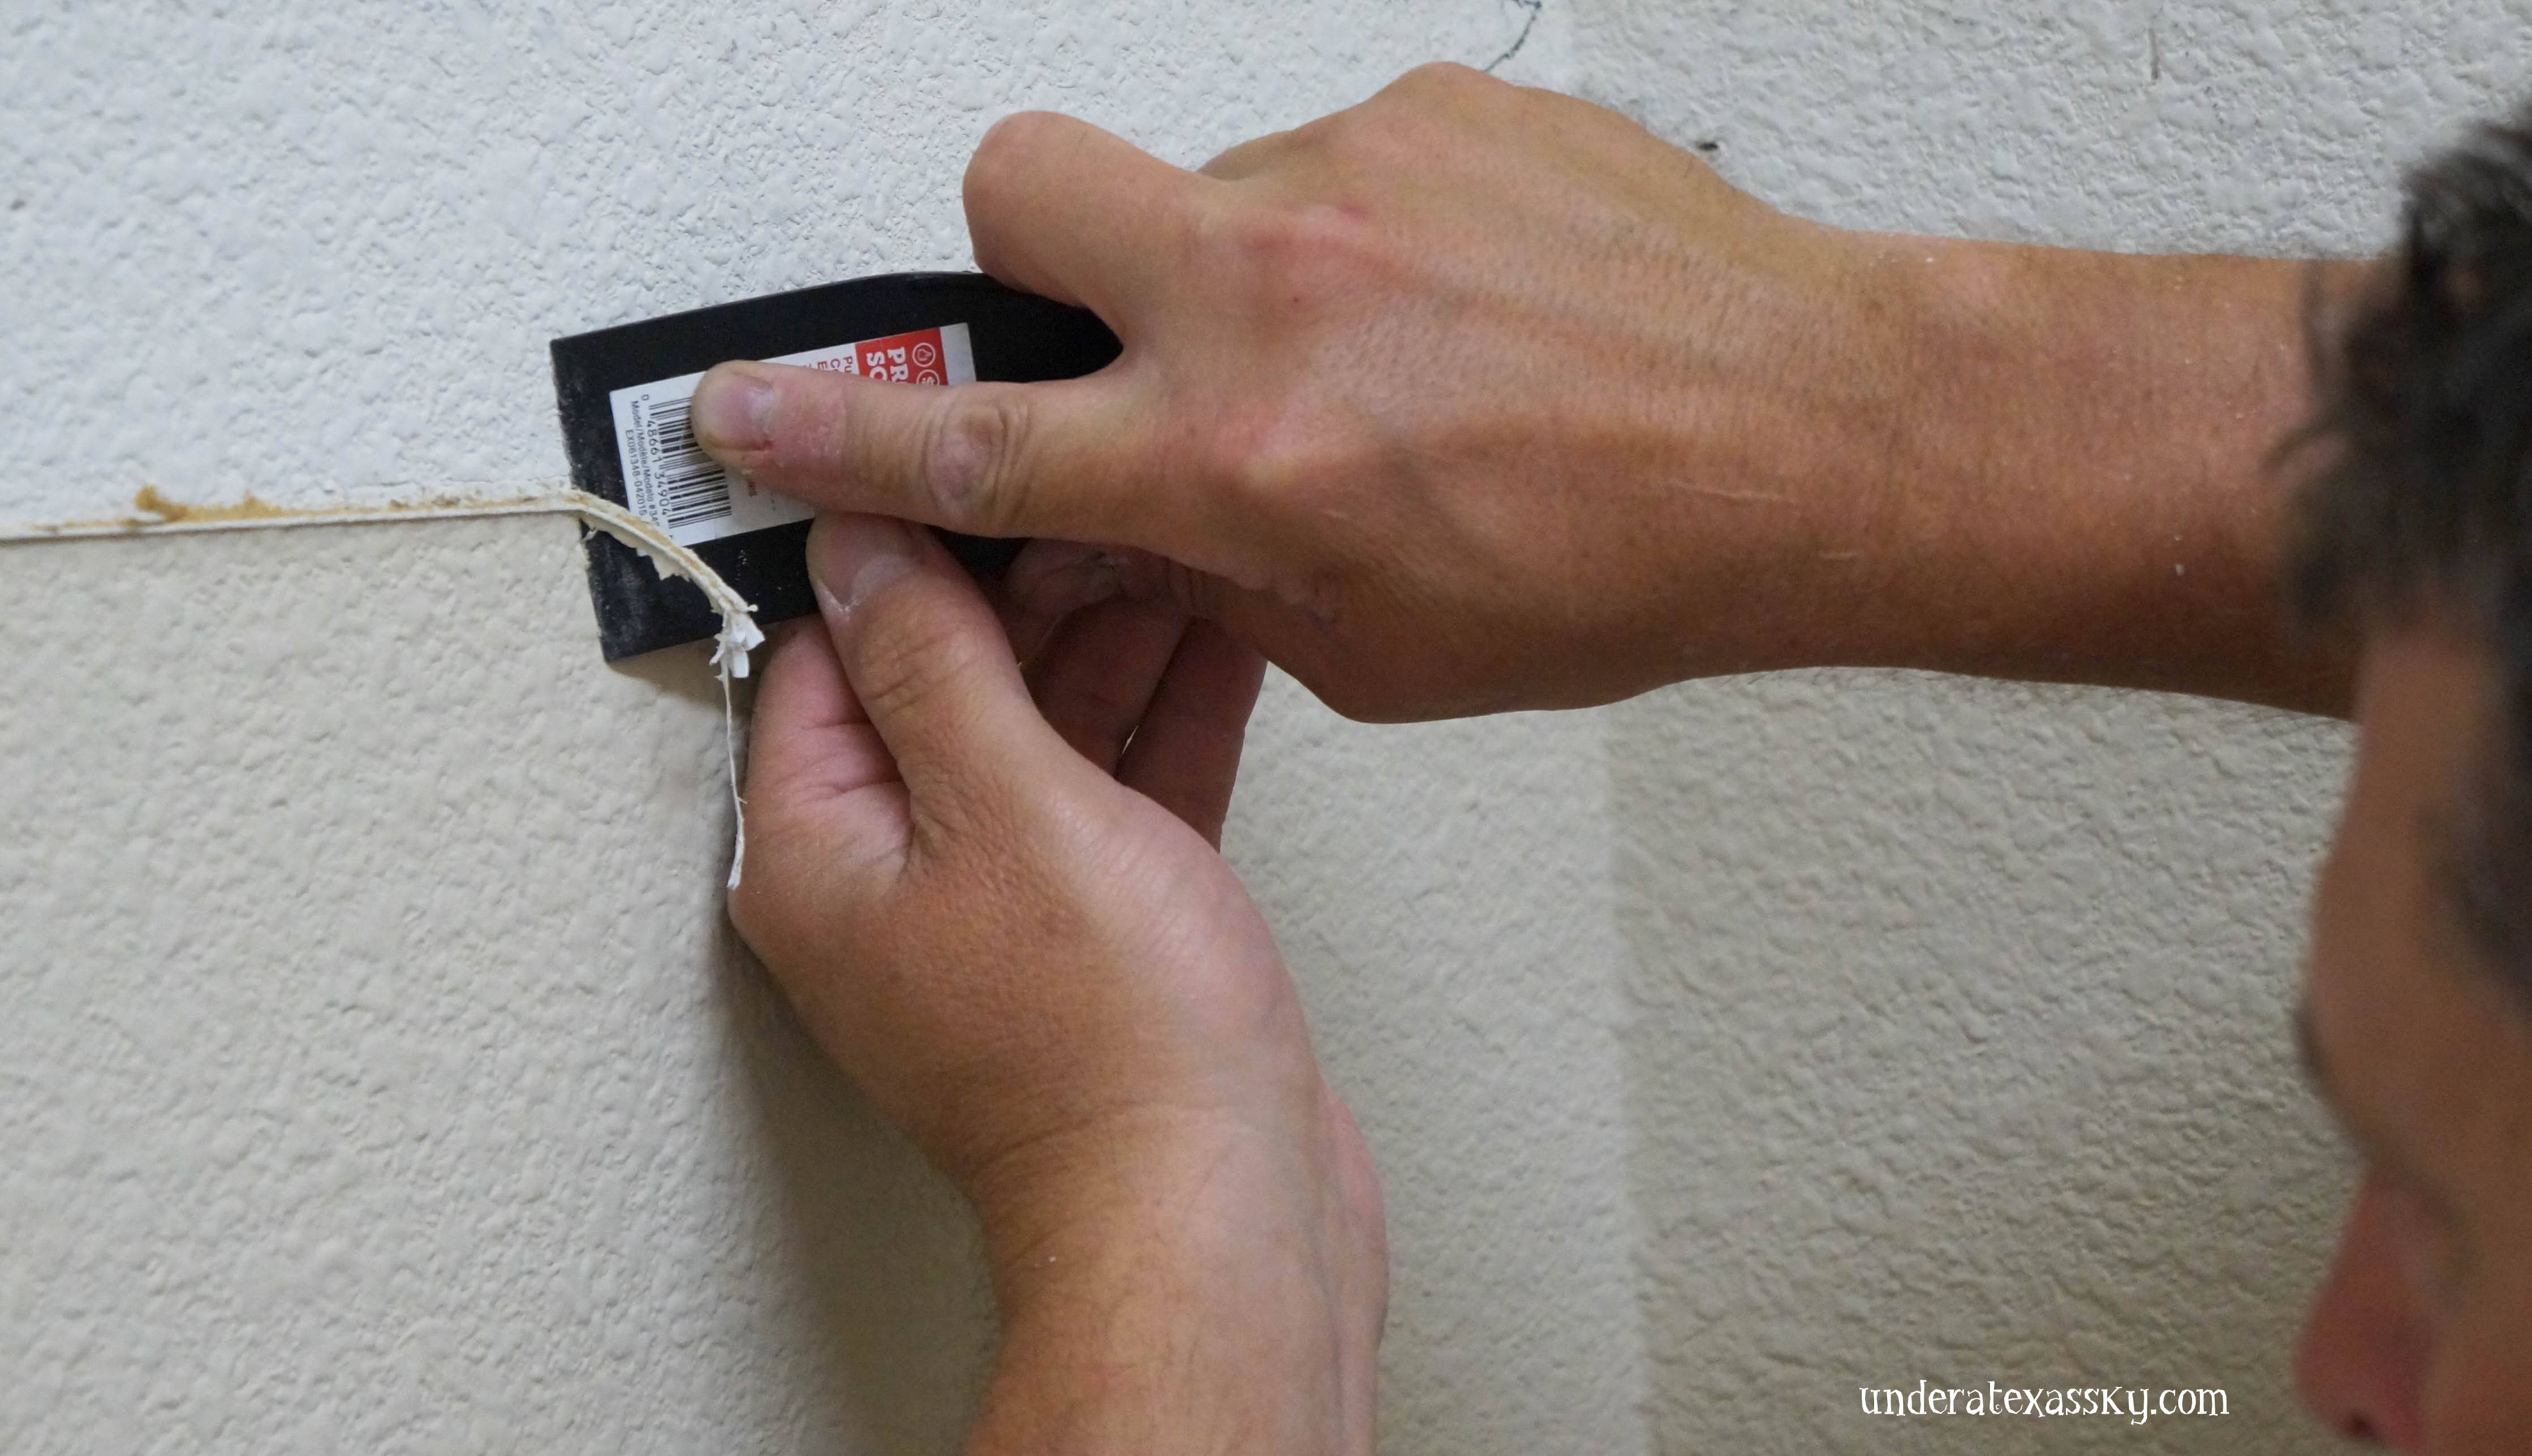
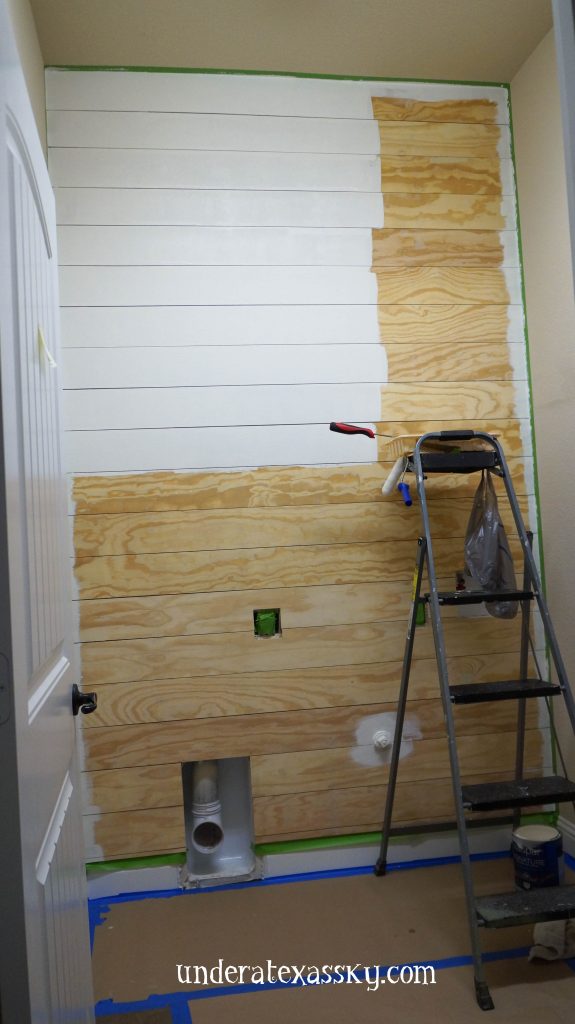
We used spackling to fill all of the nail holes and then sanded them after the spackle dried. Again- it’s important to have a nice smooth surface for painting. The plywood is pretty thirsty also. It really drinks in the paint. We used two coats to get the best coverage.


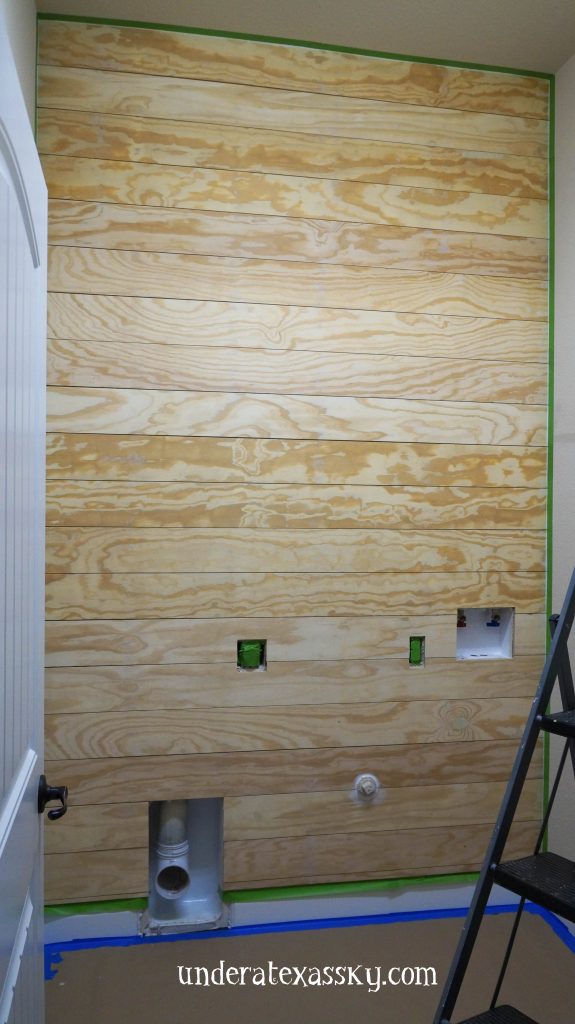
I am so very please with the result. The wall in and of itself is beautiful. We added some pipe shelves to the wall to solve our storage problem in the laundry room. It’s actually now a pleasure to go in this room.


April 21, 2017 @ 10:01 am
This looks like a great project for our home. My question is: How would I stagger the shiplap as I am moving up the wall? We would like to put shiplap on both sides of the fireplace – each side being about 11 ft in length. We are going to have 4*8 sheets of plywood cut to 6” width. The wall is 8 ft high and we want to shiplap to a height of 36″.
April 22, 2017 @ 4:25 pm
Tony- I think the important thing to keep in mind is to keep your seams random. I’d start on the bottom and lay the first long board, then cut the board that will go next to it to fit (3′). When you come to the next row, cut your I’d start with a 3’plank then add an 8′ board. On the third row I’d lay a longer board- maybe 6′ then add a 5′. I’d probably sketch it out to be sure your seams don’t line up exactly with any other row. The most important thing is that it looks like natural and random to keep it more interesting to the eye. I hope that helps- and of course, remember that I’m a serious amateur and I’d totally be winging it. I just always trust my eye when it comes to design. I’d just try to not do like a true
September 1, 2016 @ 3:38 pm
I love this!!
Thanks for linking up with Welcome Home Wednesdays! Live every Wednesday at 7AM CT.
liz @ j for joiner
August 26, 2016 @ 1:02 pm
Kelly, Hi! I found you on Sweet Inspiration Link Party and when I saw that you were in Texas I had to come and say Howdy! I am also In Texas. Temple to be exact! I think you are very creative and I love your Blog theme. You are a lovely writer also. I guess your daughters come by the Journalism Gene naturally !
Jeannee
August 26, 2016 @ 4:58 pm
Jeannee, Thank you so much for stopping by. I love to meet other Texans! And your kind words really hit the spot. As a blogger, as I’m sure you know, sometimes I make the mistake of comparison, and sometimes I worry about the quality of my blog and then the blessing of kind word of encouragement comes my way and I’m ready to take on the world again. Thanks again for stopping by. I hope you’ll visit often. Blessings to you! -Kelly
August 23, 2016 @ 5:12 pm
This turned out amazing! I would love some shiplap in my home but not sure it would look right. We just don’t have that style of house.
Thanks for sharing at the Shine Blog Hop!
August 24, 2016 @ 9:00 am
Tiffany- Thanks so much!! It’s true- this can be more of a country style. My house is less farmhouse and more Texas Hill Country, but I think I’ve incorporated some Texas elements. Plus the added industrial shelves help lessen the true farmhouse look. Bit I can definitely see how you’d have to get creative to incorporate this look into a modern style decor. Thanks so much for hosting! Blessings! -Kelly
August 22, 2016 @ 8:46 pm
That turned out so great!
Tania
August 21, 2016 @ 2:06 am
I love the results! Thanks for sharing at Merry Monday! 🙂
August 19, 2016 @ 12:28 pm
This is beautiful! I love the idea of ripping plywood into planks for a shiplap wall! We are thinking of installing a shiplap wall in our master bedroom. I will definitely keep this idea in mind. Thanks for sharing! 🙂
August 20, 2016 @ 4:36 pm
Katie- Thanks so much! I absolutely love how ours turned out. If you’re considering it, I say go for it! Blessings! -Kelly
August 17, 2016 @ 10:10 am
OH my gosh…I love how this turned out! 🙂
Would love for you to share this with my Facebook Group for recipes, crafts, and tips: https://www.facebook.com/groups/pluckyrecipescraftstips/
Thanks for joining Cooking and Crafting with J & J!
August 17, 2016 @ 6:38 pm
Jess- Thanks so much! Will do. 🙂