Hanging Mason Jars Wall Art
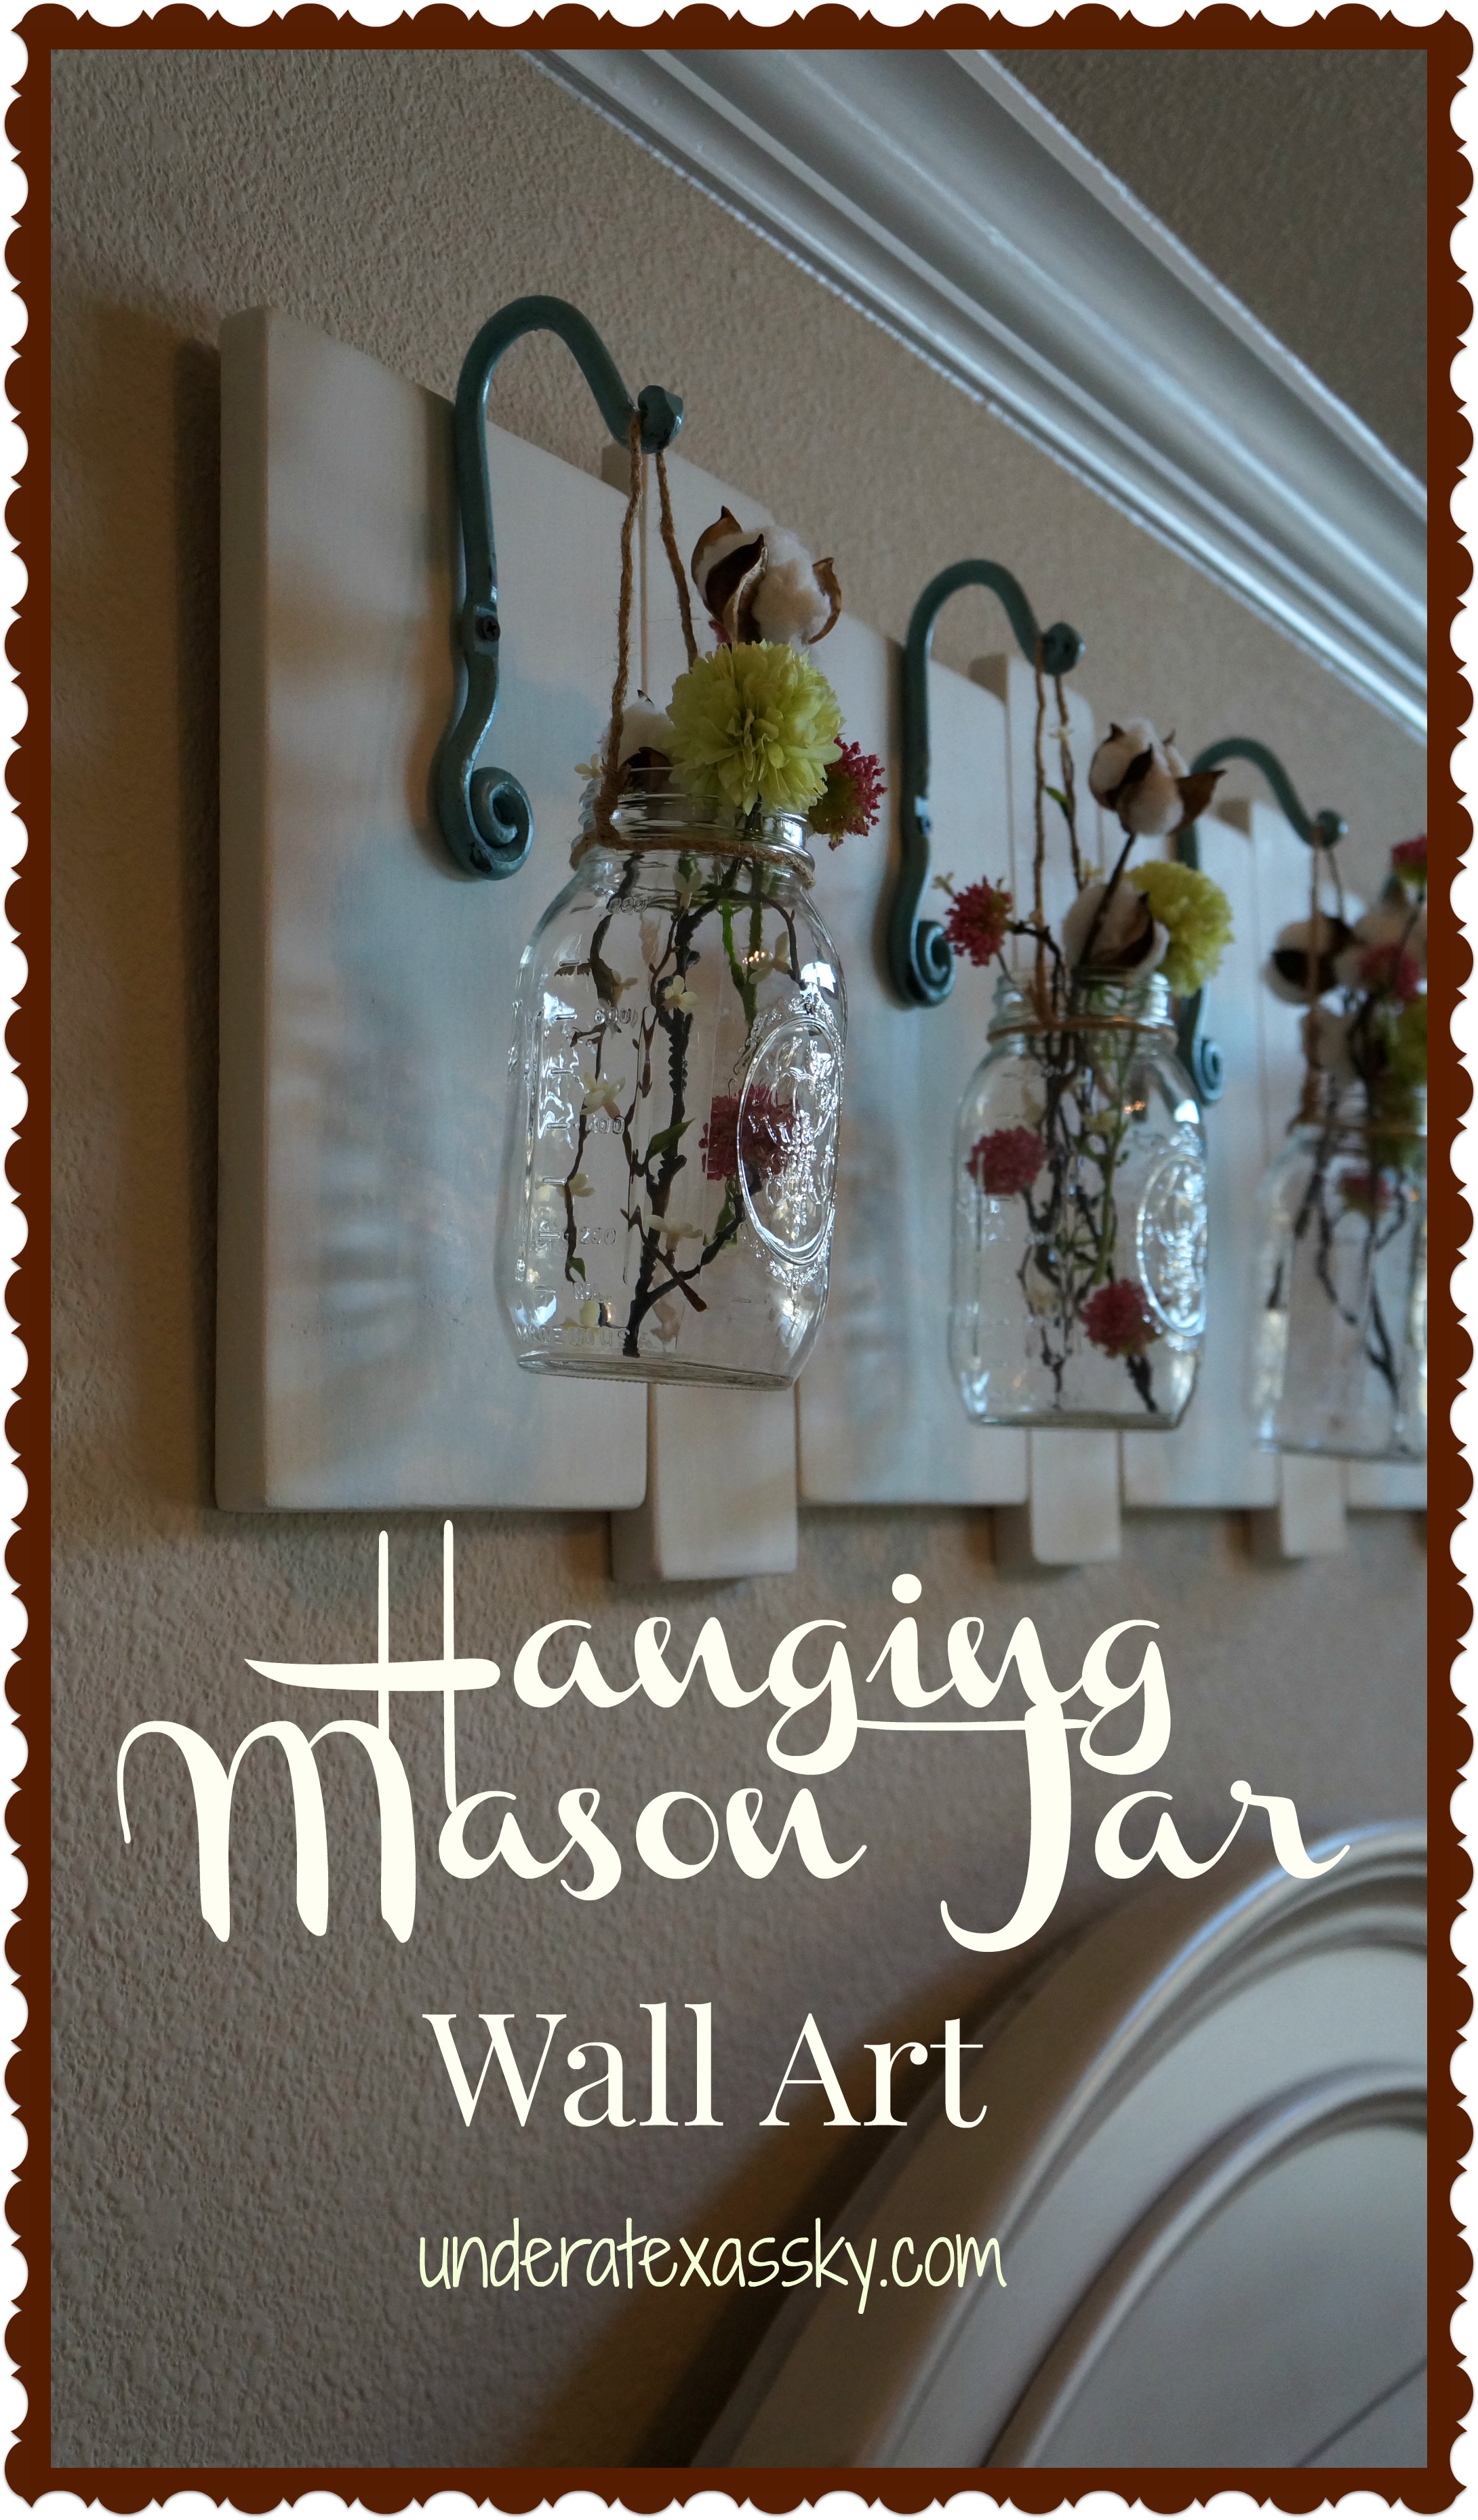
I have fallen in love with all things Mason jars! There have been countless adorable projects incorporating Mason jars popping up all over my Pinterest page. The is none that I’ve loved more than the hanging mason jars wall art that I saw pinned from Cottage Home Decor’s Esty shop.
There is a spot over the headboard in my bedroom that has just been begging for some sort of wall art to complete the wall that the bed sits against. When I saw this pinned to my profile I thought it would be perfect. I wasn’t sure of the measurements of the example that I saw so The Mean Man and I just took the wall measurement and headed to Lowe’s.
Here are the materials we used:
1- 1 x 8 whitewood pine board (6′)
1- 1 x 4 whitewood pine board (6′)
Pocket jig
5 hooks
Chalk paint
Wax and sealer
5 Mason jars
Wired jute twine
Silk flowers
2 Picture hanging hooks
We debated the sizes of boards to use. This project takes two different widths of boards to achieve this look, we just weren’t certain of HOW wide. Using a 1 x 8 board for the wider of the two, and a 1 x 4 for the smaller of the two worked out perfectly. The wide boards were cut to 14″ and the thinner boards are 16″ long. The piece ended up having 5 of the 1 x 8, 14″ boards and 4 of the 1 x 4, 16″ boards.

The Mean Man sanded the edges of the boards to give them a nice curved edge. This gives the boards a more finished, almost beveled look after sanding down the edges.

The skinnier boards were cut to extended 1″ beyond the wider boards at the top and bottom.

Dry-fitting the boards before you start screwing them together is important. You want to be sure it looks like the size you want and that it all really fits together well.

To attach the boards together, we (and when I say we, I mean the Mean Man) used a pocket jig to cut pockets for screws to be able to attach the boards together.

We used some cream colored chalk paint that we had leftover from the farmhouse table project. The boards were painted and allowed to dry overnight. A wax topcoat was added and allowed to dry. To protect the finish, a matte enamel sealer was then added. The boards were lightly sanded to give a nice smooth finish.

It was hard to find the kind of hooks to give the look I wanted. Most hooks curve at the bottom of the hook – but I wanted a hook at the top. I found some hooks that would work, but I had to turn them upside down. It worked great! These were dry fitted with the Mason jars placed where I wanted them to fall. After getting the measurement, each hanger was drilled into the 1 x 8 boards.

Now, this is a long piece of art work- about 52″ so it needed a strong method for hanging. We used two picture hangers. Just be sure you make these even on the back of your piece. We placed them on the outside two skinny boards.

To attach the mason jars, I used a wired jute twine. This stuff is great! The wire that runs through the twine makes it possible to twist the jut tightly around the neck of the Mason jar. I use one long piece and wrapped it around the neck of the jar and twisted it lightly on one side. Then I took the long side and attached it to the other side by slipping it through the side of the loop I had wrapped around the neck. It’s easy to adjust and tighten.

I think the results are fantastic! There is a sweet romantic look to this project that I simply adore. Its has just the right amount of country charm.


April 1, 2018 @ 7:54 pm
seems incredible dangerous to hang something over a bed like this.
April 4, 2018 @ 11:51 am
Karen- Some times you just have to live on the edge! Seriously, we made sure it was all secure. It won’t be over the headboard in the new house, however. We have windows there. Thanks for stopping by. Blessings! -Kelly
August 14, 2017 @ 8:13 am
How did you hang the jars? Could you please provide a picture as well as your comments. This project is genius❣
August 15, 2017 @ 8:27 pm
Lace- Thank you so much! I used that wired jute. I just wrapped it around the jar lid and twisted it like a twist tie. Before I got it super tight, I slid the end of the jute through the loop around the lid on the opposite side. I twisted that on itself like a twist tie. It’s very snug. I don’t really have pics of how I did it specifically. I hope this helps some. Blessings! Kelly
November 14, 2016 @ 9:31 pm
You and ‘ mean man ‘ did a beautiful job. Where did u find the rustic hooks
would u kindly let me know. The tutorial is great.
November 15, 2016 @ 7:50 pm
Linda- Thanks so much! He’ll love hearing that he’s getting some love as well. We picked up the hooks that I used from Hobby Lobby. I inverted the hooks to make them hang from the top. I’m glad you liked the tutorial. Blessings! -Kelly
October 1, 2016 @ 5:16 pm
Love the Idea – thanks for sharing – I have my “mean man” working on this – I found the hooks and would love to know what size mason jars you used – was thinking about using the blue color jars.
October 2, 2016 @ 2:08 pm
Sharon- Don’t you just love having a “mean man” who likes to help?! The mason jars I used are 7″ tall. I bought them at Hobby Lobby. They have a great variety. Blue jars would be beautiful. I thought about distress painting them, but decided the clear would also work. If you’re painting them and have any question as to how- I have a tutorial on distress painting Mason jars also. I’m so glad you stopped by. Blessings- Kelly
September 15, 2016 @ 1:31 am
This looks adorable! You have been featured at:
https://althingsbeautiful.wordpress.com/2016/09/15/creatively-crafty-link-party-32/
September 15, 2016 @ 9:20 am
Ann- Thanks so much! Blessings! -Kelly
September 14, 2016 @ 12:32 pm
Those hooks are to die for and your sanding is amazing – look at those corners! Thanks for sharing with us at #CCBG.
September 14, 2016 @ 1:29 pm
Janet- Aren’t those hooks the cutest?! And OMG I’m so laughing right now. The Mean Man was obsessed with sanding those edges!! He’ll be really happy to know it’s appreciated!! That just made my day. Thanks for stopping by. Blessings! -Kelly
September 14, 2016 @ 6:26 am
These are so beautiful and perfect as decoration above a headboard. Posts like this would be perfect for the Waste Less Wednesday Blog Hop! Check it out: http://www.skipthebag.com/2016/09/waste-less-wednesday-blog-hop-5.html #wastelesswednesday
September 14, 2016 @ 8:25 am
Katy- Thanks so much! I’m happy to share. Blessings!- Kelly
September 17, 2016 @ 10:04 am
Thanks for posting on the #WasteLessWednesday blog hop! Can’t wait to see what you post next week!
September 18, 2016 @ 12:34 pm
Katy- Thanks for the forum! Blessings- Kelly
September 9, 2016 @ 5:45 pm
These are really pretty! You did a great job!
Visiting from that Friday blog hop.
September 9, 2016 @ 7:45 pm
Thanks so much! Blessings- Kelly
September 9, 2016 @ 12:15 pm
Oh gosh…I SO love this!!
I would love for you to share this with my Facebook Group for recipes, crafts, tips, and tricks: https://www.facebook.com/groups/pluckyrecipescraftstips/
Thanks for joining Cooking and Crafting with J & J!
September 9, 2016 @ 7:46 pm
Thanks so much! It was a fun project. Blessings! Kelly
September 8, 2016 @ 12:37 pm
This is the best thing done that I have seen with Mason Jars!! Please come share this at our party we would love to have you! https://www.floydfamilyhomestead.com/2016/09/07/the-homesteader-hop19/
September 8, 2016 @ 1:06 pm
Tana- Thanks so much! I’d love to share. I’ll be joining the Homestead Hop weekly! Blessings- Kelly
September 7, 2016 @ 4:55 pm
Love this project and it looks perfect over your headboard. I too have become obsessed with Mason jars. I am in flea markets and antique stores looking for vintage ones all the time. The projects are endless, although I don’t want to decorate my whole house with mason jars, they will lose their charm. I have had friends ask me to make some for them.
September 7, 2016 @ 6:44 pm
Diana- Thanks so much! And yes- you can really only go so far with the Mason jars as decor. I’ve done two project in two different rooms. I just love their versatility and their country charm. I think making them as gifts is such a great idea! I love easy and beautiful projects. Thanks for stopping by. Blessings- Kelly
September 6, 2016 @ 3:06 pm
Hi Kelly, This is a great way to use mason jars! The finished piece looks so attractive over the bed! Well done! Blessings, Janet
September 6, 2016 @ 4:16 pm
Janet- Thank you so much! I really loved this project too- it just turned out so nicely elegant but not pretentious- I mean, it’s mason jars… to think, some people just use them for canning! Thanks for stopping by. Blessings! -Kelly
September 6, 2016 @ 8:28 am
Love how you used those mason jars…they look wonderful above that beautiful bed!
September 6, 2016 @ 12:44 pm
Christine- Thanks so much for stopping by and for the lovely compliment! Blessings- Kelly