Simple Porch Sign Post DIY

I’ve seen these porch sign posts all over our neighborhood and decided I had to have one too. After commissioning The Mean Man, he set about the checking our supply of left over building materials and came up with a lot of what we needed.
We had a the 4×4 cedar fence post leftover from our fence installation a year ago. Also in our stack of leftovers were leftover 2×12 boards left from the industrial shelving we built for our laundry room makeover. We were well on our way!
A trip to Lowe’s was in order to pick up the rest of what we needed. We purchased a flat top fence post cap, wood deck post deck trim, some wall panel moulding (to trim out the base), and a deck post finial to crown the top of the post. Something is needed from which to hang your sign so I went with an oil-rubbed-bronze double hook. I decided I wanted to stain the post and then paint over the stain with chalk paint. This would allow a dark under color that will come through when we distressed it. Lowe’s carries chalk paint- but there was no way I’m spending over $25 for a pint of paint. So we decided to check to see what the Walmart next door had to offer.
In Walmart’s craft section, they carry Waverly Chalk Paint. It was like $8 or so for 16 oz. SOLD! We had dark walnut stain leftover, again from our laundry room shelf project. Sealing the post is important because it will be, well, on the front porch and will be subject to the elements. We went with a spray on varnish to give that protection.
Here’s how we did it:
This is seriously so simple. The toughest part is matching up the pieces to be connected to one another. If you choose to do like we did and want a finial on the top of the flat fence post cap, you need to find center to drill a hole that will allow the finial to be screwed into it.


Put the cap on the top of the fence post and drill down so the finial can be screwed in through the cap into the post itself.

The 2×12 is cut to where it’s a 12×12 square. There is a ton of wind out where we live so we wanted a very sturdy base. We (and of course, when I say “we” I mean The Mean Man) notched around the base so the trim piece would sit nicely on top and wrap around the bottom of the base. That decorative piece that wraps around the base of the post was purchased at Lowe’s.

After determining the center of base, a portion of the post that was cut away was used as a template to determine where we’d attach the base to the post.

This shows the base from the bottom.

Here’s how it looked after screwing it all together. You can see the trim that’s around the base. It’s what fit into the notches that were cut earlier.


Now to make it pretty.
Using a wood filler, we covered all the cracks where the items fit together. And then it’s time for sanding and stain. The post is made of cedar so was pretty rough. We sanded all the pieces smooth and used a sponge brush to stain the post in a dark walnut.

We let the stain dry overnight, then painted over it with chalk paint. The dark stain was lovely as it was. You could totally just stain and seal yours if that’s your style.

After painting, we took a sanding block and started roughing up the edges to give the post a distressed look.

Once the entire post was roughed up enough, we sprayed on a sealer. After a day of drying, we added the decorative hook.

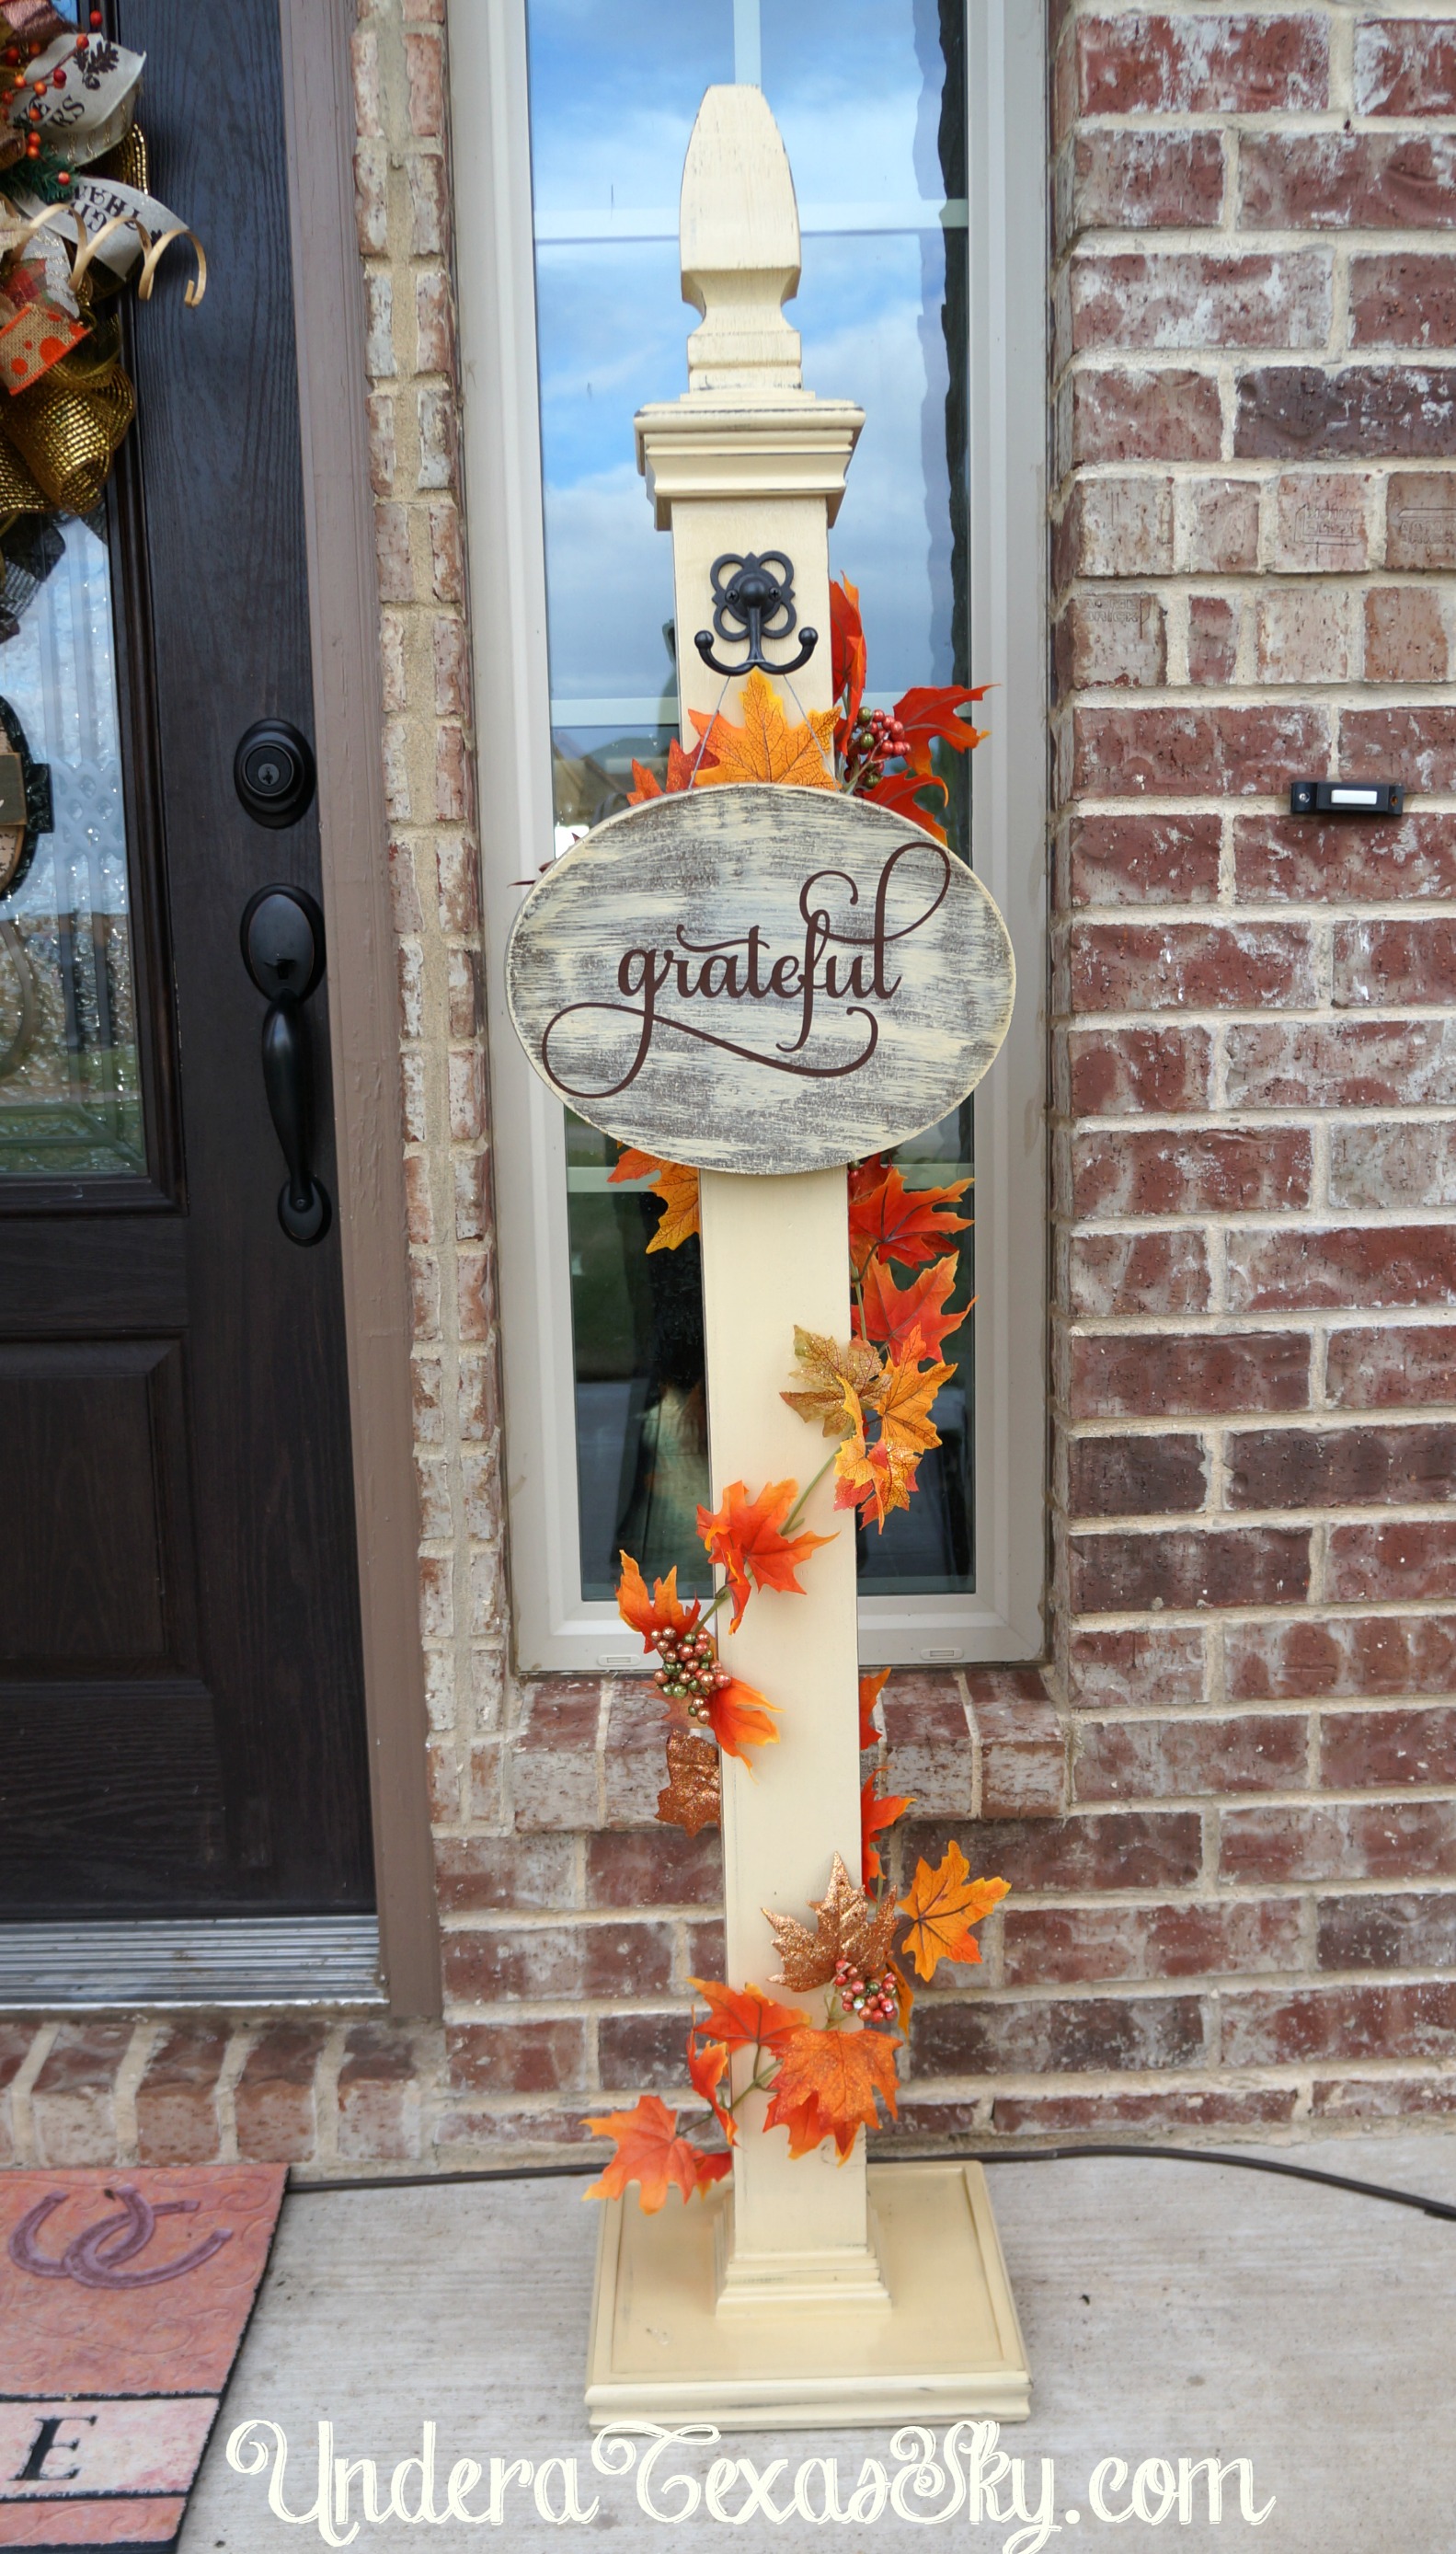
Finally we added two cup hooks to the back side top and bottom so I could attach garland for that extra decorative touch.

Finally I made a sign that has the perfect sentiment for the Thanksgiving season. This “Grateful” sign says it all. It’s a tutorial for anther day.
December 12, 2020 @ 12:30 pm
We are in the middle of building 3 of these and are SO excited!! We love yours and hope ours will come out even remotely similar! One question, do you have placement specs for the two hooks you put on the back of the post?
December 12, 2020 @ 5:57 pm
Lindsay- I’m so glad you found our tutorial helpful and are making a few. I just love them!! I’m not certain the exact measurement on where the hook is. I really think that can just be a preference thing. A few inches below the top trim worked for us. I’ve seen them lower actually- about in the middle. Anywhere you choose will work. I hope this helps. Thanks so much for stopping by. Blessings, Kelly
October 23, 2020 @ 3:28 pm
This was about the most detailed instructional that I found, I’m gathering from the captions. The pictures never fully downloaded. They were blurry.
October 27, 2020 @ 12:27 pm
PL- I’m so sorry the pics were blurry. They updated the software for my blog and things are still not right. If you click on the pic, it should open in a larger window. Thanks so much for stopping by and for the feedback. Blessings- Kelly
May 11, 2020 @ 11:40 pm
Great tutorials! Two questions, where did you get the hook for your Porch Sign Post and did the Mean Guy ever do a tutorial on how to make the white sign post next to the driveway? Would like to see that.
May 30, 2020 @ 11:35 am
Peter- I’m so sorry it’s taken so long to get back to you! I got the hooks at Lowes in the hardware section. I’ve also found great hooks at Hobby Lobby. I’ve never got the chance to do a tutorial on the other post. Thank you for reminding me. I’ll have to check with the hubs to see if we can’t crank that out! Blessings- Kelly
December 10, 2019 @ 6:53 am
I had the same idea. I use mine this year as candles on front porch in different heights. Mow I will recycle with the hooks for different signs for different holidays. I love anything done by a southern girl yall. Proud to be one.
December 11, 2019 @ 12:05 pm
Shirley- We southern gals know how to make something out of nothing! I love my porch post. It’s great for every season, plus they’re so easy to make. Easy is my jam! I’m so glad to stopped in. Blessings! Merry Christmas – Kelly
November 15, 2019 @ 9:26 am
Kelly, I am going to have my students build some of these in my woodworking class. Where did you find the unique hanger? Great project! Thanks!
November 16, 2019 @ 10:38 pm
Bryan- Thanks! I got the wall hook at Lowe’s. I believe it’s called Gatehouse. Thanks so much for stopping by! Blessings- Kelly
September 7, 2019 @ 5:55 pm
Oh my goodness I would love to try this. I was so excited to see this. Thank you for the inspiration.
September 13, 2019 @ 11:23 am
Julie- It’s a great project! It’s easy and so versatile. Thanks for stopping by. Blessings- Kelly
September 2, 2019 @ 10:37 pm
Will the height of the post affect it’s stability? I’d like to make one that’s closer to 5 feet.
March 17, 2019 @ 1:55 pm
This post is such a welcoming sight for visitors! My sister actually pinned your post on her Pinterest page. Her birthday is coming up, and I wondered if you sold these?
March 18, 2019 @ 11:24 am
Tammy- I so love this project! We actually made and sold one at the Hubbard Antique Mall a few weeks ago. I can check with The Mean Man to see if he can carve out some time to put one together. He’s traveling so much with his job lately I can’t promise. Shoot me an email at kelly@underatexassky.com and I’ll see what we can do. Blessings- Kelly
October 23, 2018 @ 6:19 pm
How big is your oval? And how tall is post without base or post top?
October 24, 2018 @ 12:29 pm
Dana- Our post it 48″ before base and topper. The oval for the sign is roughly 5″ deep and 7″ wide. The “grateful” and “this is our happy place” wording were both purchased from the Silhouette store. Hope this helps! Thanks so much for stopping by. Blessings- Kelly
October 15, 2018 @ 7:17 am
I LOVE the grateful sign on the post. Can you share where it came from please? Thank you.
October 15, 2018 @ 11:39 am
Debbie- Thanks so much! That sign is one of my favorites too. I actually made the sign. The Mean Man cut an oval out of an old cabinet shelf and I dry brushed some white chalk paint over the stain. I gut the grateful vinyl using my Silhouette Cameo (I purchased the image from the Design Store). I finished it all off with a generous coat of polycrylic to protect it from the elements since it hangs outside. I hope this helps. Blessings- Kelly
October 13, 2018 @ 1:33 pm
Beautiful! How far apart did you put the string to hand the sign? Thanks for sharing how to do this.
October 15, 2018 @ 11:36 am
Mary- Thanks so much! We spaced them about five inches apart but it will depend on the width of your sign. We’ve had to play with it some. Sometimes the wire has to be shortened so it hangs right. Hope this helps! Blessings! -Kelly
September 24, 2018 @ 6:19 am
Awesome, love it I bought all wood work and I’m going to built it just as soon I get home from work. Thank you for these beautiful ideas.
September 24, 2018 @ 10:38 am
Mercy- How fun! This is one of my all time favorite projects. I hope yours turns out beautifully! Blessings- Kelly
August 26, 2018 @ 10:53 am
So excited to do this. Myself and 2 sisters are fixing to give this a try. Thanks for the instruction
August 27, 2018 @ 10:07 am
Michelle- You are so welcome! I hope y’all’s turn out beautifully. Thanks so much for stopping by. Blessings- Kelly