A Wood Serving Tray that’s Easy to Make
This is DIY wood serving tray can be made for just a few dollars. It’s actually made from a piece of birch that we had left over from some shelves we made earlier. We cut the birch slab to 14″ x 24.” The Mean Man then cut 3 grooves at 3.5″ wide. Grooves were cut using the table saw set to 1/8.”
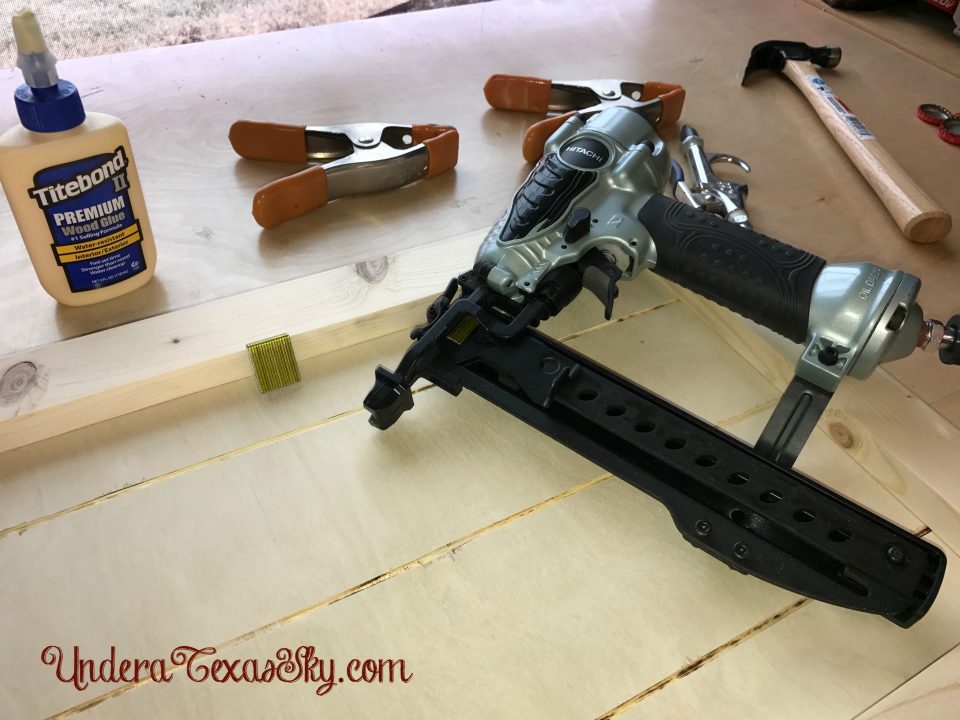
The raised edges were made by cutting a 1″x4″ in half for width and cut to the length of the sides. These were attached by gluing and stapling them from the bottom. Clamps were added to hold it all nicely together while the glue dried.
The Mean Man stained the tray with some Danish oil.
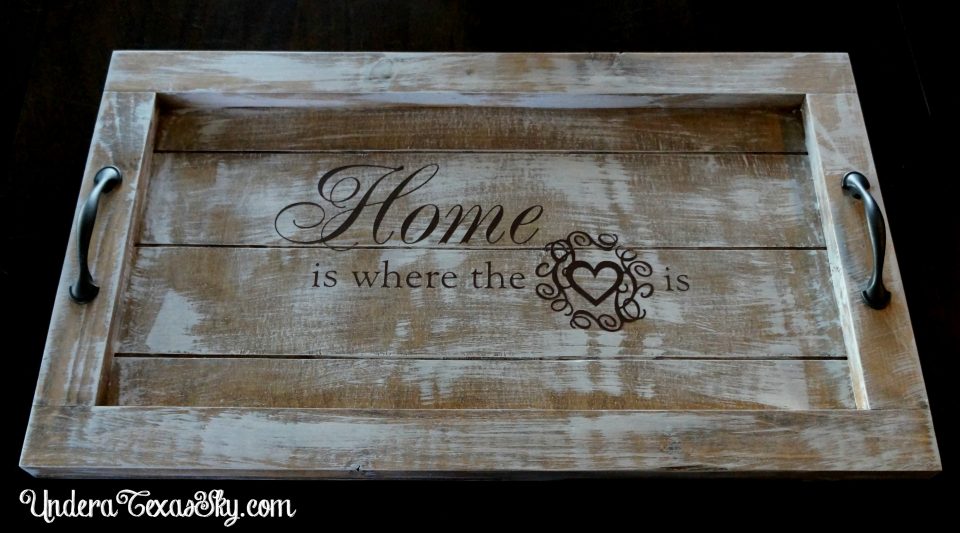
It looked pretty with the stain alone, but I wanted to add a vinyl cut out for some further decoration. A dry brush technique using chalk paint always looks so good over stain.
Finishing Touches
I cut out a pretty vinyl sign using my Silhouette and added it to the tray.
The Mean Man sealed the tray with a clear matte enamel. You’ll want it sealed because you’ll likely use the tray for beverages at some point and you want to protect the wood.
Seal it before you add the handles. I picked these up at Home Depot in the hardware department.
And that’s all there is to it! It seriously only took a few hours and just a few dollars since it we used all scrap wood. It can likely be made for less than $15 otherwise.
Give this DIY wood serving tray a try!


Birch Wood Coffee Table – sa4mayor.com
October 3, 2019 @ 5:31 am
[…] Download Image More @ underatexassky.com […]
March 11, 2017 @ 6:09 pm
It turned out so beautifully (and I’m jealous you have a silhouette). Thanks for sharing on the Waste Less Wednesday Blog Hop!
March 16, 2017 @ 3:48 pm
Katy- Thank you for hosting! And yes, I love my Silhouette! I also have a Cameo- it’s smaller but works great and was much less expensive. Blessings!
March 9, 2017 @ 11:52 pm
This is SO pretty! 🙂
I would love for you to share this with my Facebook Group for recipes, crafts, tips, and tricks: https://www.facebook.com/groups/pluckyrecipescraftstips/
Thanks for joining Cooking and Crafting with J & J!
March 9, 2017 @ 10:18 am
Hi Kelly, wow your tray your made is just gorgeous! Thanks for sharing it at C&C with J&J. Enjoy the weekend and we hope to see you again!
March 9, 2017 @ 9:57 pm
Julie- Thank you so much for hosting!
March 7, 2017 @ 7:35 am
This is so cute! I never thought of cutting wood grooves into a solid piece before – such a neat idea. Nice work!
Best,
Kelly
March 7, 2017 @ 9:04 pm
Kelly – I like this easy technique to give the appearance of wood slats! I’m glad you stopped by. Blessings!
March 6, 2017 @ 9:37 pm
Beautiful tray – pinned it! 😀 Thanks for the tutorial.
March 7, 2017 @ 9:04 pm
Lina- Thanks for the nice compliment!
March 6, 2017 @ 9:21 pm
Beautiful tray!
March 7, 2017 @ 9:03 pm
Roseann- Thanks so much!
March 3, 2017 @ 2:58 pm
Oh, so pretty. You did a great job on this project!
March 7, 2017 @ 9:03 pm
Julie- Thank you so much!
March 1, 2017 @ 12:45 pm
Pinned and waiting for me to get the energy to make one. I adore your project and the picture was beautiful.
March 2, 2017 @ 10:45 pm
Thank you so much!