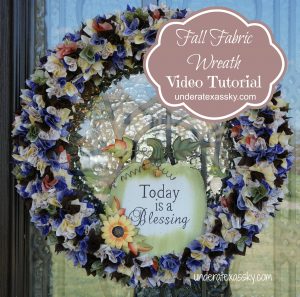
Fall Fabric Wreath

So many of the wreaths I do for y’all are big and flashy, but the style used to make this fall fabric wreath, while subtle, still makes a beautiful statement. This is wreath uses an easy technique, I honestly don’t know what exactly to call it. It uses two inch fabric squares, poked into a styrofoam wreath form. There are just a few supplies needed to make this wreath. They are:
17″ styrofoam wreath form
2 yards of fabric (I used 4 colors of 1/2 a yard each)
tacky glue
something to poke the fabric into the wreath
scissors or rotary cutter
ruler
embellishments
Here’s how you make the fall fabric wreath:

Cut your fabric into two inch strips.

Cut the two inch strips into two inch squares.


Take your the tool to poke the wreath and wrap a fabric square around the tip. Dip in glue, then poke into the wreath form.


Continue poking the fabric into the wreath form all the way around, adding rows of fabric.


Fill in all areas of the wreath form that can be seen when the wreath is displayed. Be sure you cannot see any part of the wreath form through the fabric squares. Add any embellishments you’d like. I added a little fall metal pumpkin.

Here’s a link to the video tutorial.
July 7, 2020 @ 8:19 am
Wondering, do you stick fabric in right or wrong side up ?
I am a novice.
July 7, 2020 @ 12:00 pm
Laura- this is the perfect type of wreath for a beginner. Wrap your fabric squares with the print side on the inside. When you stick the squares into your wreath it will open up a bit and you want to see the right side of the fabric. Hope this helps! Blessings- Kelly
Wall Lettering Wood | whyprosperity
September 22, 2019 @ 7:58 pm
[…] Download Image More @ underatexassky.com […]
fabric wreath tutorial – Idhey
March 5, 2019 @ 2:37 am
[…] Fall Fabric Wreath Tutorial – Under a Texas Sky […]
January 9, 2017 @ 1:49 pm
OMG , I can’t stand it this is just so beautiful . Yes it looks like flowers i am doing this!!! (lol) Curious how many sqares do you think you had all in all?
Thanks for sharing this beauty.
Connie
January 9, 2017 @ 8:20 pm
Connie- Thanks so much! Oh my goodness, I have no idea how many squares I cut. LOTS! But it’s easy to do with the rotary cutter. I just wouldn’t even know how many to guess. Just cut away! I hope yours turns out beautifully. Blessings! -Kelly
August 18, 2016 @ 6:30 am
Great work- so subtle & beautiful. You’ve been featured this week at CCBG:
https://althingsbeautiful.wordpress.com/2016/08/18/creatively-crafty-link-party-28/
August 18, 2016 @ 9:08 am
Ann- Thank you so much for featuring my fabric wreath! And thank you for hosting. Blessings! -Kelly
August 17, 2016 @ 10:00 am
I’ve never made a wreath like to! It looks so pretty and easy. Thanks for sharing #CCBG
August 17, 2016 @ 9:29 am
So pretty! I love the colors you’ve chosen. They remind me of pansies for some reason 🙂 Thanks for sharing with us at Creatively Crafty #ccbg 🙂
August 15, 2016 @ 9:49 pm
I love the result of the fabric squares all together. Thanks for sharing with us at Creatively Crafty Link Party #CCBG http://tryit-likeit.com/link-party-it
August 12, 2016 @ 11:24 am
The wreath is beautiful! Love the quote you included in the middle <3
Blessings,
Edye | http://gracefulcoffee.wordpress.com
August 13, 2016 @ 8:37 am
Thank you so much! I love the quote also. It’s so good to be reminded of how blessed we are. Thanks for stopping by!
August 11, 2016 @ 6:42 pm
This is so lovely! I love that it’s not “typical” fall colours too. Very well done!
Thanks for sharing (and for linking up to the #SHINEbloghop).
Wishing you a lovely evening.
xoxo
August 11, 2016 @ 9:57 pm
Jennifer- Thank you so much! I just love almost any color with browns- especially in such a colorful wreath. Thanks so much for hosting. Blessings- Kelly
August 9, 2016 @ 3:49 pm
This turned out so neat! 🙂
Would love for you to share this with my Facebook Group for recipes, crafts, and tips: https://www.facebook.com/groups/pluckyrecipescraftstips/
Thanks for joining Cooking and Crafting with J & J!
August 10, 2016 @ 10:29 am
Jess- Shared! 🙂
August 8, 2016 @ 9:17 am
This is beyond adorable, I love it!
August 8, 2016 @ 10:09 am
Thanks so much! 🙂 Blessings- Kelly