Quilling a Monogram
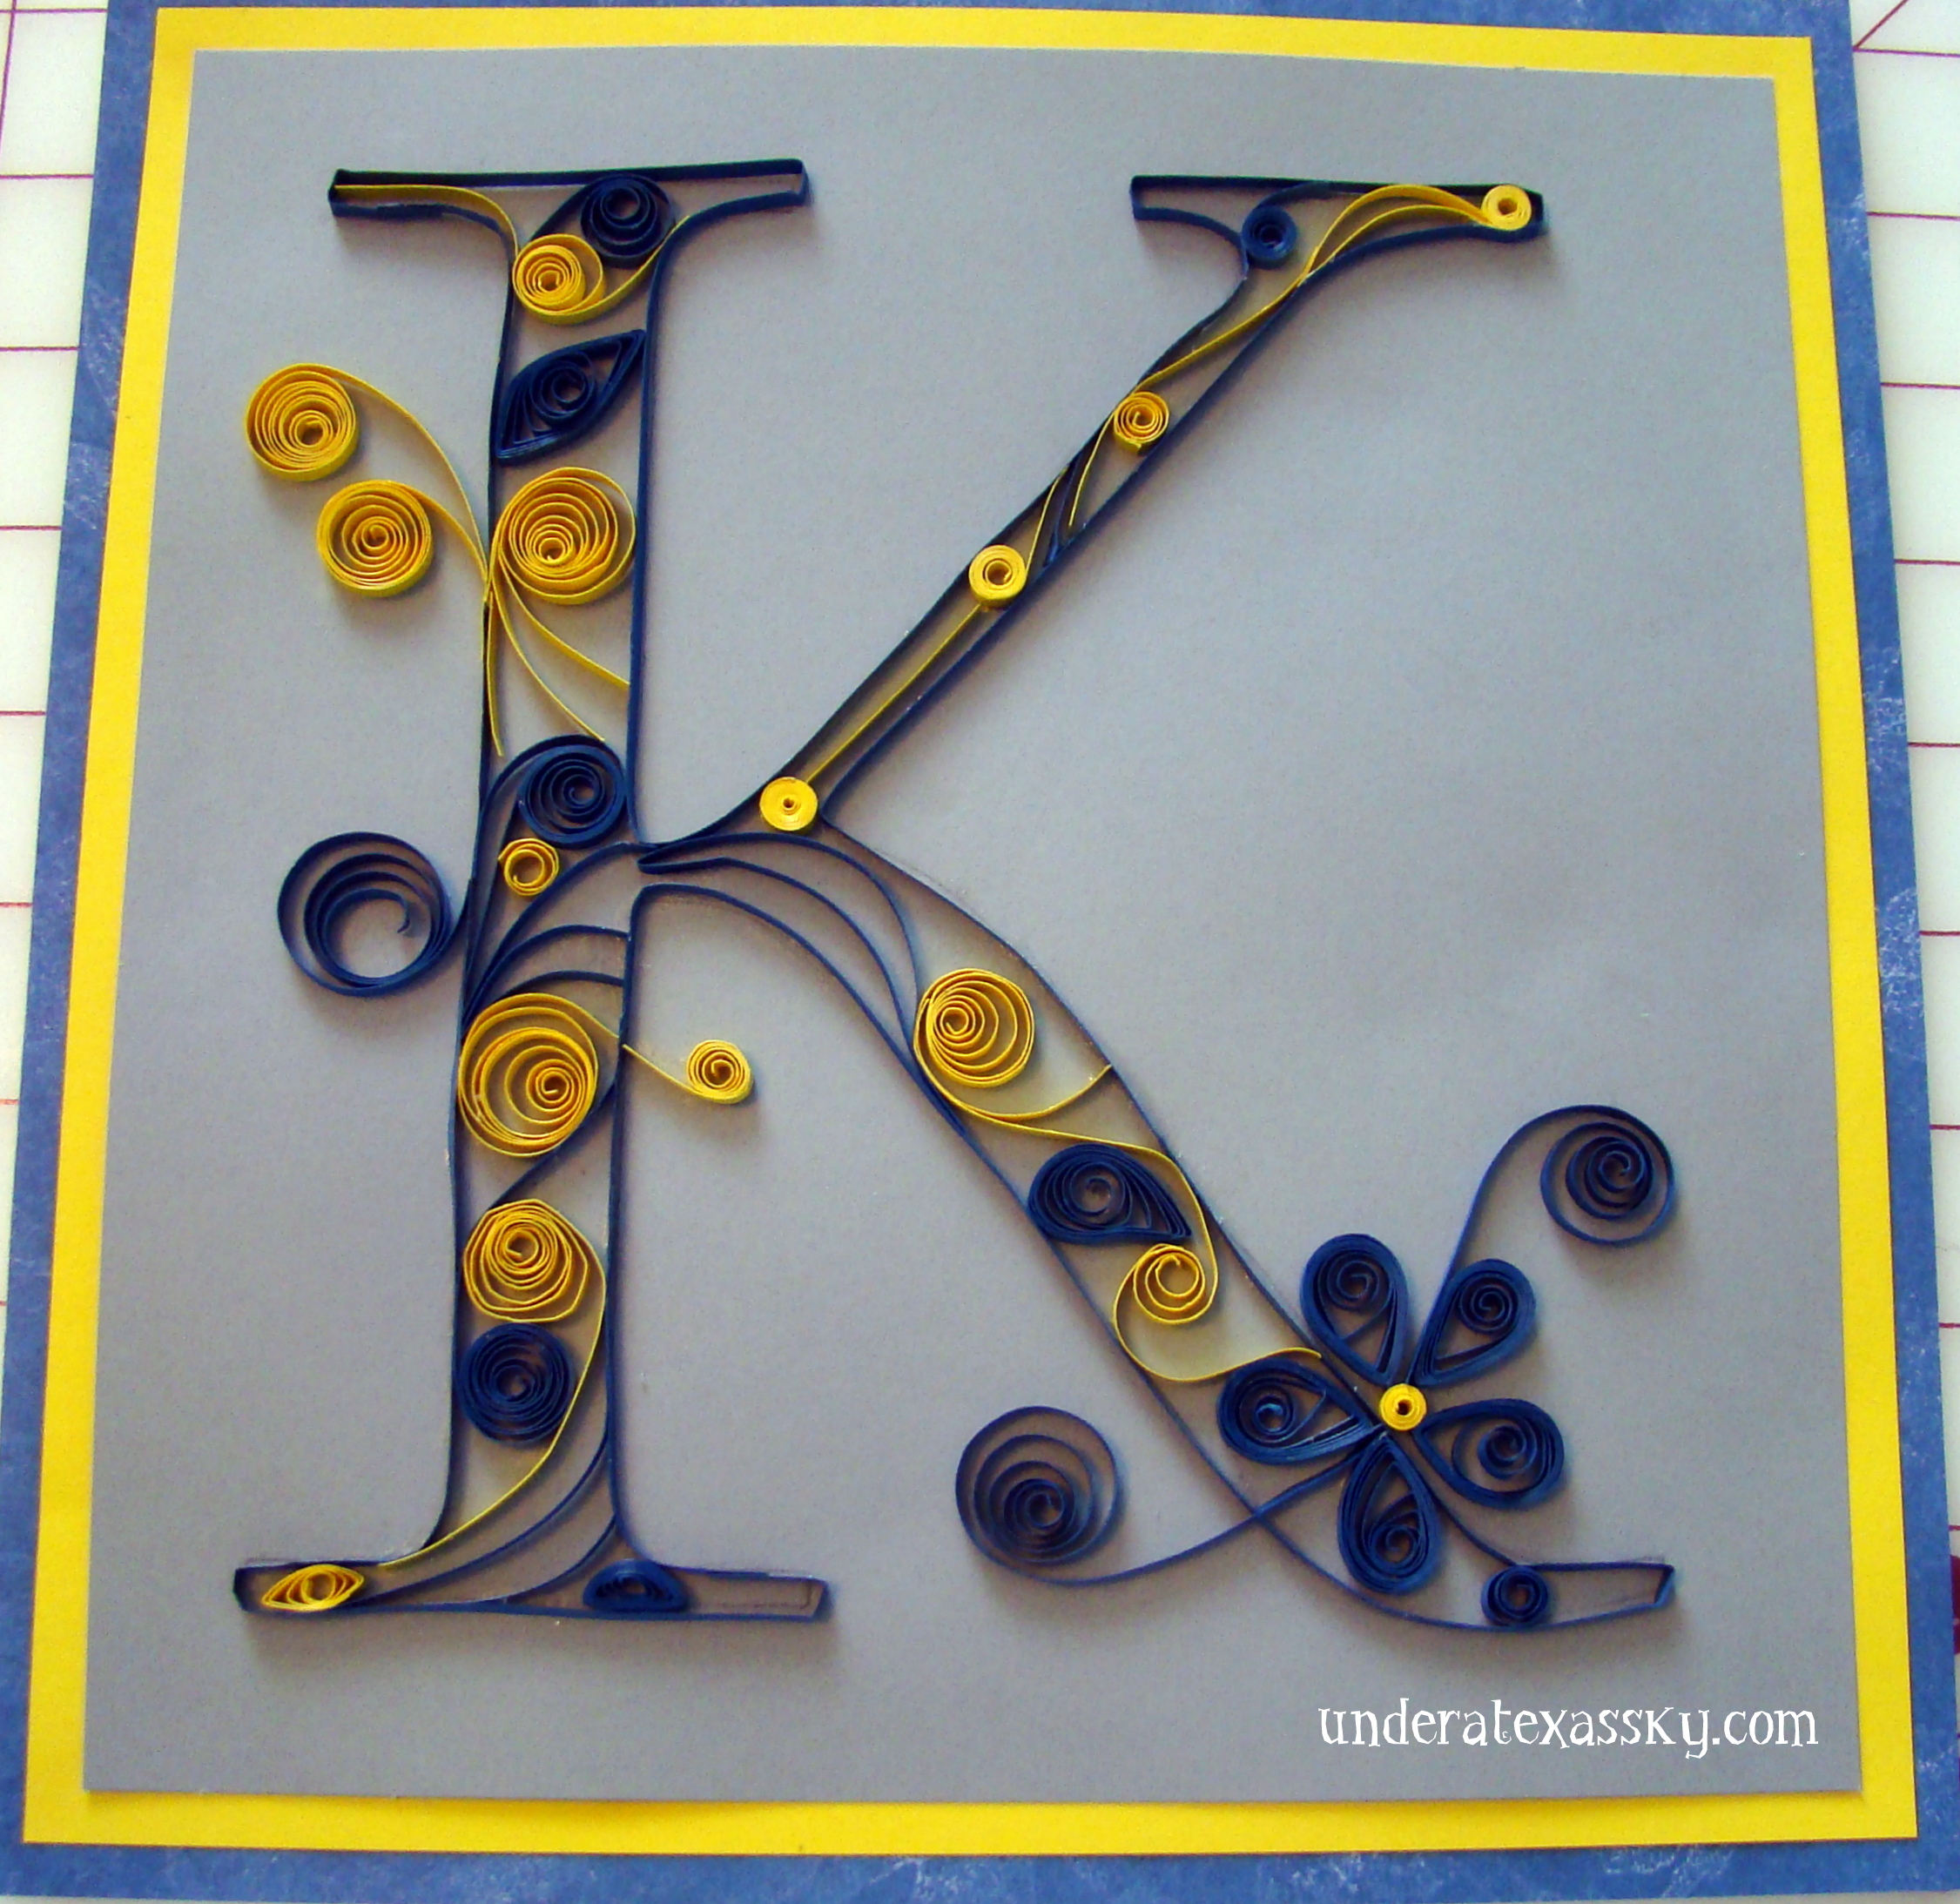
Quilling is basically rolling thin strips of paper into coils and then manipulating those coils into various shapes, and gluing them together to make designs. You are here for my first attempts at doing this. I decided an easy place to start would be just creating the letter “K.” Now that I know what I know; that may have been a little ambitious- but think it’s important for you to see how first attempts, while not perfect, can still turn out pretty well.
For first things first, I picked up a few necessary tools to be able to do these crafts. I found a tool kit that included a slotted tool (which is easiest for me), and a quilling needle. I also purchased a quilling board that includes some templates that give you control over the size of your coils. I grabbed some clear glue and of course quilling strips of 1/8″paper (yes you can purchase these at any craft store- the tools too!).
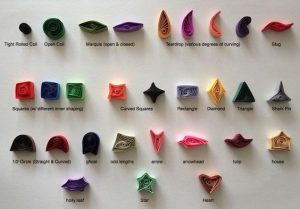
Little Circles has a GREAT tutorial on how to make the shapes.
Then I began:
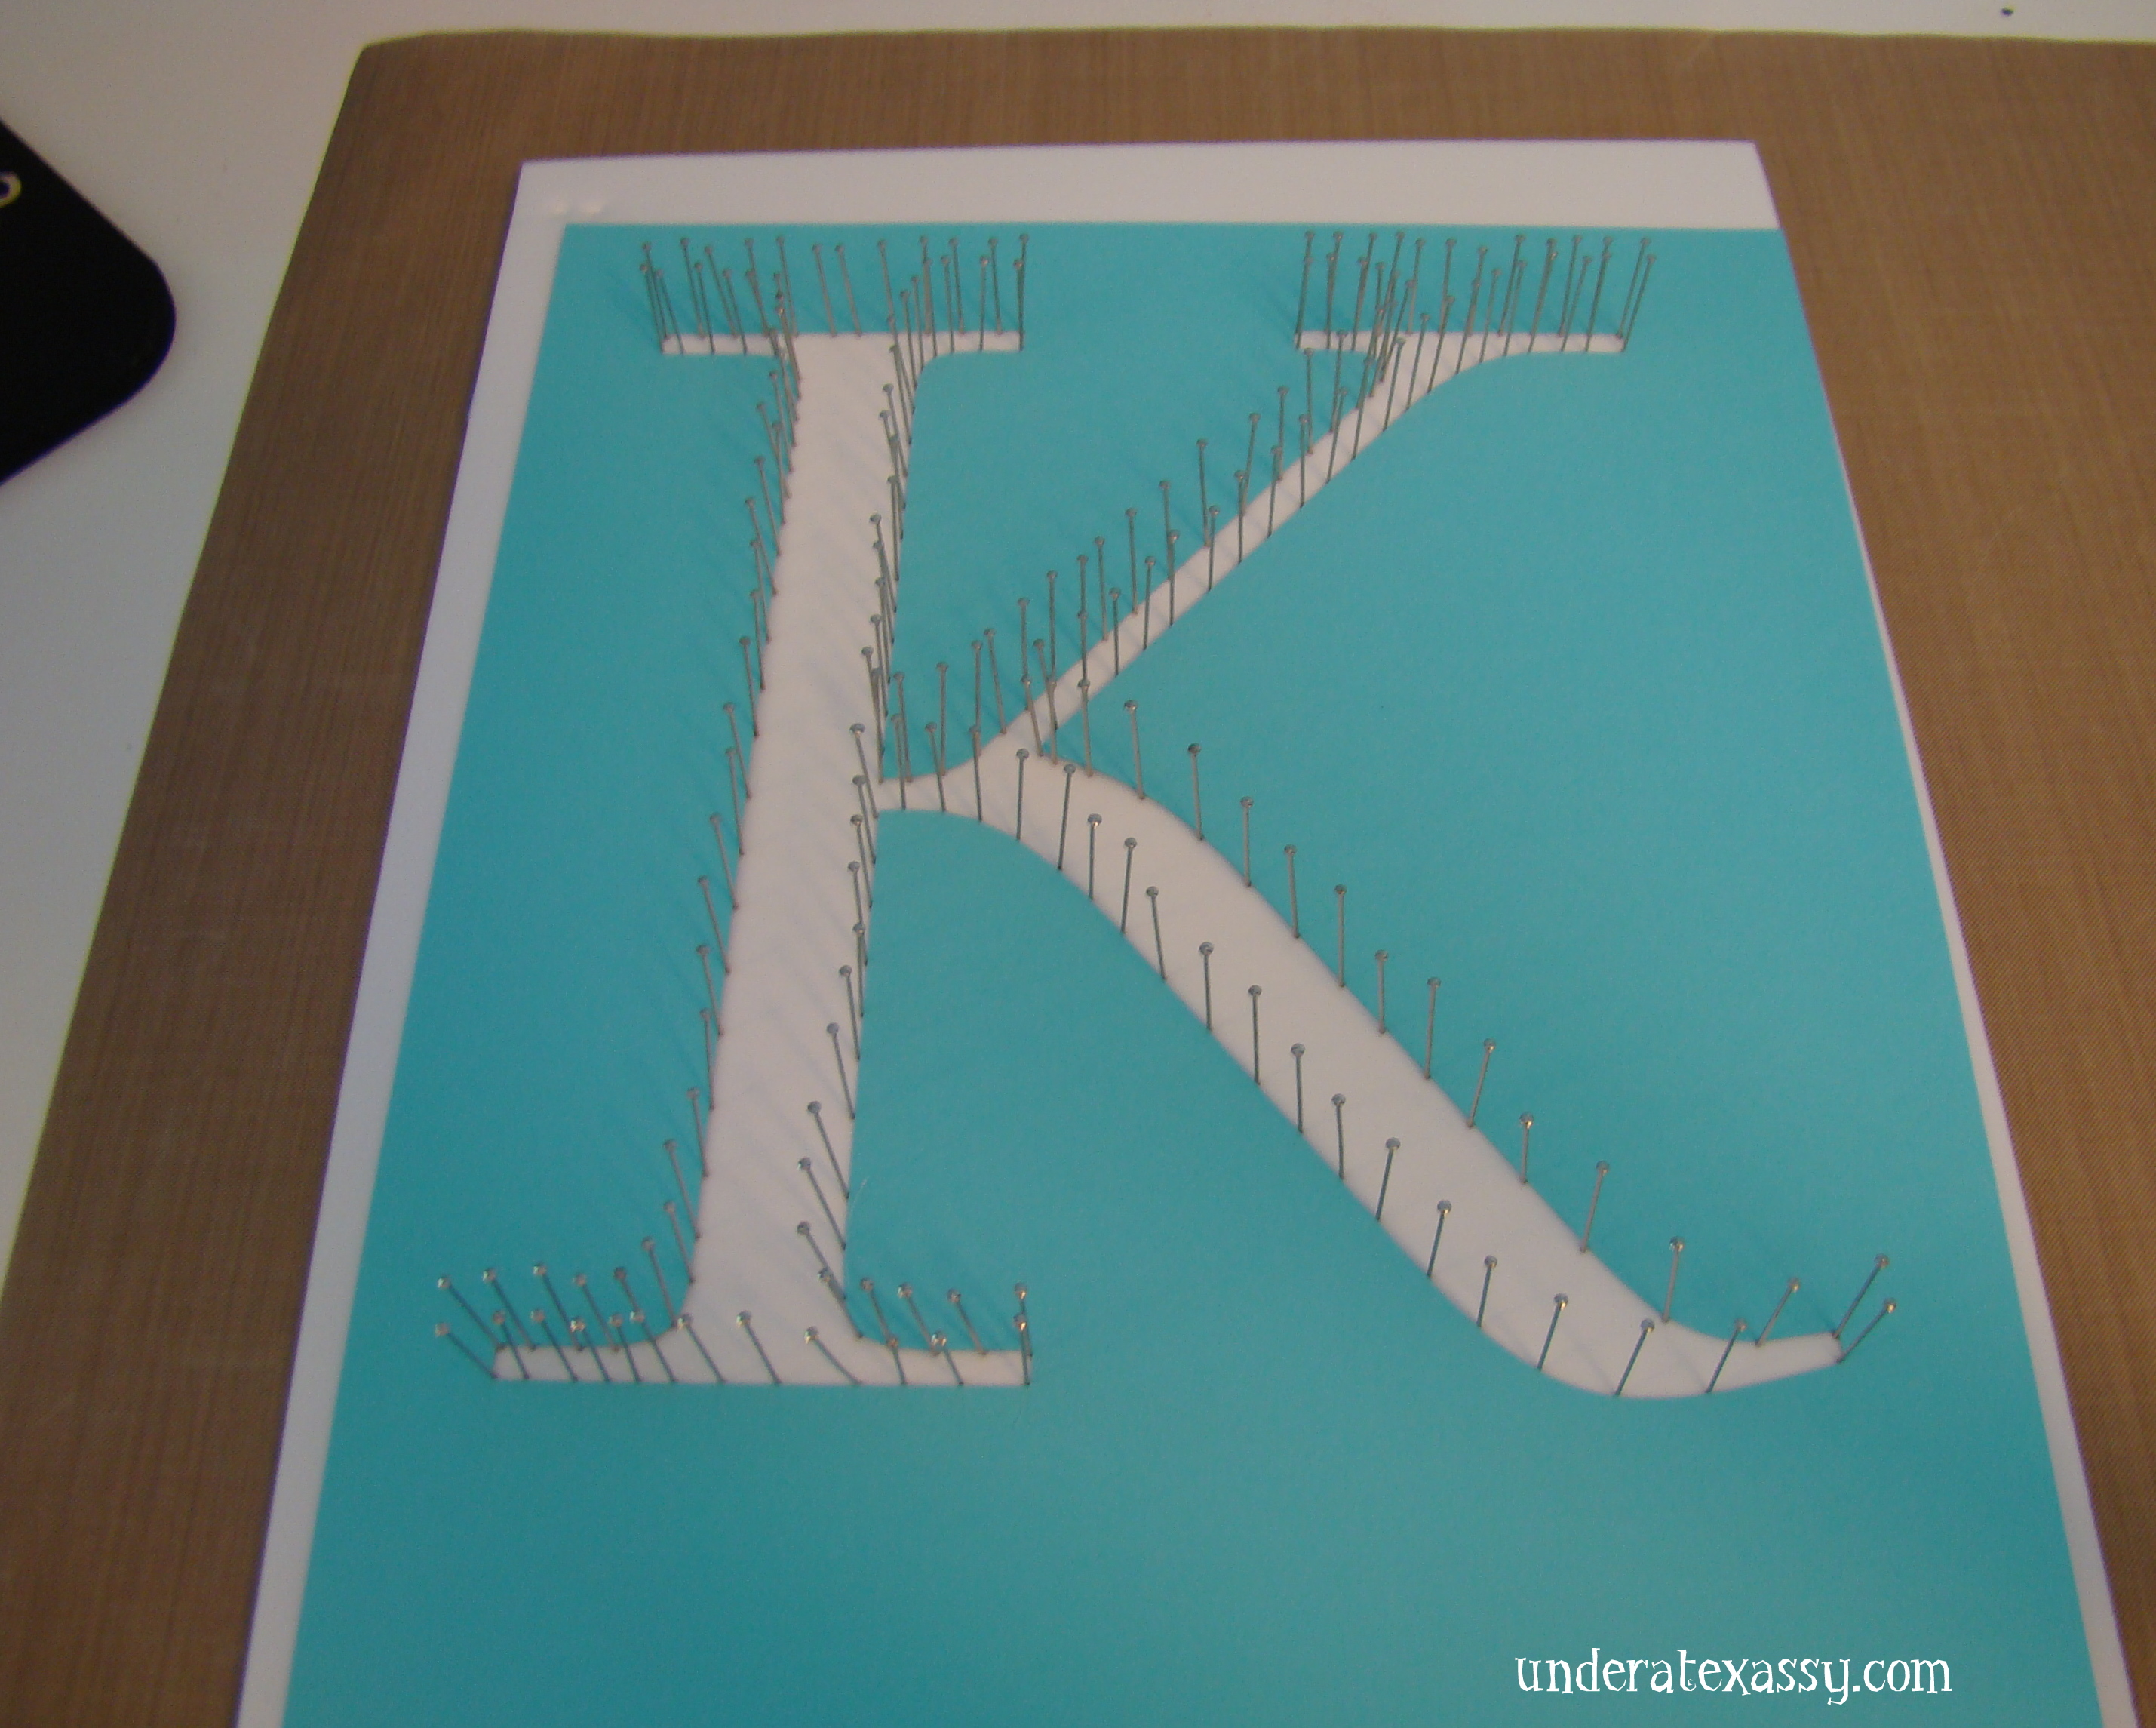
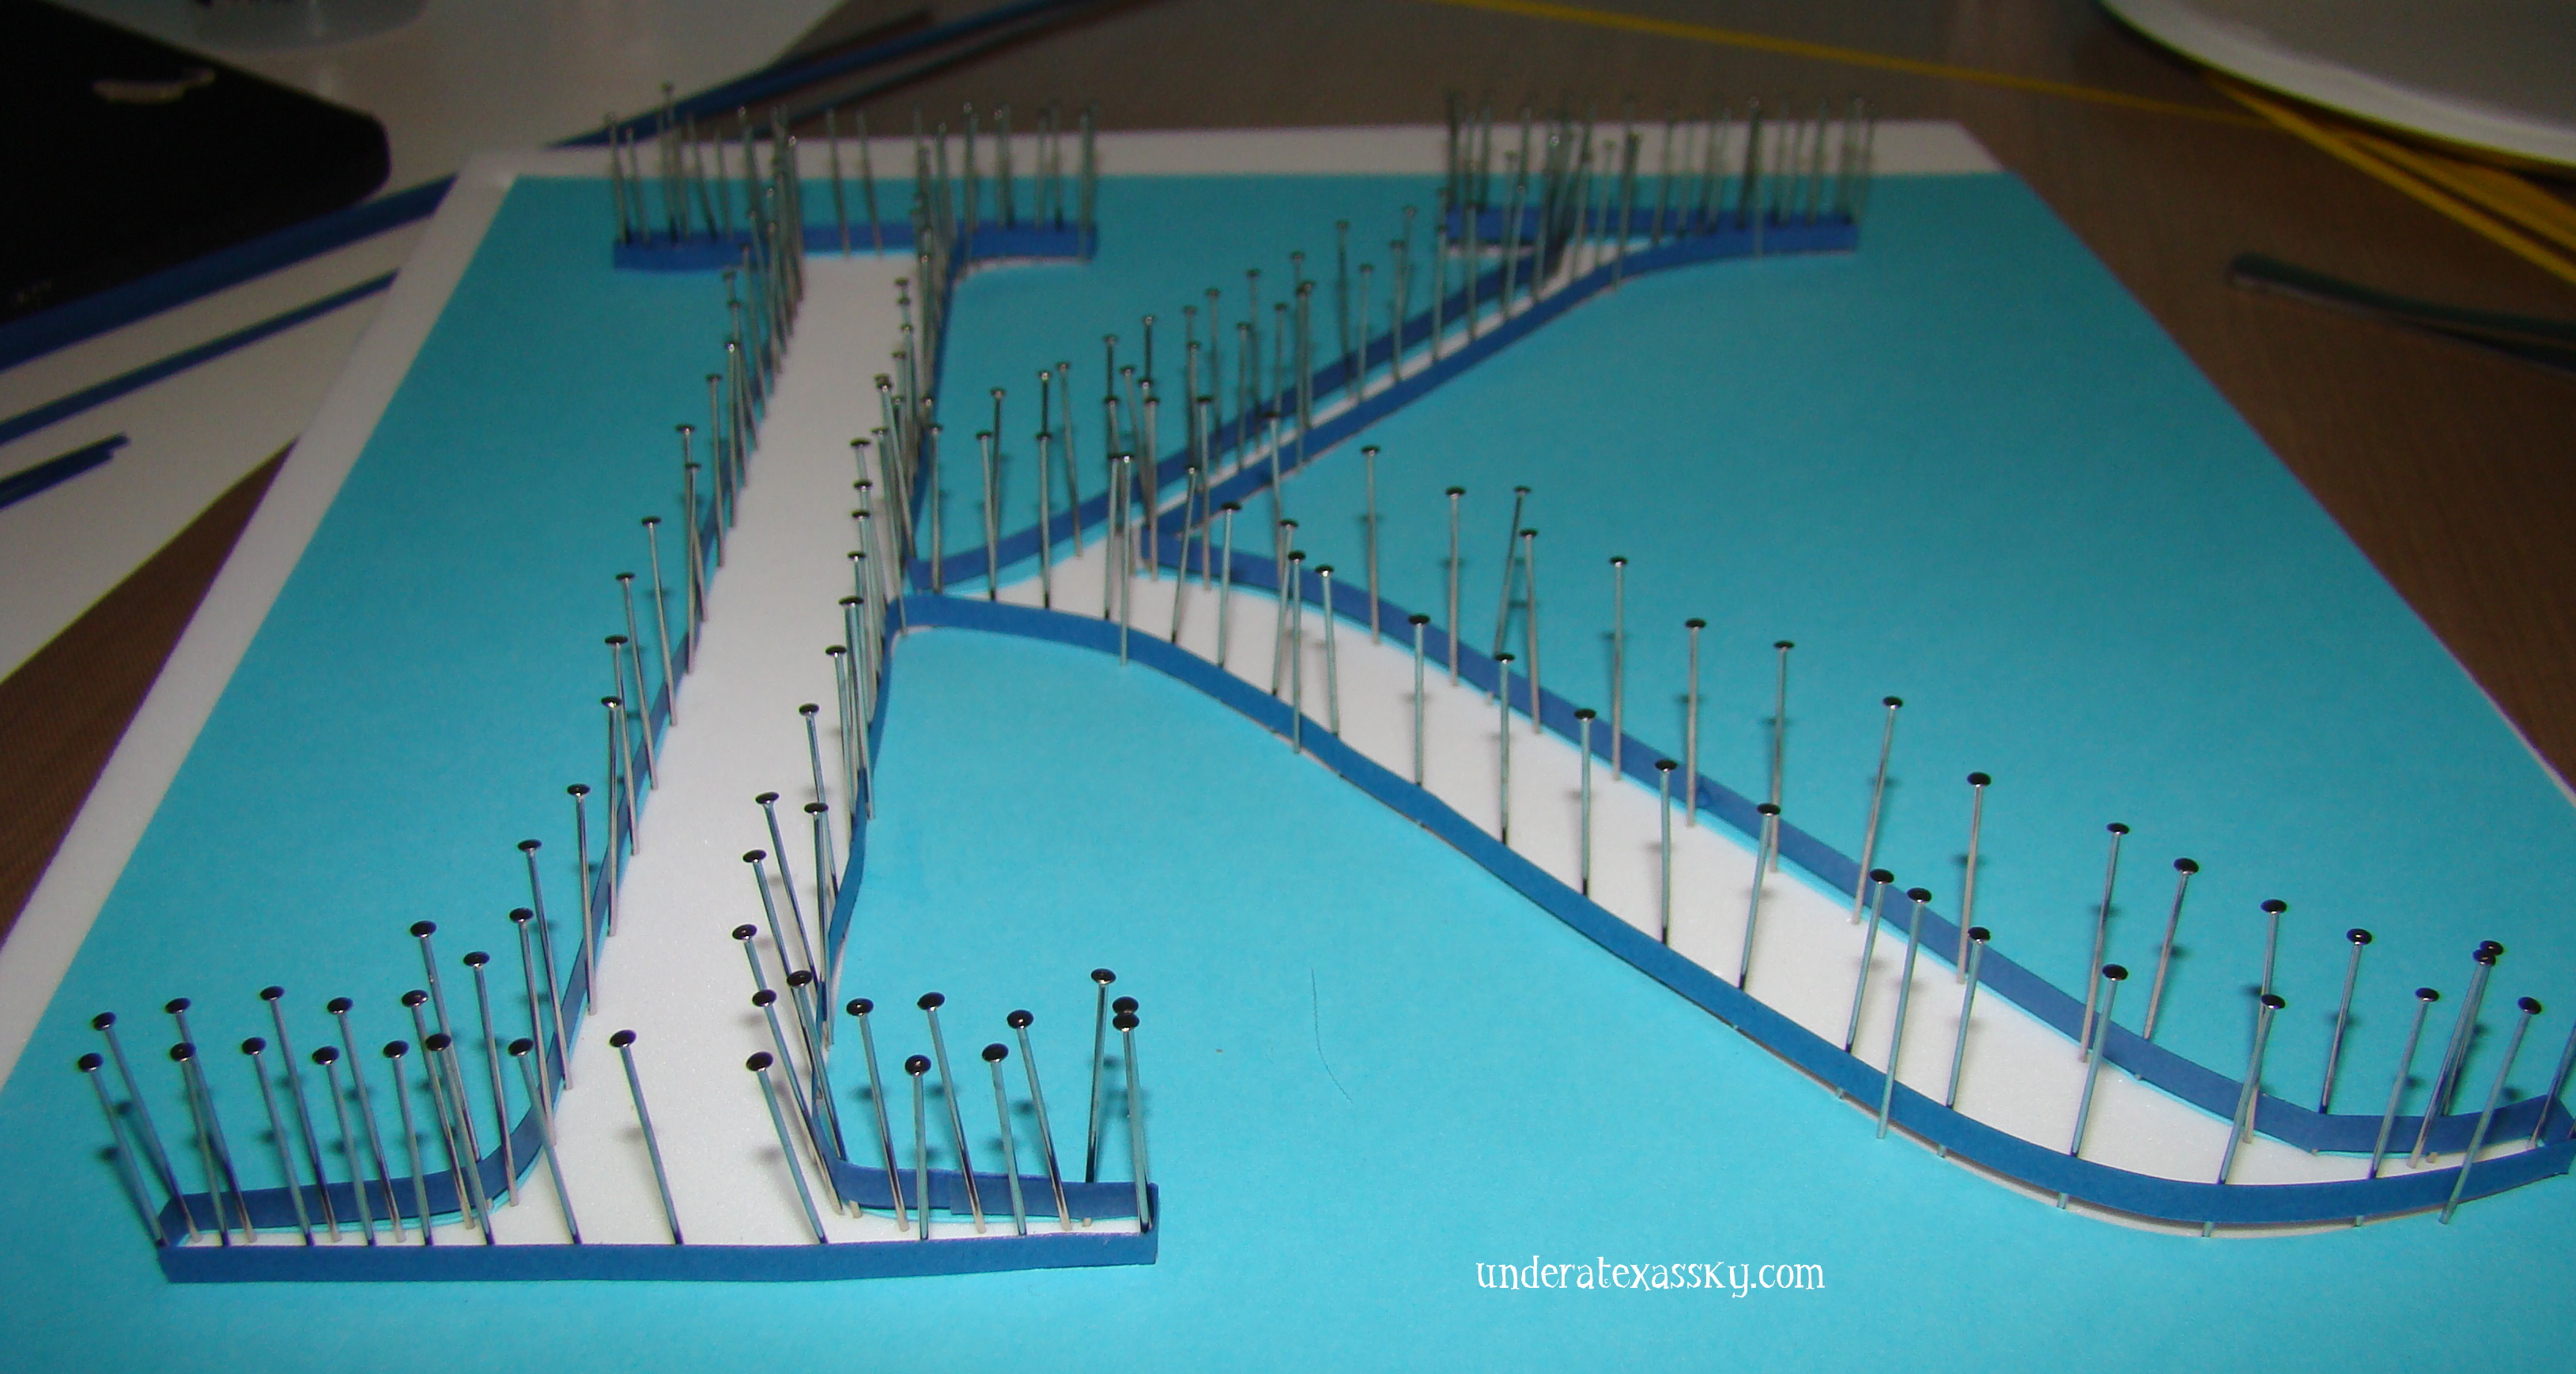
I used my Silhouette Portrait to cut the letter K out of some card stock. This became my template. I placed the outline of the “K” on some foam board. I think stuck a bijillion straight pins all along the outline of the letter to build the frame for my quilling strips to create the outline.
I began at the bottom of the K and started the quilling strips there. I just followed the shape of the design, gluing the strips together as I got to the end of each of them.
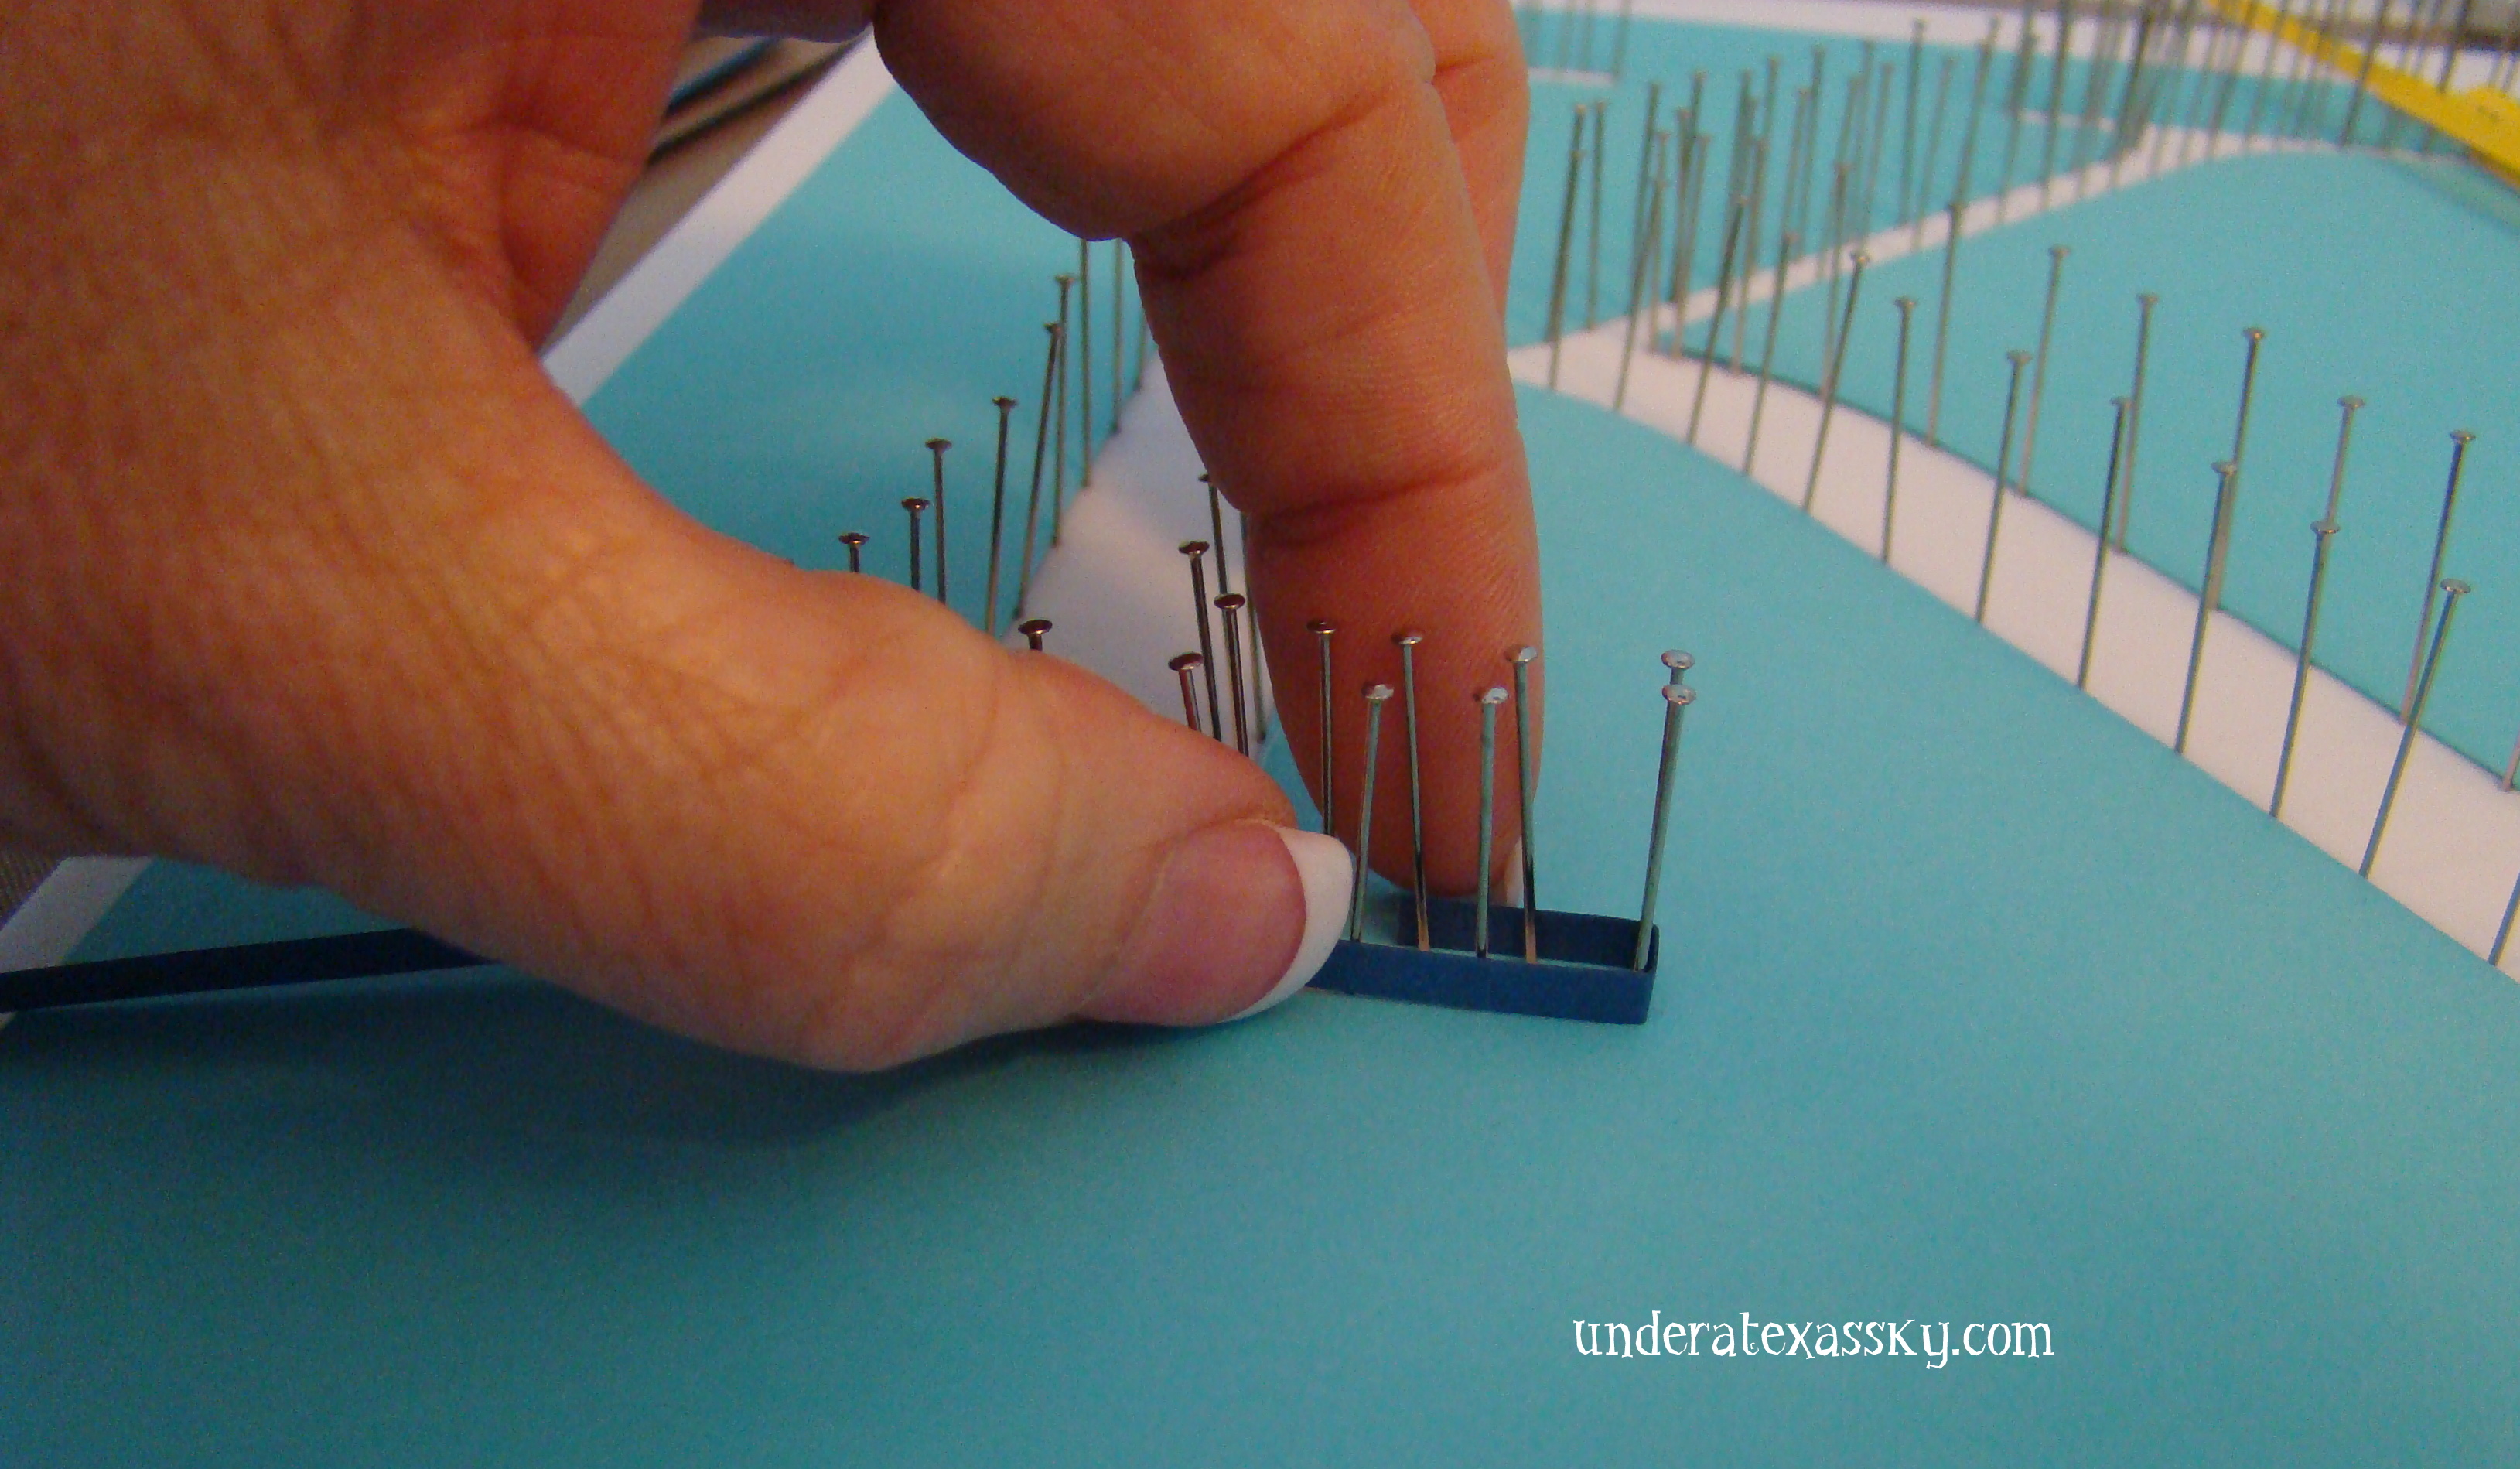
As you can see, I weaved in and out between the straight pins to keep the paper on its edge.You can also see where I glued strips together. I just poured a circle of glue on a paper plate and used a toothpick to dab the glue on the paper where it joined the next piece.

FINISHED! Now getting the frame of the “K” off the foam board and onto the cardstock I chose for the background was NOT easy. I pulled all the pins out of the foam board and had the outline of the letter. But it was without much form. I had to reshape the letter as I was gluing it to the cardstock backing upon which it would rest. Putting the glue on the very thin edge of the quilled paper was a challenge; but I persevered!
I used the quilling board to help with the coil sizes. The coils are then pinched here and there to make a variety of shapes. 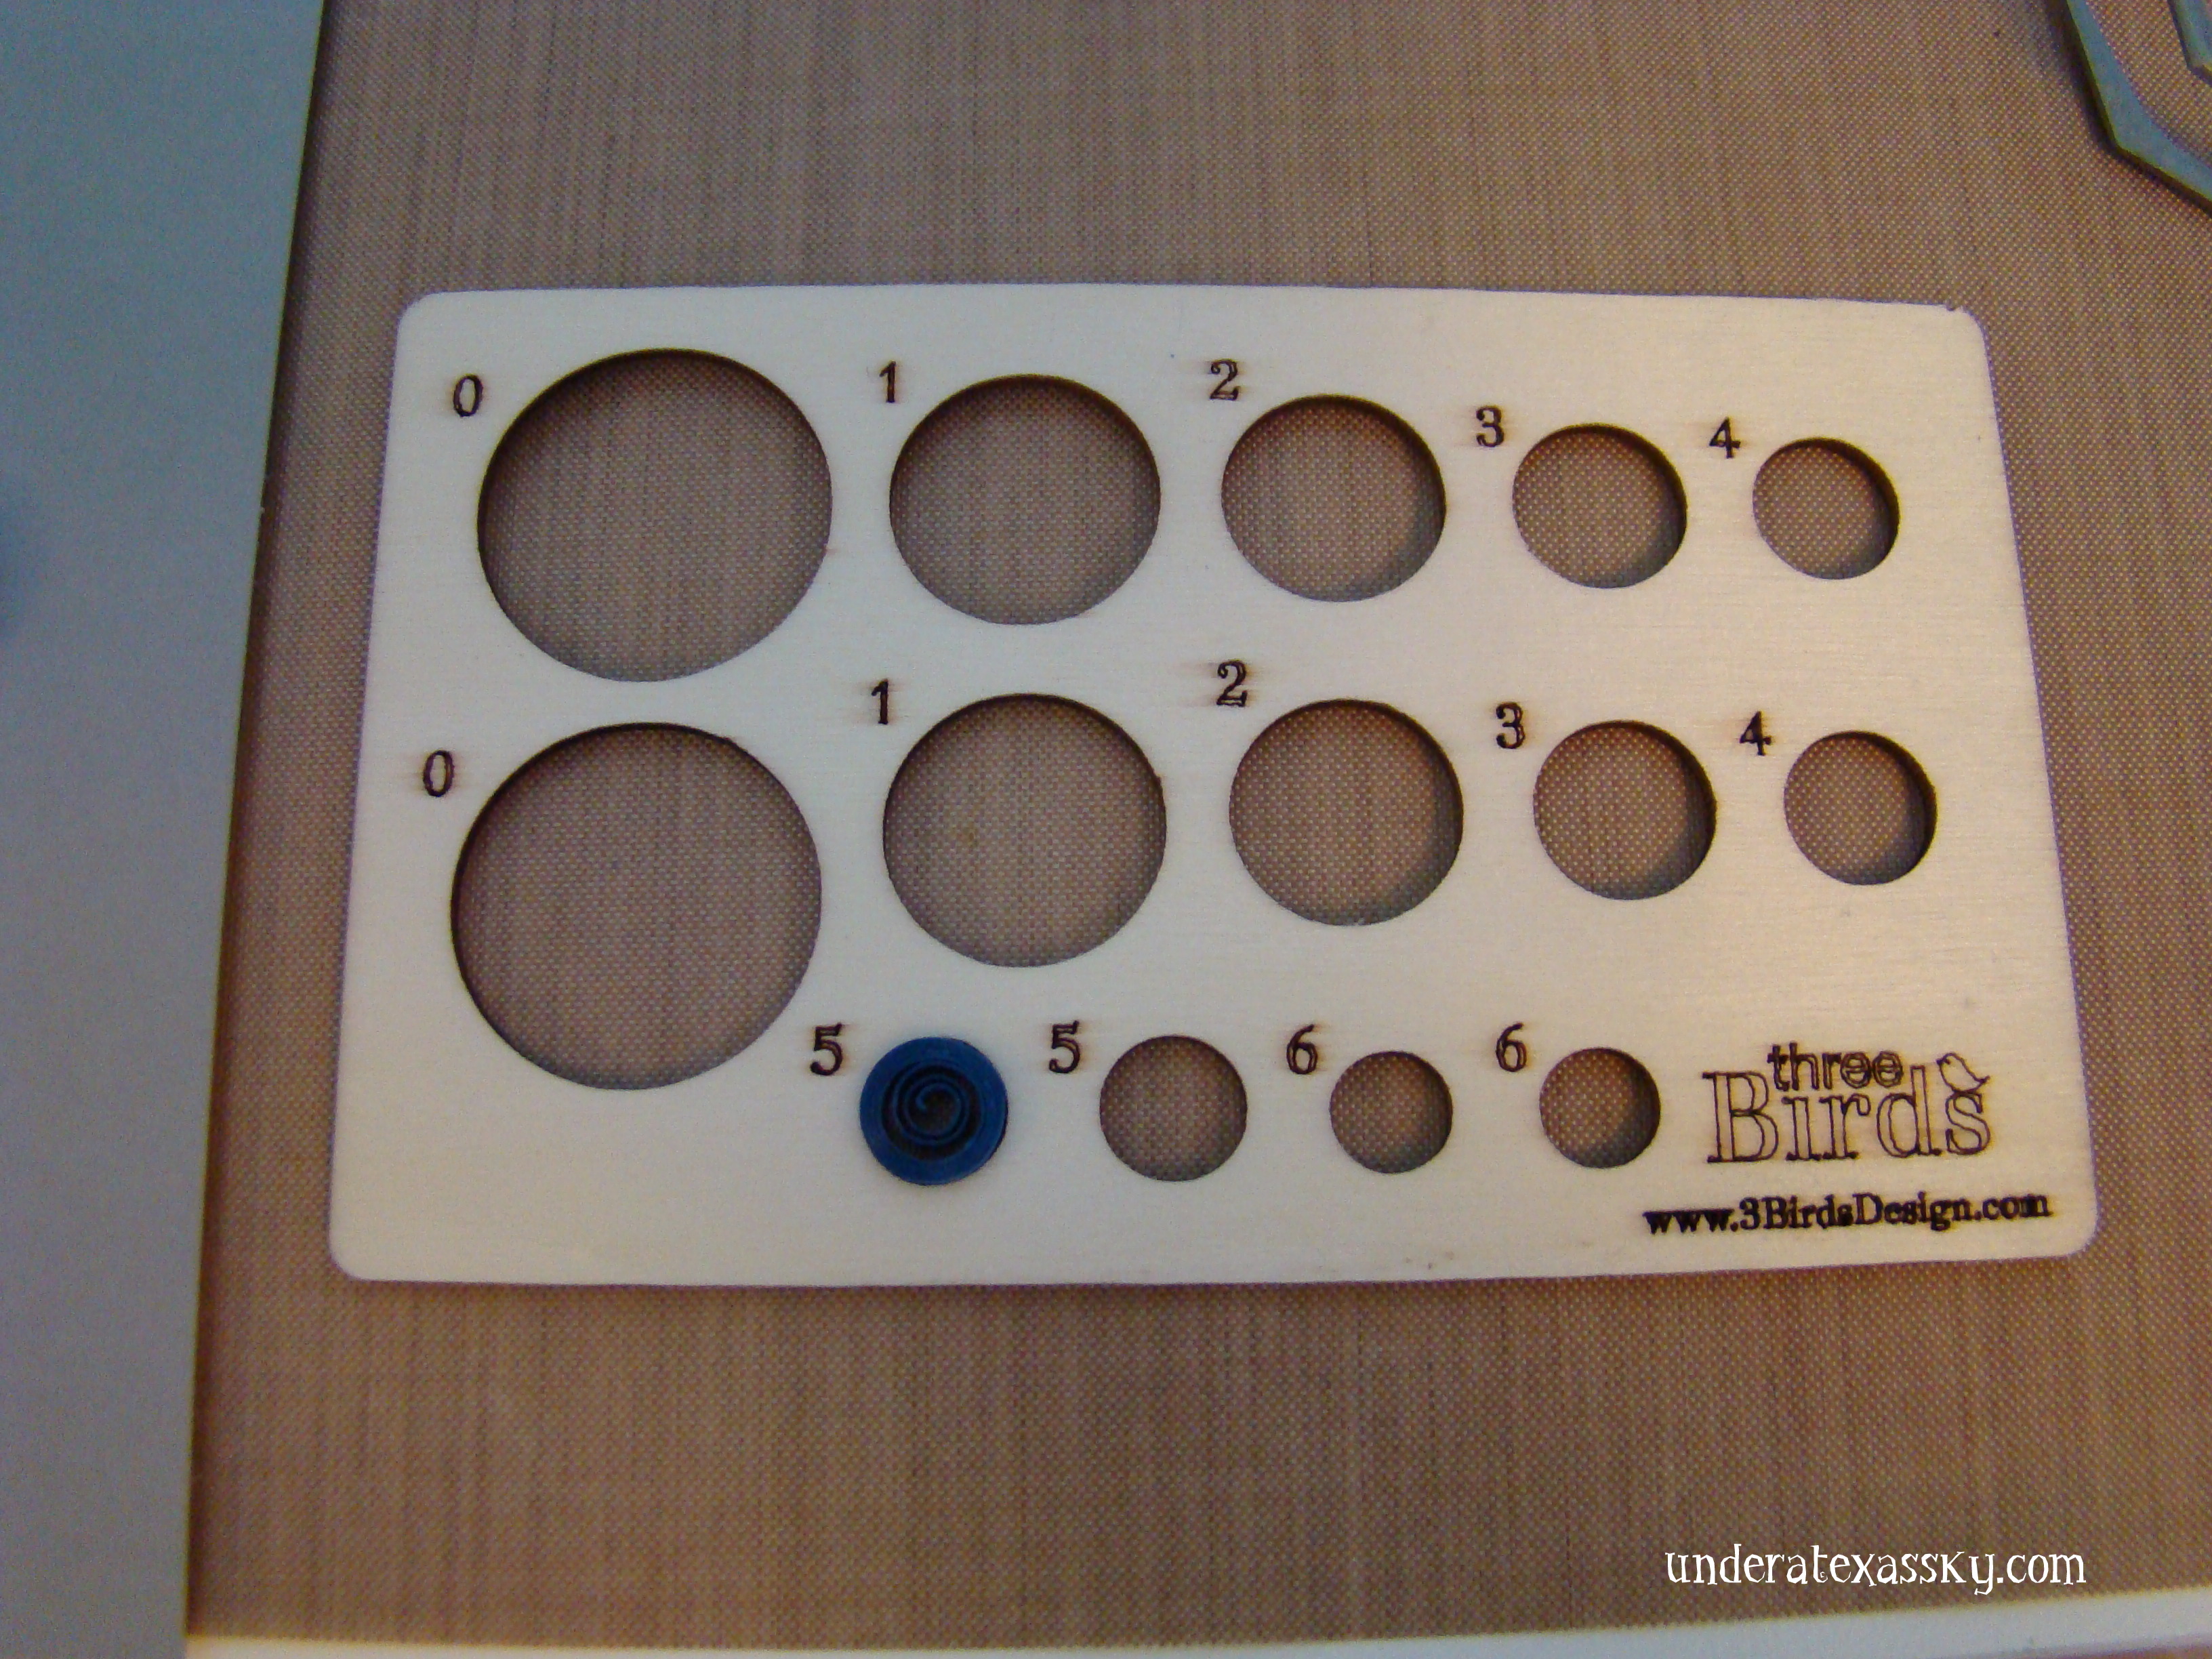
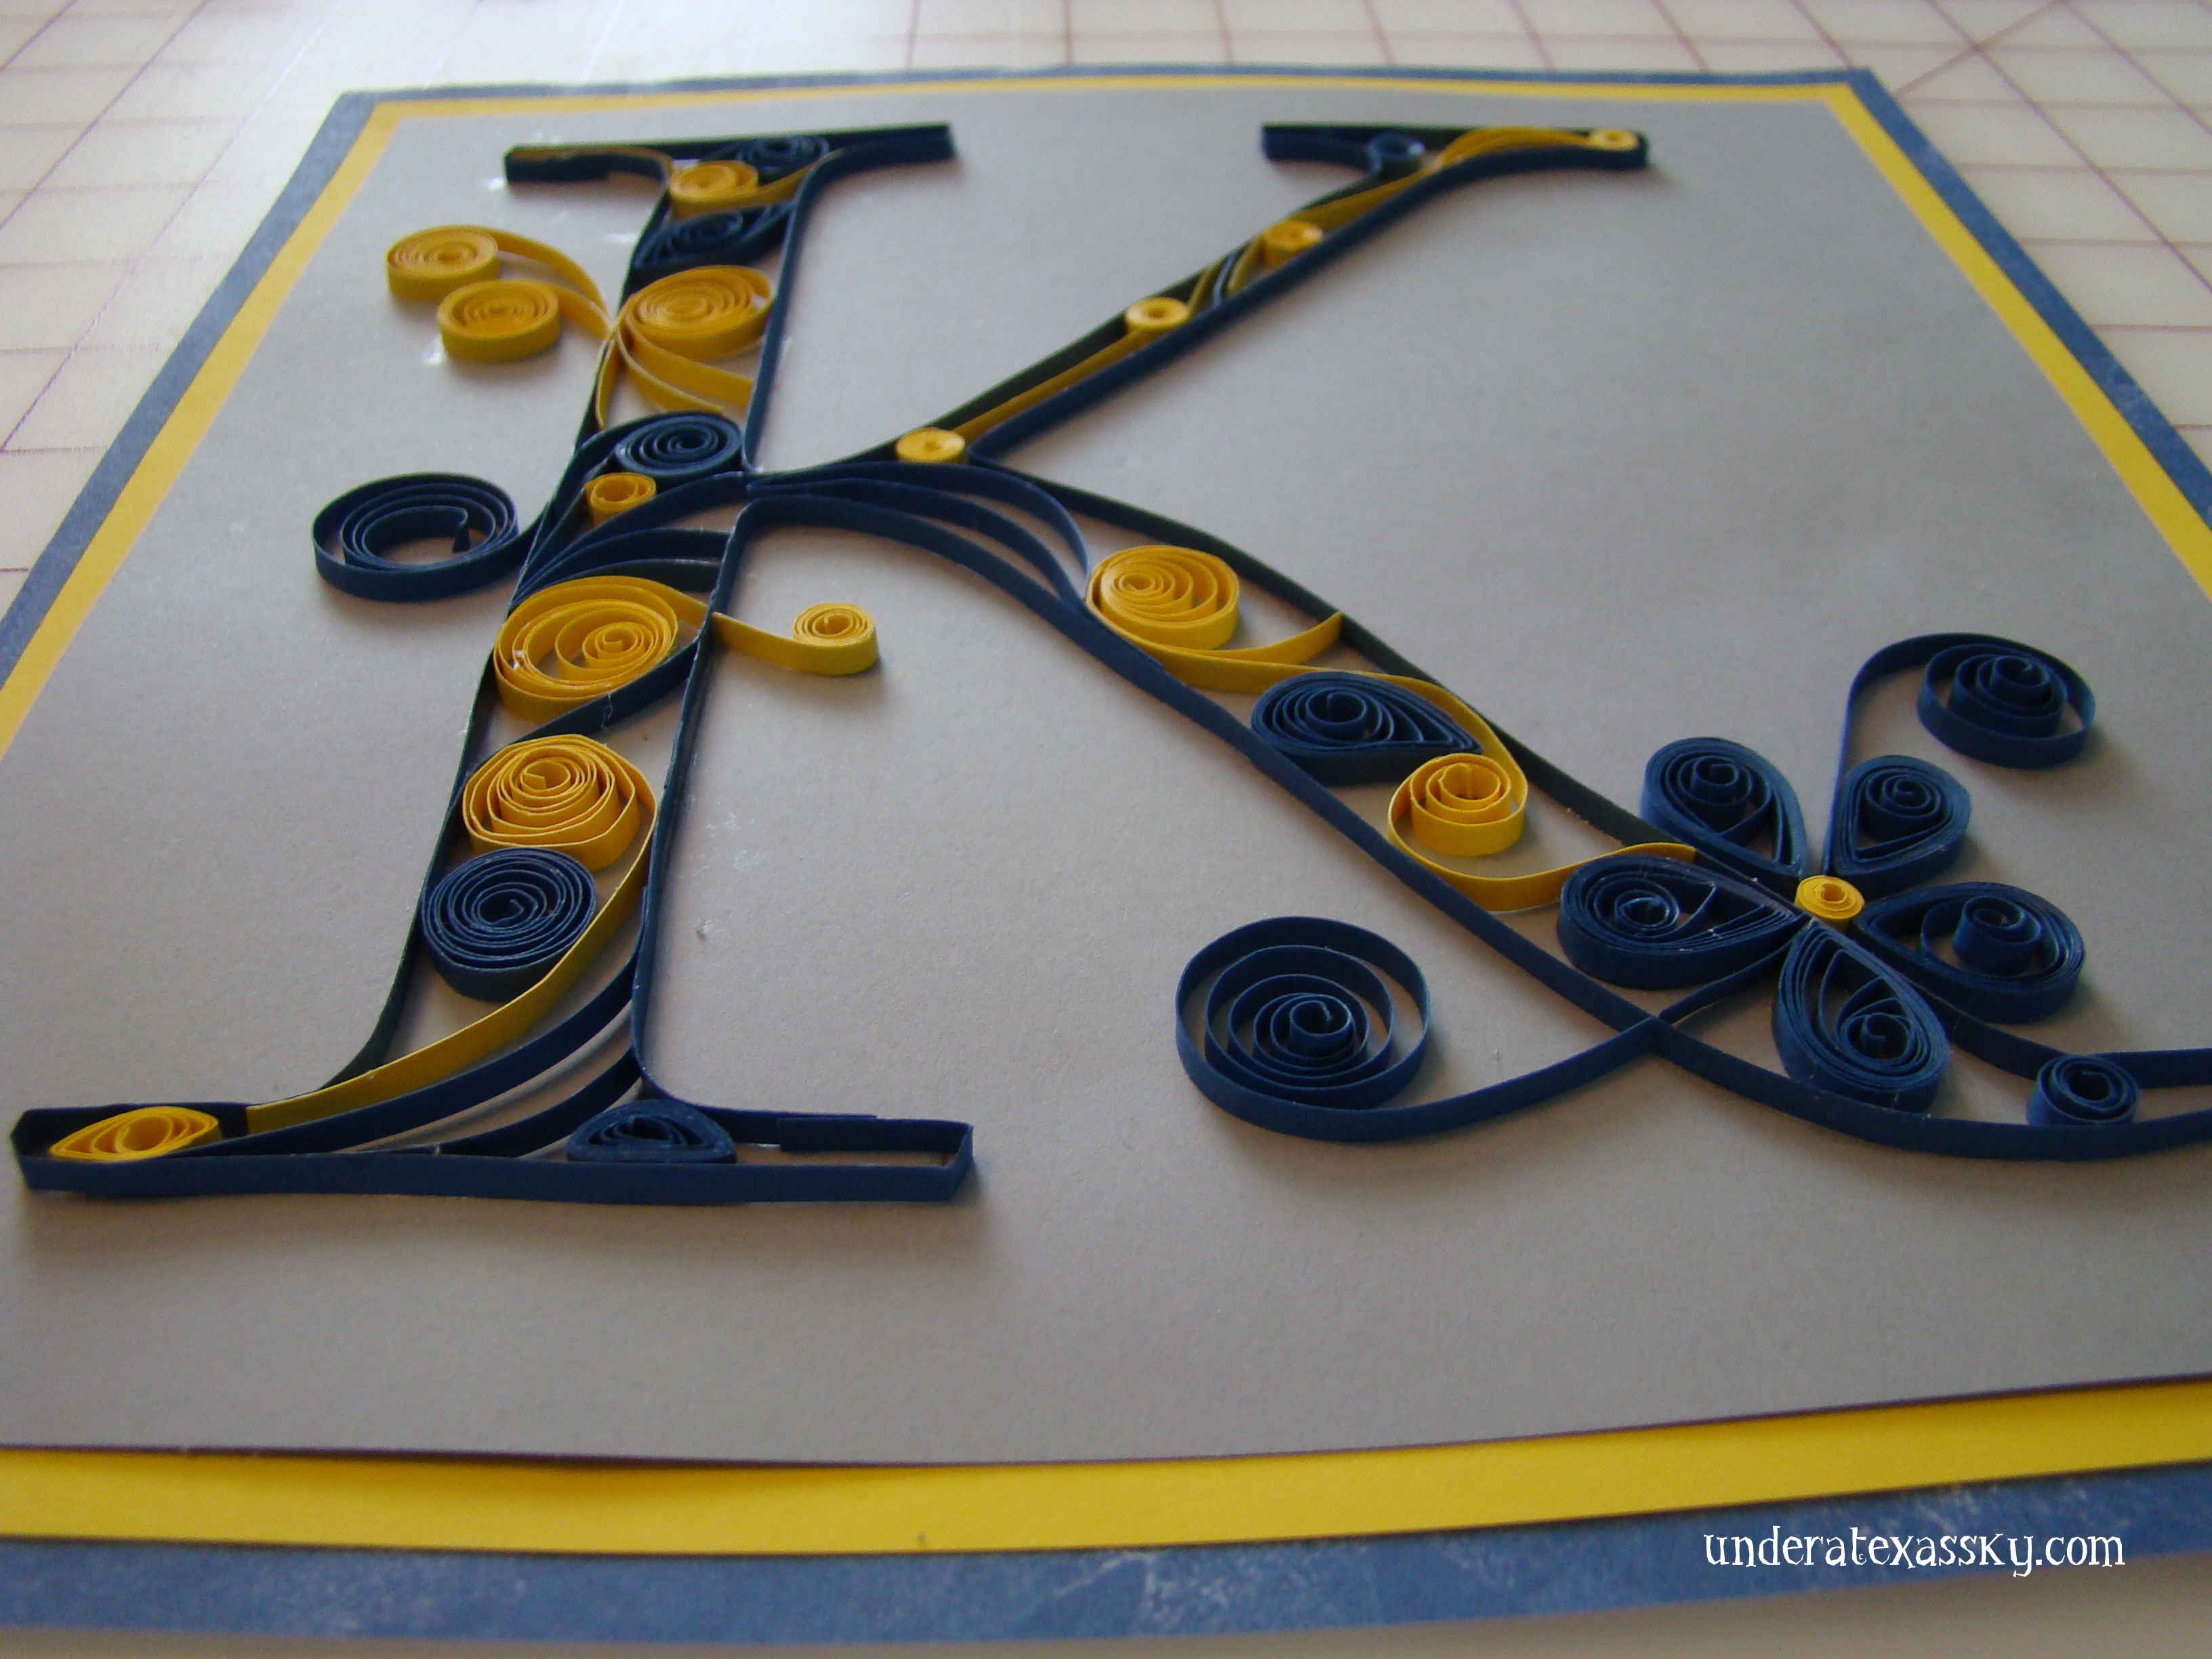
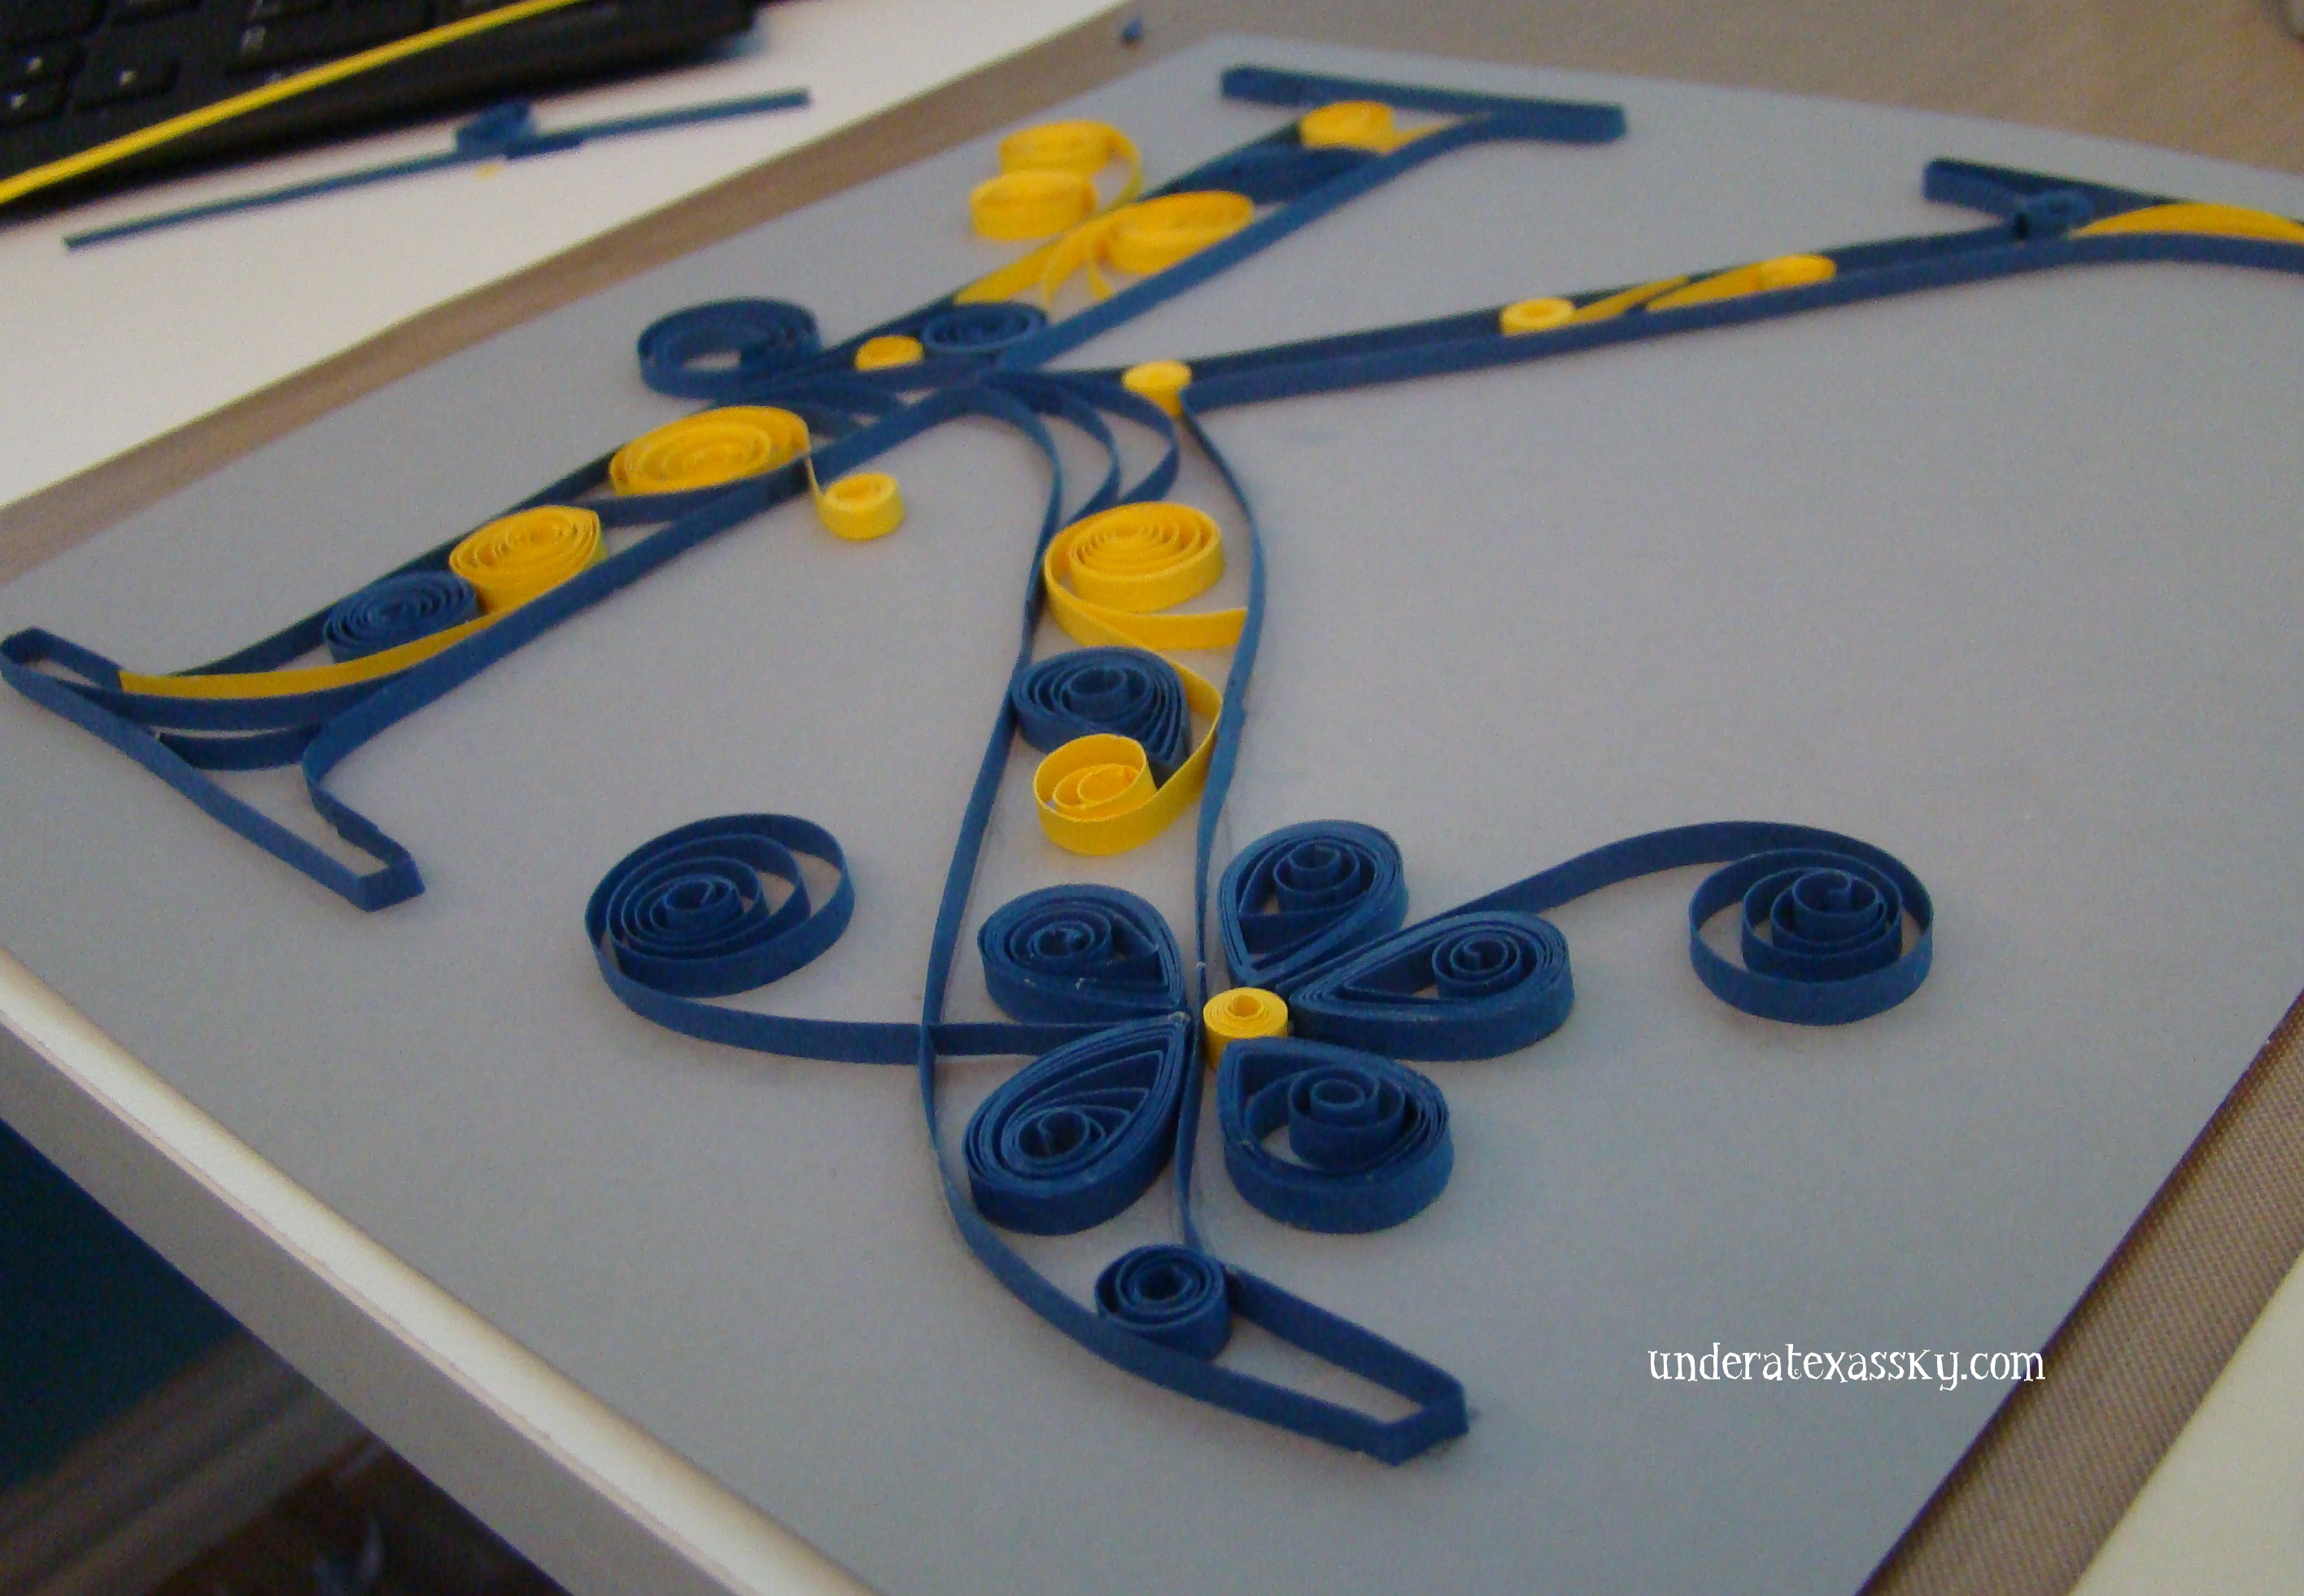
I used lots of shapes, loose coils, some strips not coiled at all, to move in and around the frame of the letter. I tried to make some of the strips appear to go through the letter outline. As you can see, I had difficulty controlling the glue, and it dried kind of shiny. But I think the letter turned out really rather nice.
April 29, 2021 @ 1:46 pm
I started quilling when I was about 75 yrs old. I am self taught. I so enjoy it and find it relaxing. This is one project I have been wanting to try but did not know where to start. Thanks for the inspiration.
May 6, 2021 @ 4:40 pm
Donna- Isn’t it fun? I love making new designs and watching other people create beautiful things. I’m so glad you took a moment to stop by. Blessings- Kelly
June 12, 2017 @ 9:39 pm
I am working on a project right now! 😊 I’d love to share it with you all!
June 13, 2017 @ 5:27 pm
Jennifer- Please do! You can email me at kelly@underatexassky.com.
June 19, 2016 @ 7:56 pm
I used to do quilling when I was younger. I bought a kit recently, I guess I need to get it out and start rolling! Thanks for sharing your post with us at Creatively Crafty #CCBG http://tryit-likeit.com/link-party-it
June 20, 2016 @ 8:28 am
Janet- I just love how easy these projects can be- if you have the patience to make them happen! Thanks so much for allowing me to share. Have a blessed week!
June 19, 2016 @ 4:16 pm
I’ve never tried quilling before and this is something new for me. Such a neat process! Thanks so much for sharing it on Merry Monday.
June 20, 2016 @ 8:24 am
Erlene- Thanks for hosting! You should give quilling a try! The designs are endless! Have a blessed week!
June 19, 2016 @ 2:54 pm
This project brings back memories! When my sister and I were teens my mother bought a quilling set and we spent hours making Christmas ornaments. I think your project turned out great and I love the colored paper. Thanks for sharing with us at Creatively Crafty #ccbg 🙂
June 20, 2016 @ 8:23 am
Thanks Lydia! It’s amazing how pretty it all looks when it comes together! As always, thanks for letting me share. I hope you have a fantastic week!
June 16, 2016 @ 6:02 pm
This is so beautiful! I’ve never tried quilling – and I’m not sure I’d have the patience – but it sure is lovely!
June 16, 2016 @ 8:09 pm
Thanks so much! You know, it can actually be sort of therapeutic if you’re just rolling your shapes. It’s just amazing to me just how many beautiful creations I’ve seen others make. But yes, a degree of patience is definitely called for. Thanks for stopping by. Blessings! -Kelly
June 15, 2016 @ 11:01 am
WOW! I’ve always wanted to do this…how pretty!! 🙂
I would love for you to share this with my Facebook Group for Recipes and Crafts: https://www.facebook.com/groups/pluckyrecipescraftstips/
Thanks for joining Cooking and Crafting with J & J!
June 15, 2016 @ 11:48 am
Jess- I’m happy to share!! Done! Thanks for the opportunity.